Migrating Teams from PagerDuty or Opsgenie
FireHydrant's team migration flow lets you move your existing on-call operations from PagerDuty or Opsgenie into FireHydrant Signals without starting from scratch. Team membership, on-call schedules, support hours, and escalation policies are carried over automatically, so your team's existing incident response structure is preserved from day one.
You can also use this flow to create multiple teams in bulk if you are setting up FireHydrant for the first time without an existing provider to migrate from.
Prerequisites
- You must have
manage_teampermissions to create and manage teams - If importing from an alert provider, you will need a read-scoped API key for that provider
Step 1: Choose a Starting Location
There are four entry points for creating or importing a new team.
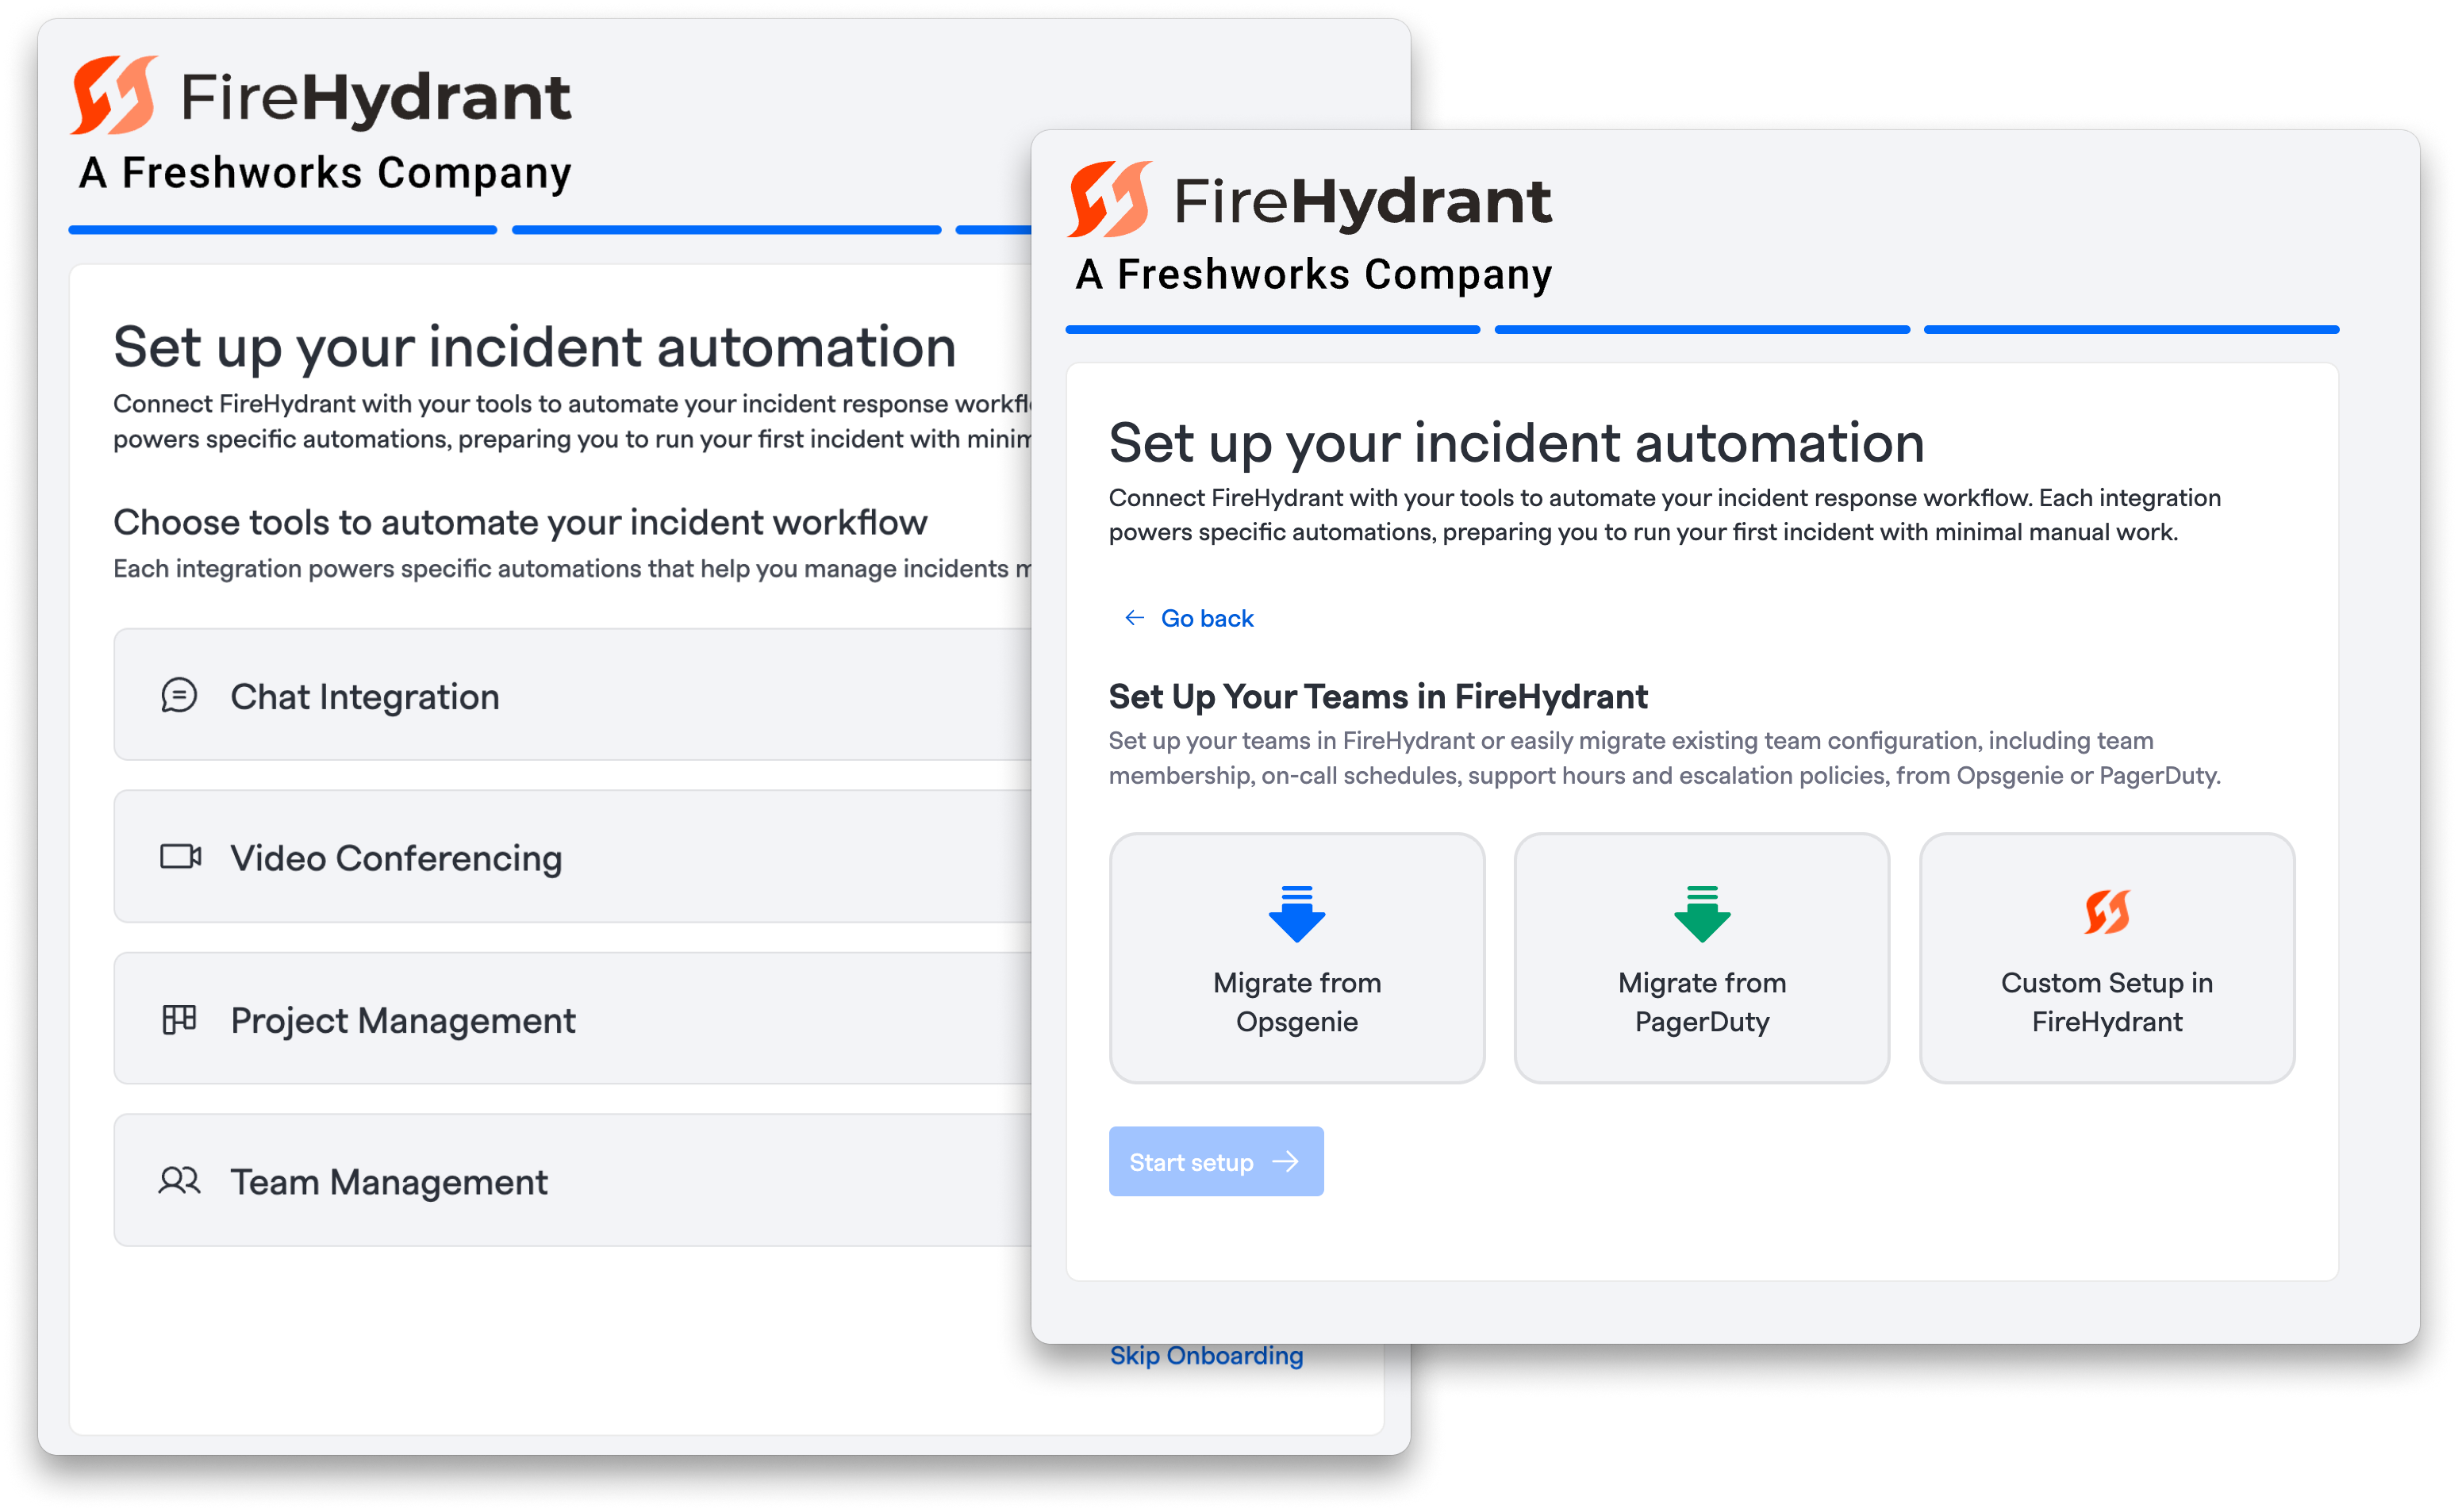
Onboarding flow
During the initial onboarding process, you will be shown an option to "Manage Teams". Once selected, you may either choose to import from Opsgenie, PagerDuty, or continue with a custom setup in FireHydrant.
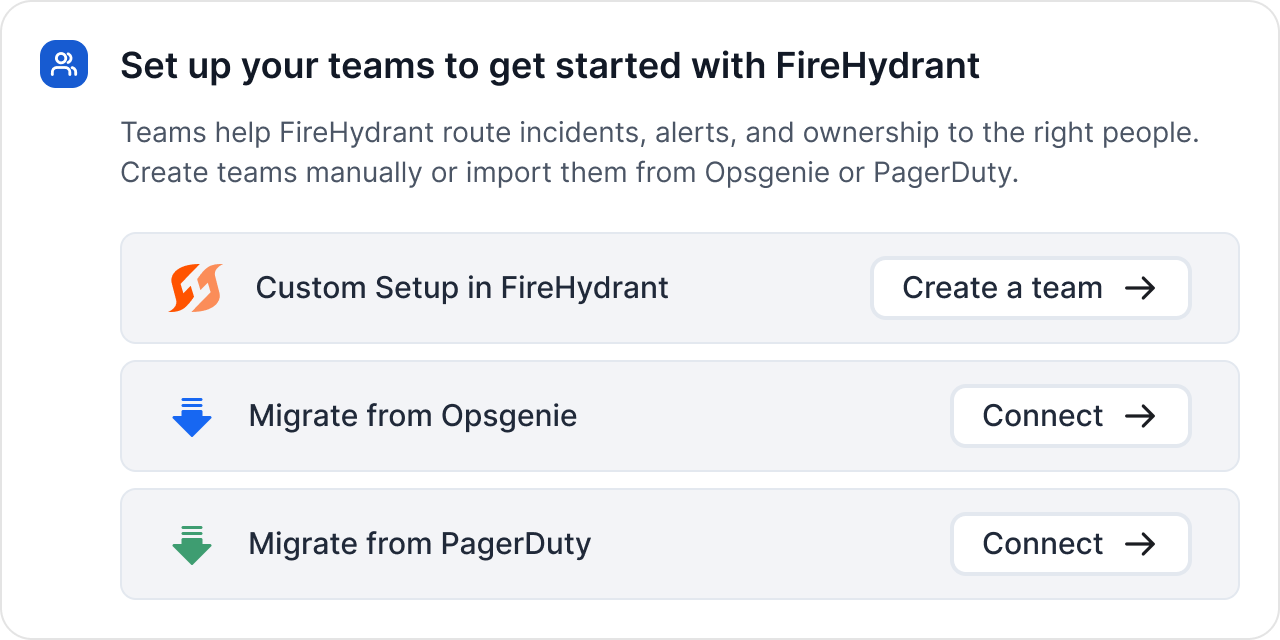
Homepage widget
If you have not set up any teams yet, a widget on the FireHydrant homepage will prompt you to get started.
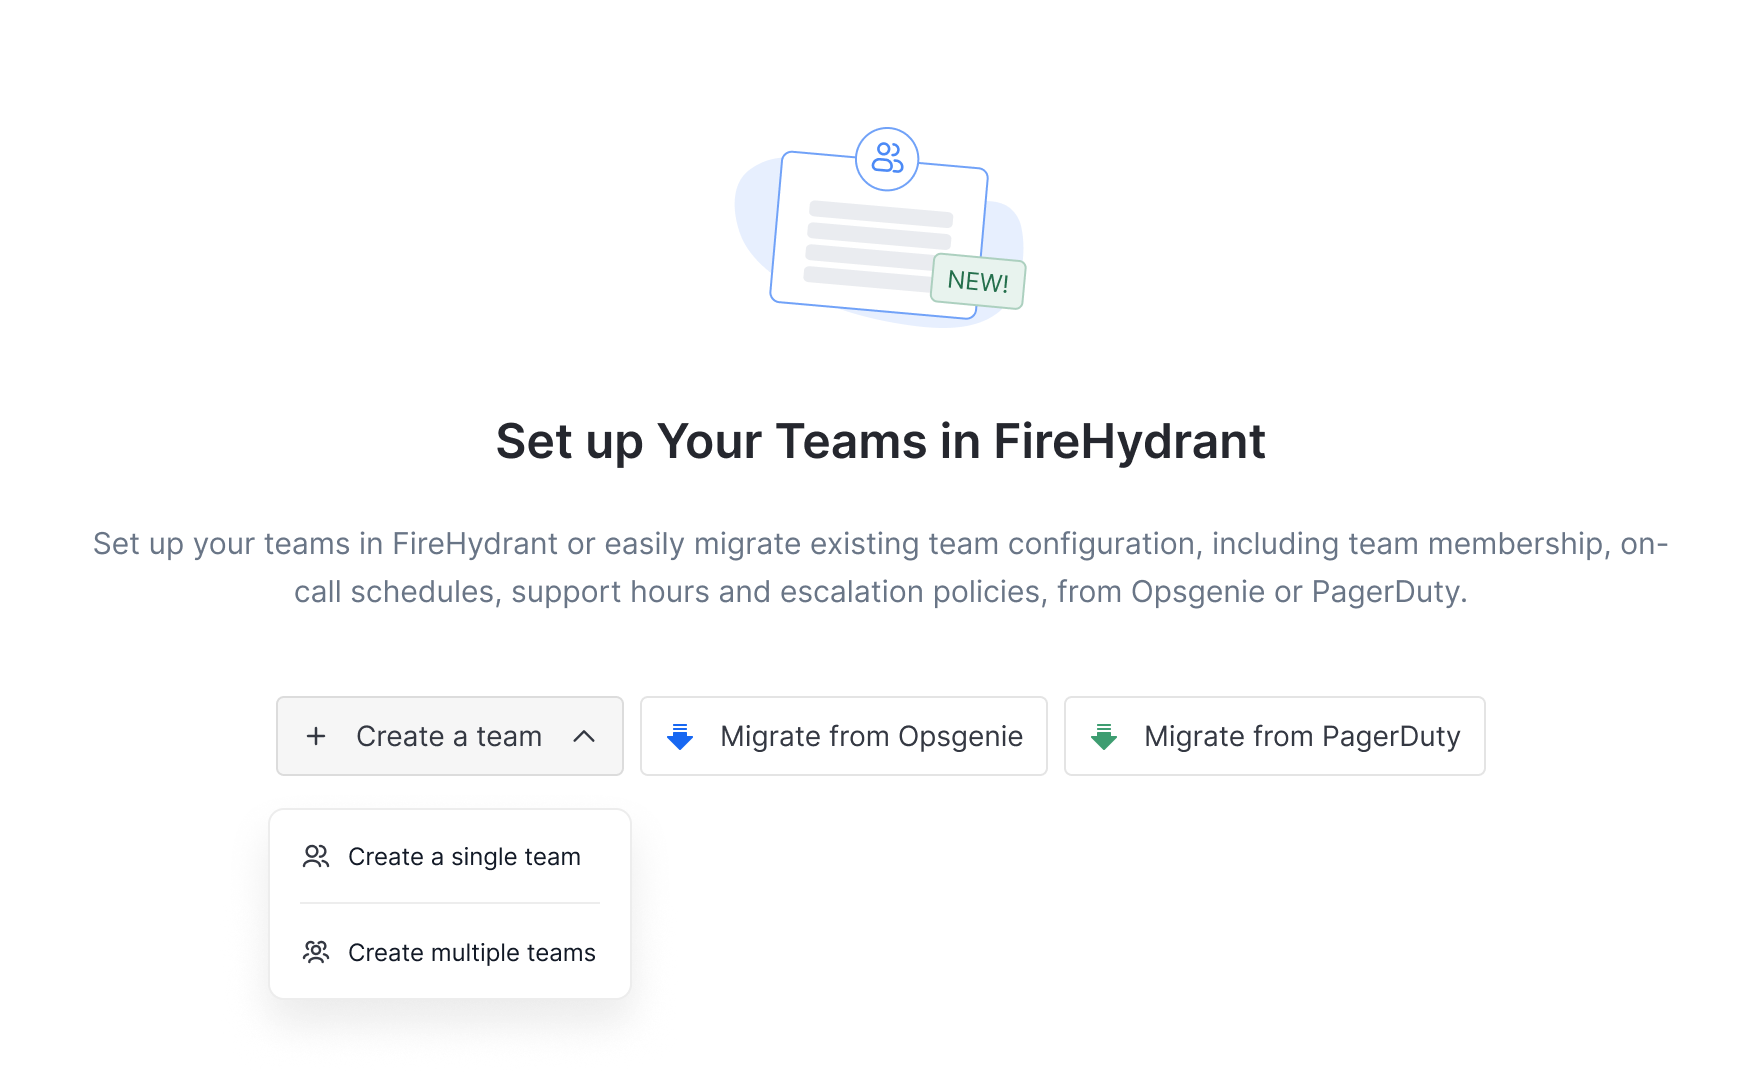
Teams Directory — empty state
When no teams exist, the Teams Directory page displays options to:
- Create a team — manually define a one or many teams without importing from an external provider
- Migrate from Opsgenie — pulls teams, schedules, escalation policies, and members from your Opsgenie account
- Migrate from PagerDuty — pulls teams or services, schedules, escalation policies, and members from your PagerDuty account
Teams Directory — existing teams
If teams already exist, click Add Team in the top right of the team overview table, then choose from the same three options listed above.
Step 2: Connect Your Alert Provider (Import Only)
If you selected Create a team, skip ahead to Step 3.
If you selected Migrate from PagerDuty or Migrate from Opsgenie, you will be prompted to authenticate:
- Enter the API key for your alert provider.
- Click Connect.
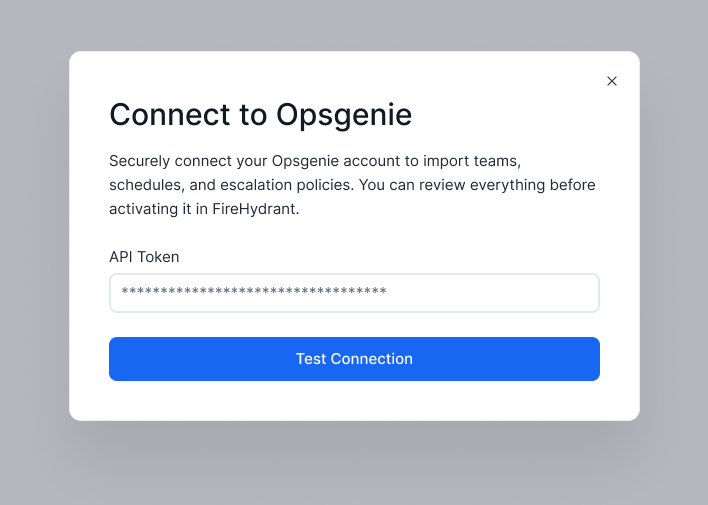
FireHydrant will validate the credentials and display a summary of what was found in your account — including teams, on-call schedules, and escalation policies available to migrate into Signals.
Your API key is used only to read configuration data during the import. FireHydrant does not store the key after the import is complete. If validation fails, double-check that the key has sufficient read permissions on your provider and try again.
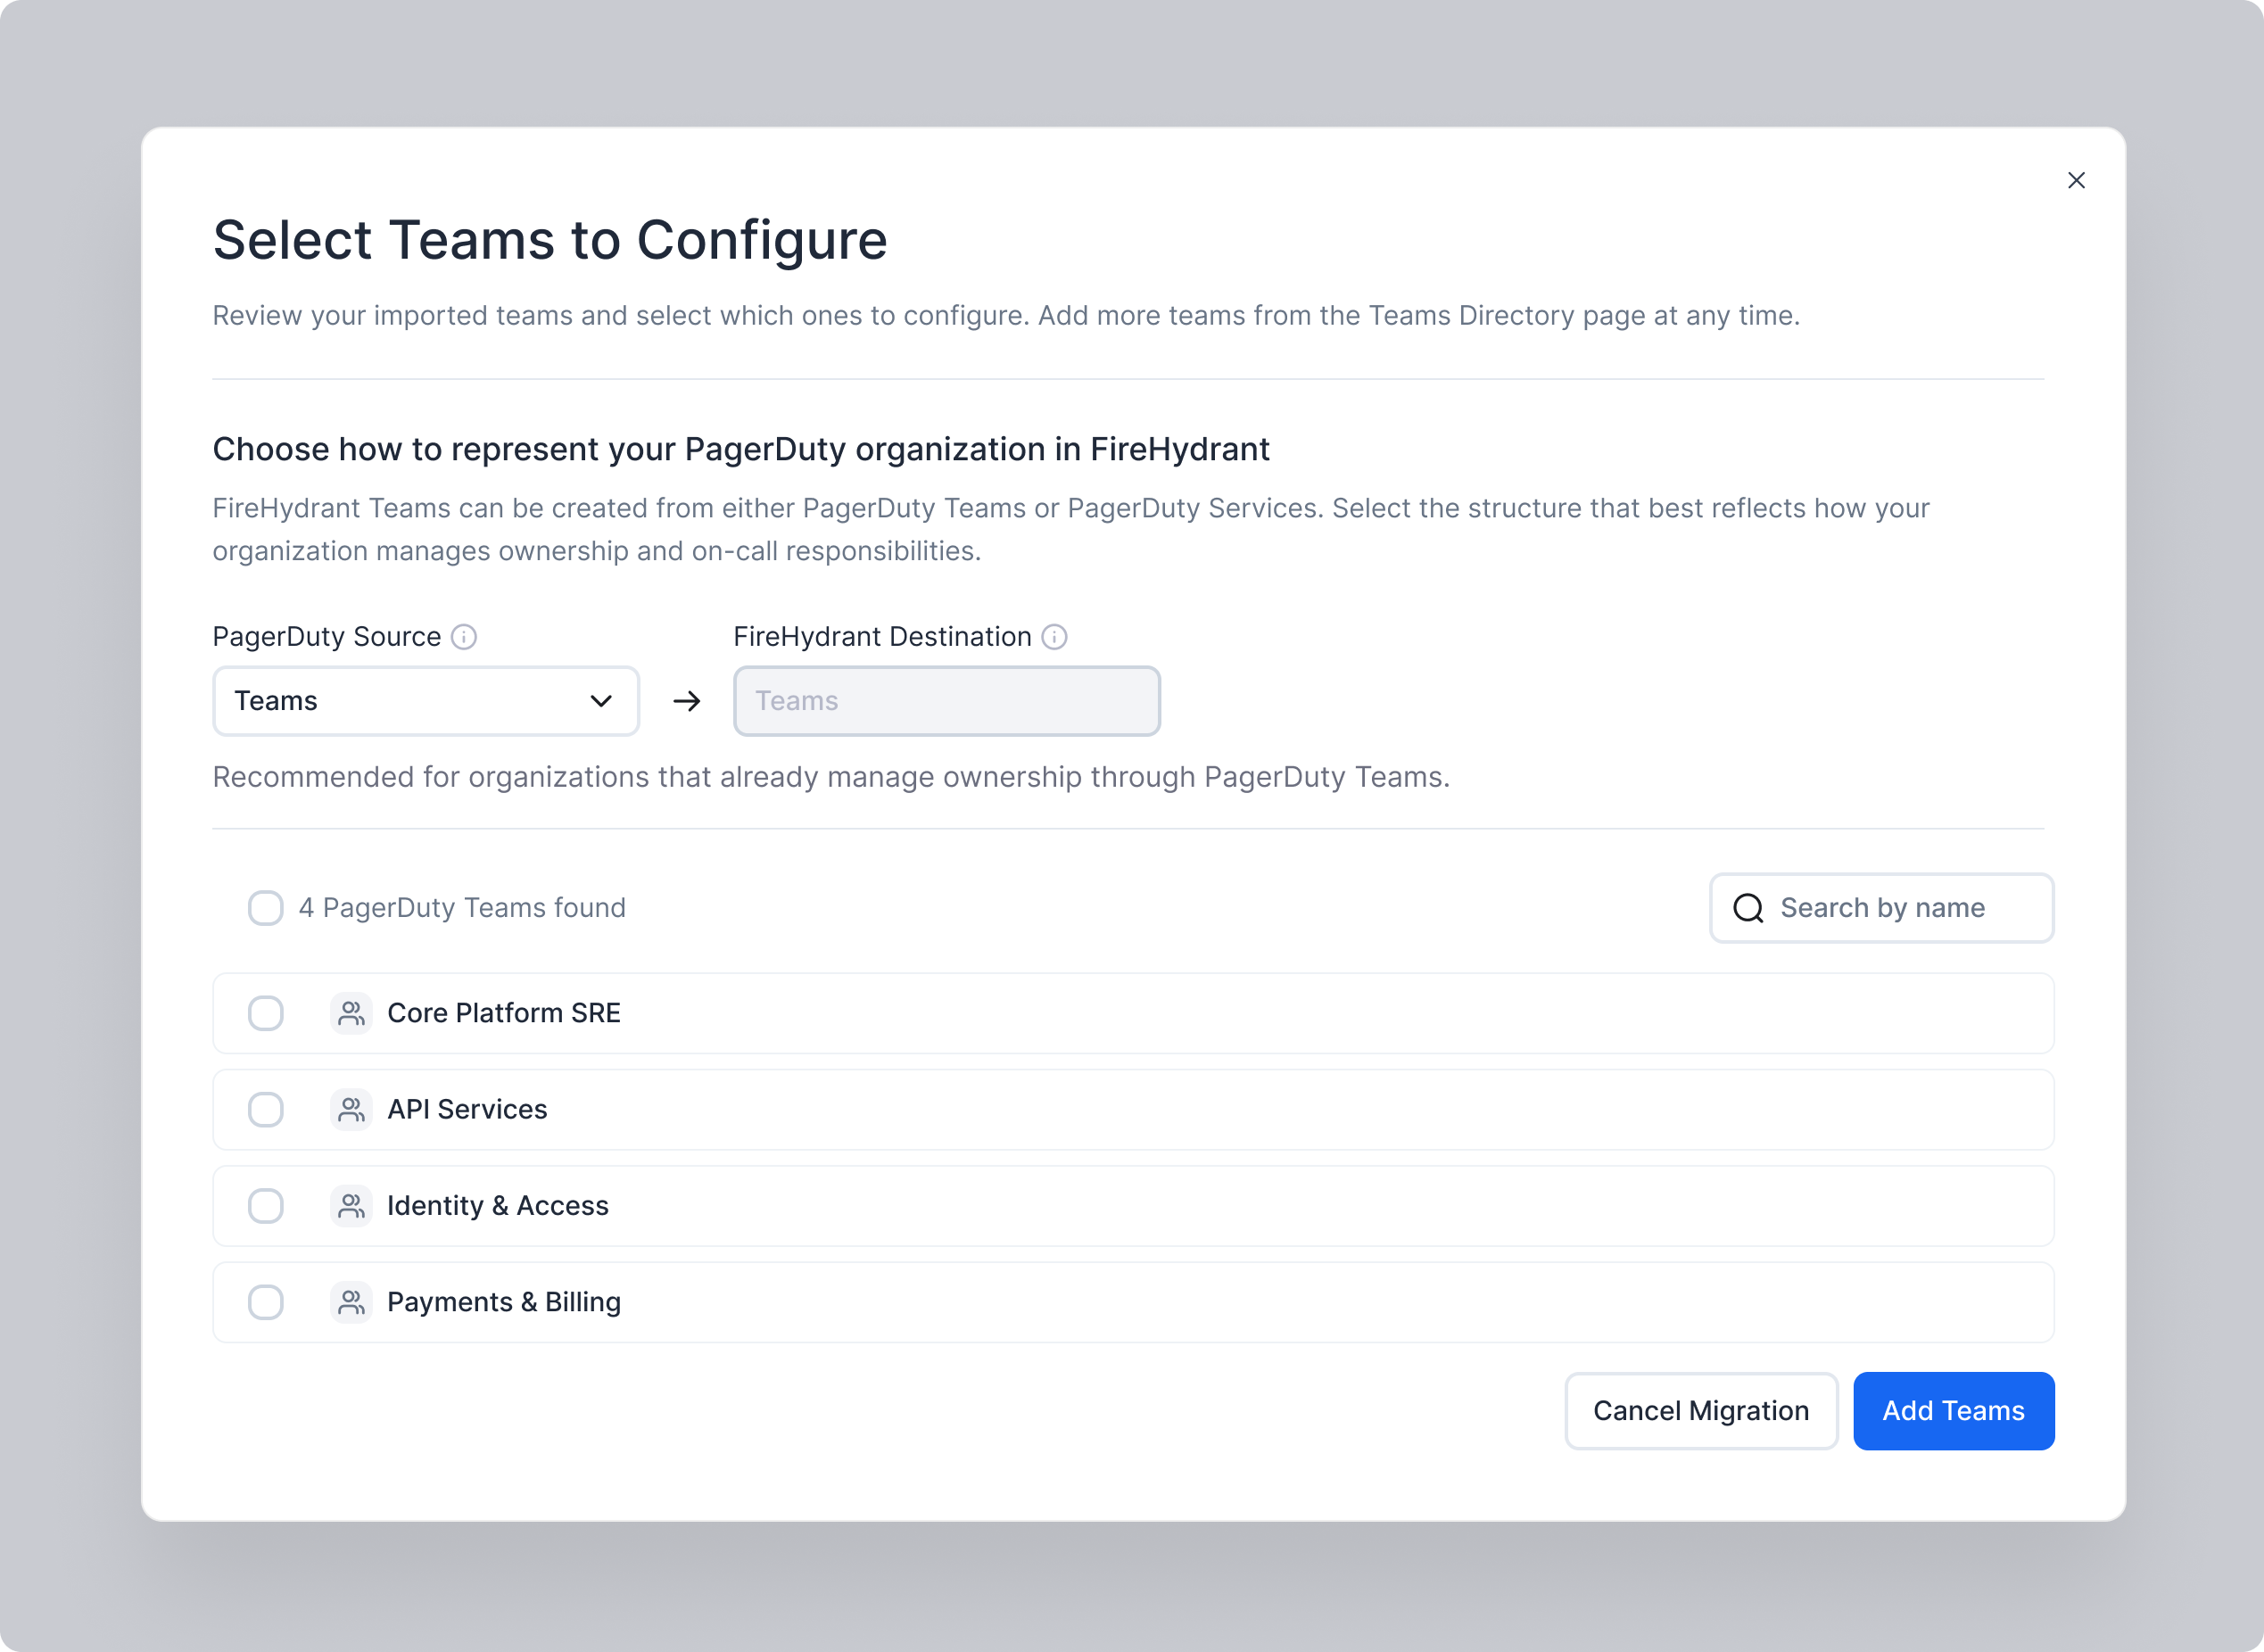
Step 3: Select or Name Your Teams
Importing from an alert provider
From the list of teams discovered in your provider, select the teams you want to bring into FireHydrant. You can select any combination — you are not required to import all teams at once. If you are importing from PagerDuty, you can select Teams or Services as the source that will be translated into a Team resource within FireHydrant.
Teams not selected here will not be imported. You can re-run this flow at any time to import additional teams.
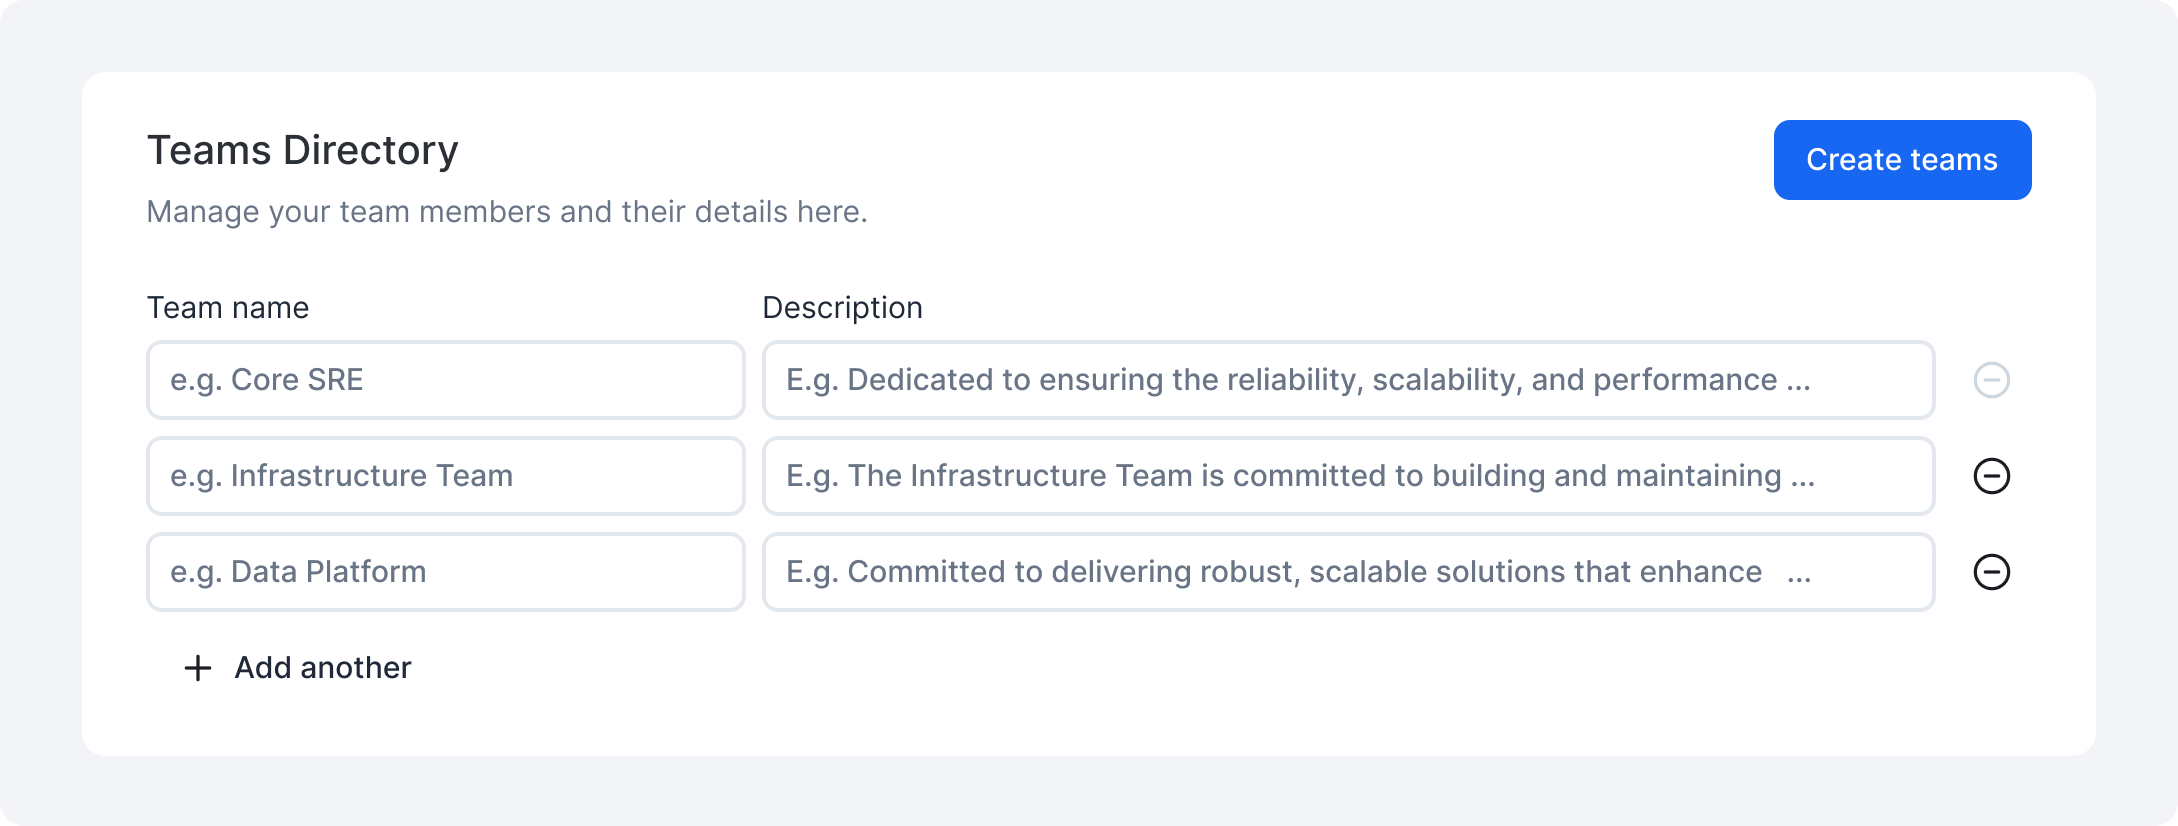
Creating from scratch
If you are in the initial onboarding flow, you will have the option to create teams in bulk. If you selected Create a team manually, you will fill in all required fields in the team creation form.
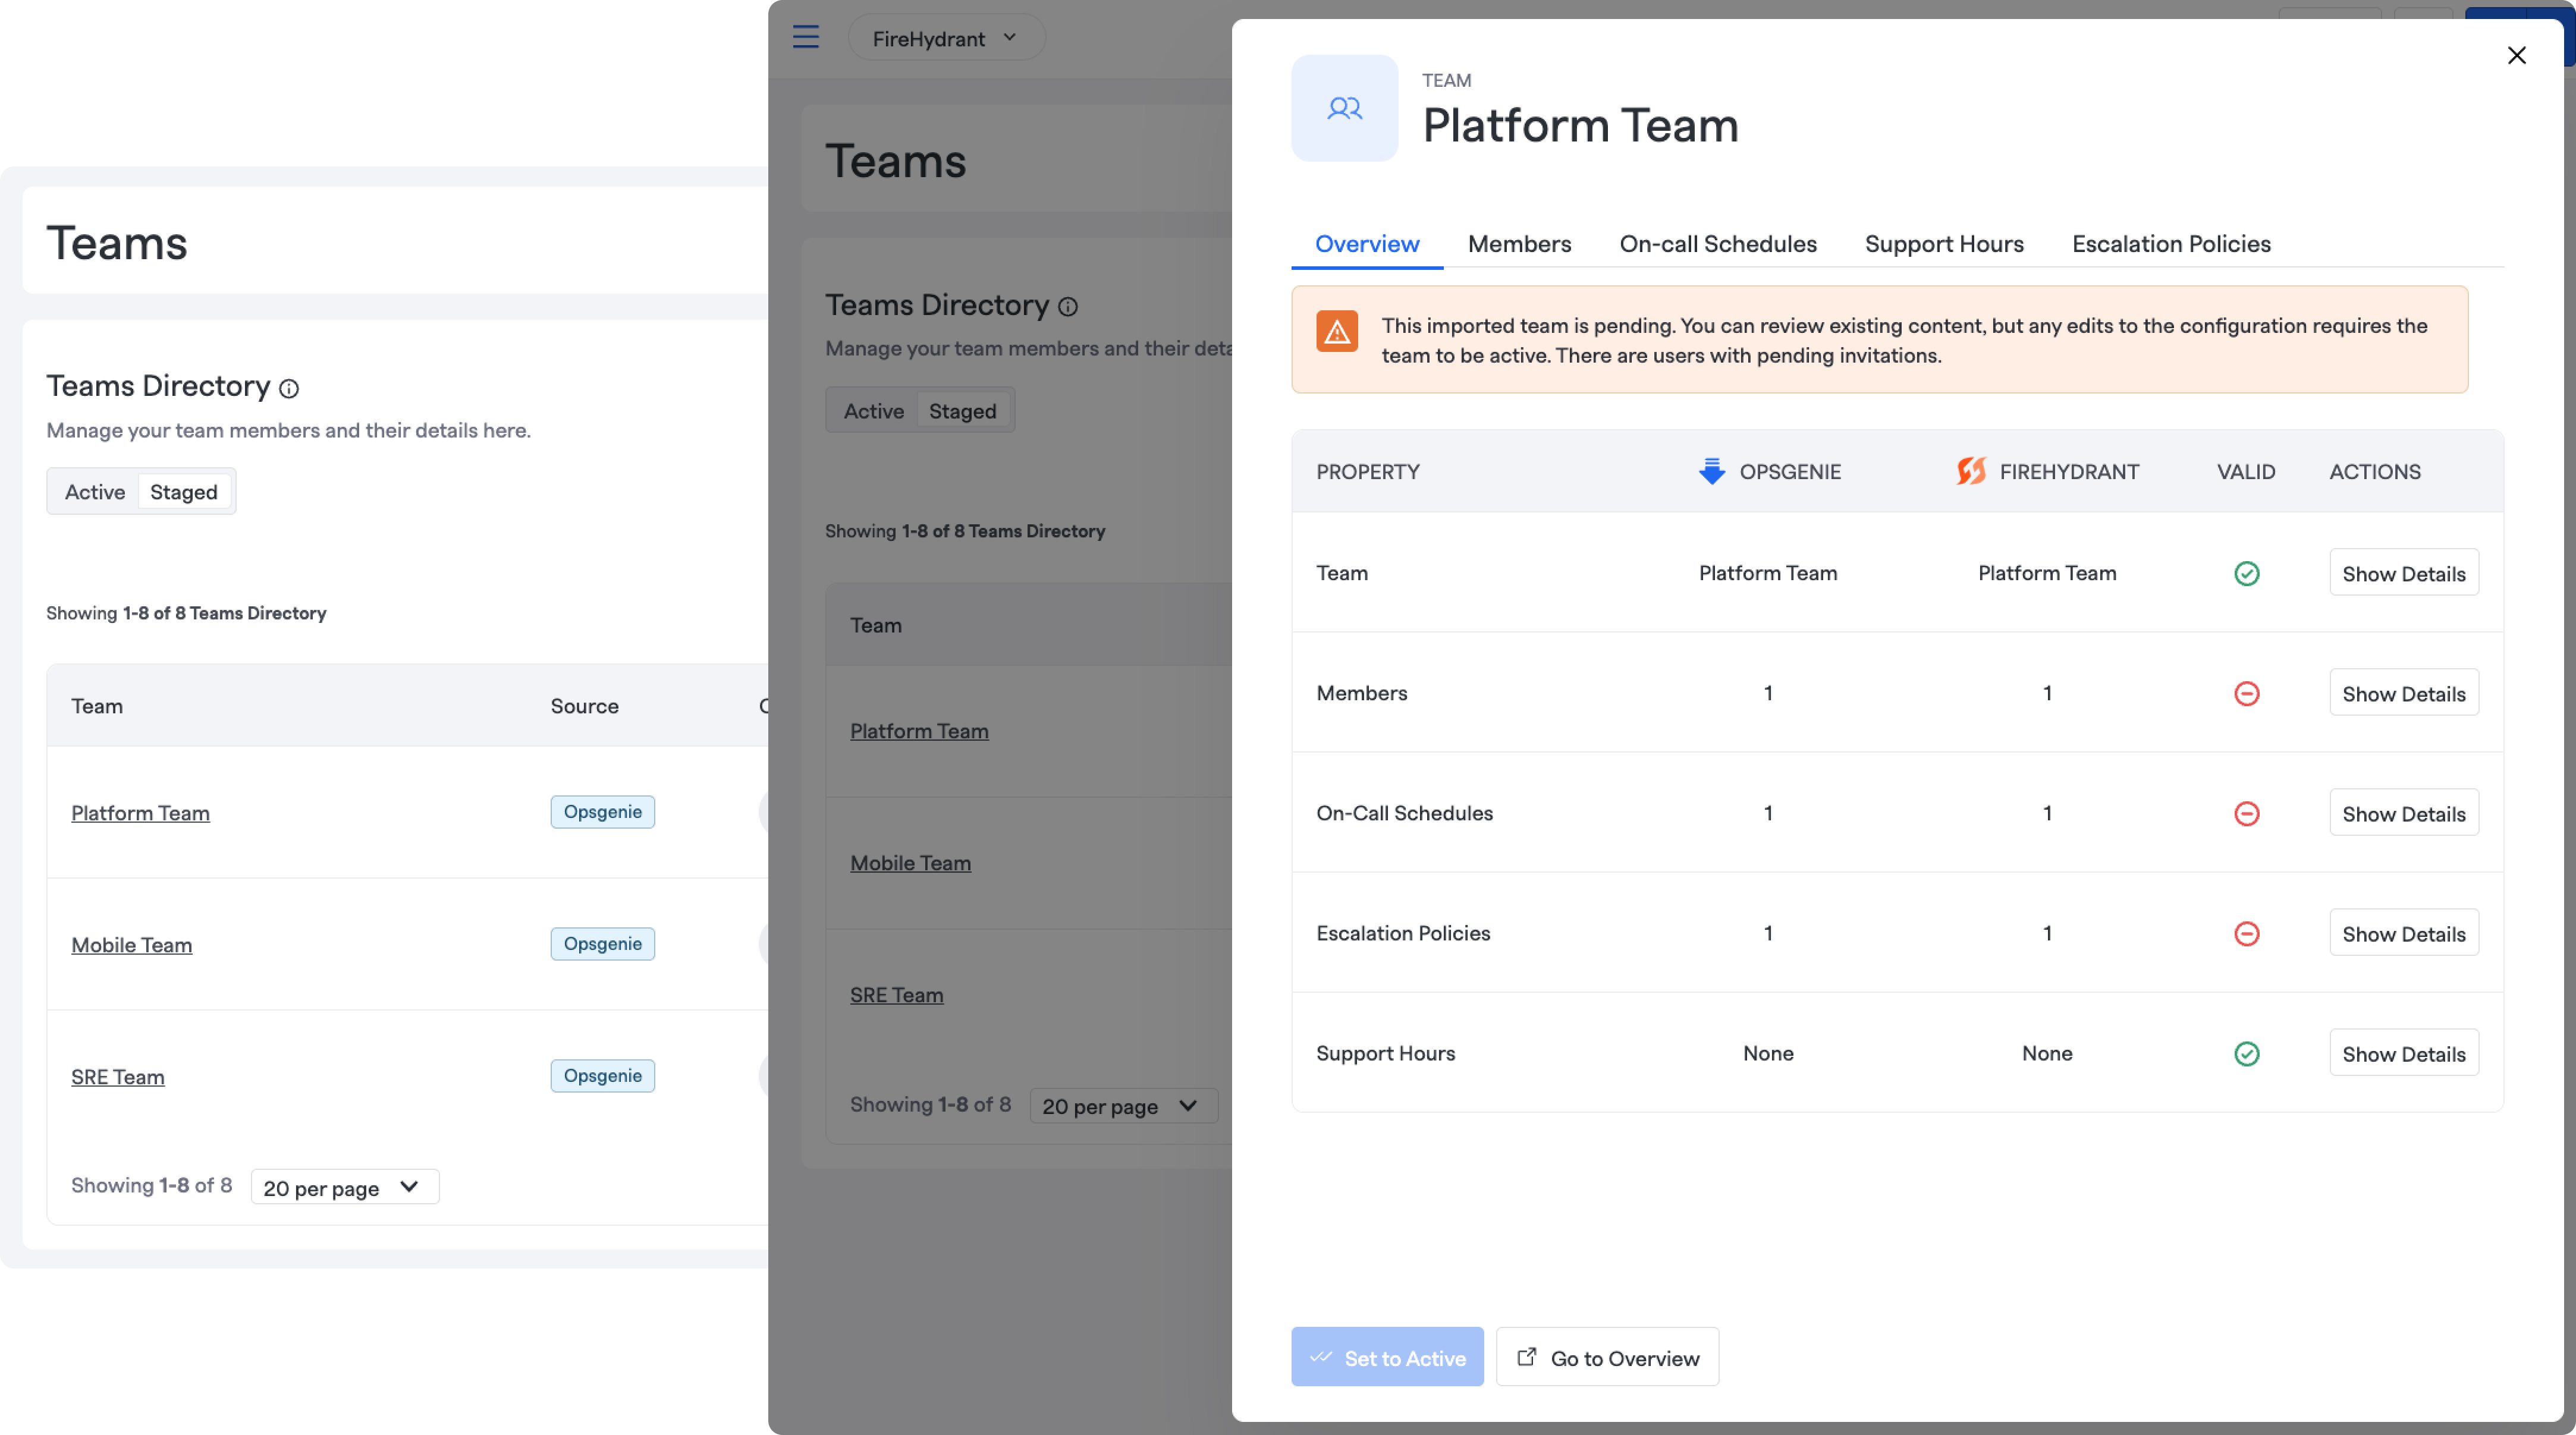
Step 4: Review Each Team Import
Once you select the teams to import, each pending team will appear under the Staged tab on the Teams overview table. For migrated teams, the Signals configuration pulled from your provider is pre-populated — including team members, on-call schedules, and escalation policies — giving you a chance to review the imported data before the team goes live. For teams created from scratch, you will start with a blank configuration.
For each pending team, you can review the imported resources to understand what was successfully imported. Anything that could not be imported will be flagged in the migration overview table for further action.
Resolving Missing Users
If the imported team references users who do not yet have FireHydrant accounts, you will be blocked from continuing until you resolve them. You must either remove each missing user from the team members page, or invite and activate the users.
You cannot confirm or skip a team while it has unresolved missing users. If you expect to provision users via SSO or SCIM, use Remove missing users to unblock the import and let SCIM handle provisioning separately. Users can always be added to the team later from the team's settings page.
Once all missing users are resolved and you are satisfied with the rest of the configuration, you can use the "Validate import" button on the top right to ensure that the imported team members are associated with the activated users.
Step 5: Activate Your Team
After confirming all selected teams, each team will be in a Staged state. To make a team available for incident response and unlock the full set of team configuration options:
- Open the team you want to activate.
- Click Set to active.

Once active, the team's migrated Signals configuration — schedules, escalation policies, and memberships — is live and ready to use. The team can be assigned to incidents, linked to services and functionalities in the Catalog, and configured with all other standard team settings.
Teams in Staged state are not available for assignment in incidents or Runbooks. Activate each team before configuring downstream automation.
Next Steps
With your teams active, you can continue expanding your FireHydrant setup:
- Add or edit team members and on-call roles
- Associate teams with services and functionalities so the right responders are pulled in automatically when components are impacted
- Configure escalation policies and on-call schedules with FireHydrant Signals
- Set up Runbooks to automate team assignment during incidents
Updated 20 days ago