Alert Routing
Note:We encourage users to look at using Signals, our new system for ingesting alerts from monitoring tools and paging users or notifying Slack channels.
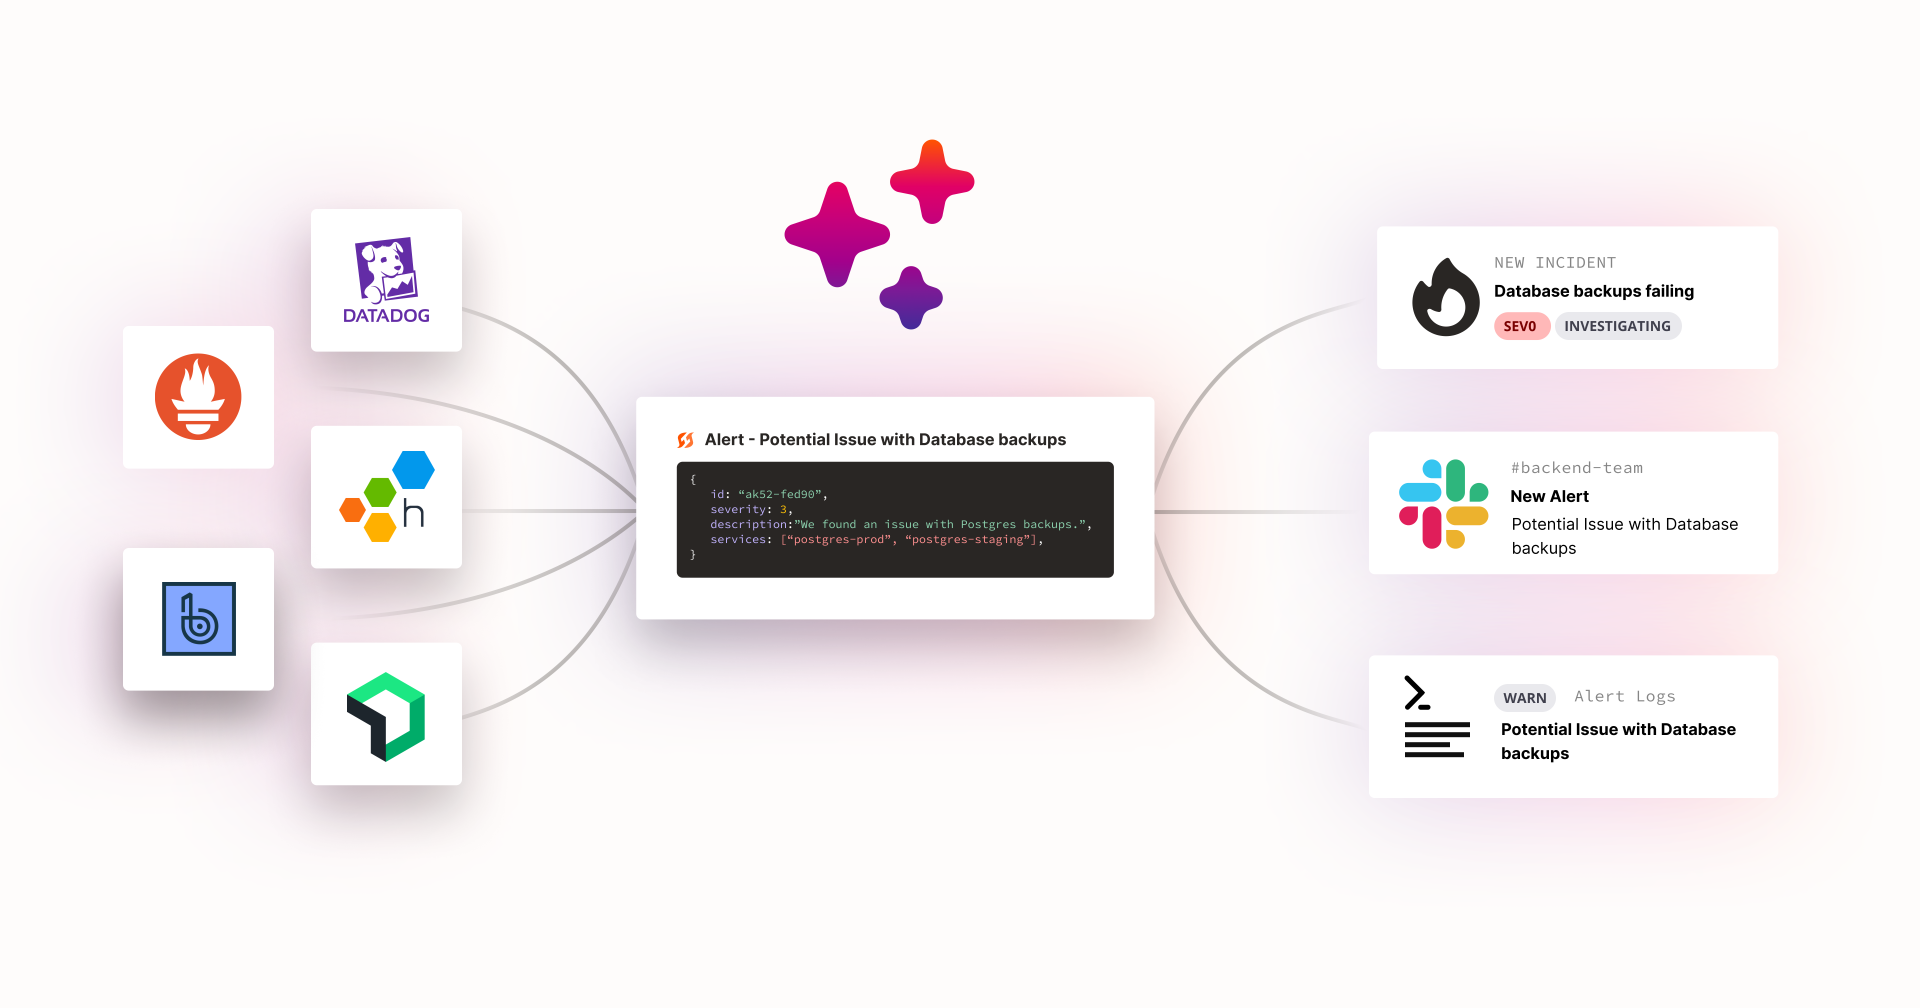
Alert routes allow you to create conditional rules for inbound alerts to FireHydrant from both alerting providers like PagerDuty and Opsgenie as well as monitoring providers like Honeycomb and Datadog.
These rules allow you to automatically open incidents, send notifications to Slack channels for someone to manually triage and open an incident from there, log alerts in FireHydrant, or simply ignore an alert. You can use powerful conditional statements that take advantage of the incoming data from your alerting provider.
FireHydrant today provides alert routing capabilities for the following providers:
- Alerting
- Monitoring
- Other
Prerequisites
Aside from initially setting up the appropriate integration(s) (see links above), you'll also want to configure a default alerting channel in Slack. Every alerting and monitoring integration comes with a default rule to notify the default Slack channel you've configured for alerts.
This Slack channel is configured in your Slack integration settings (Settings> Integrations list > Slack), as seen below:
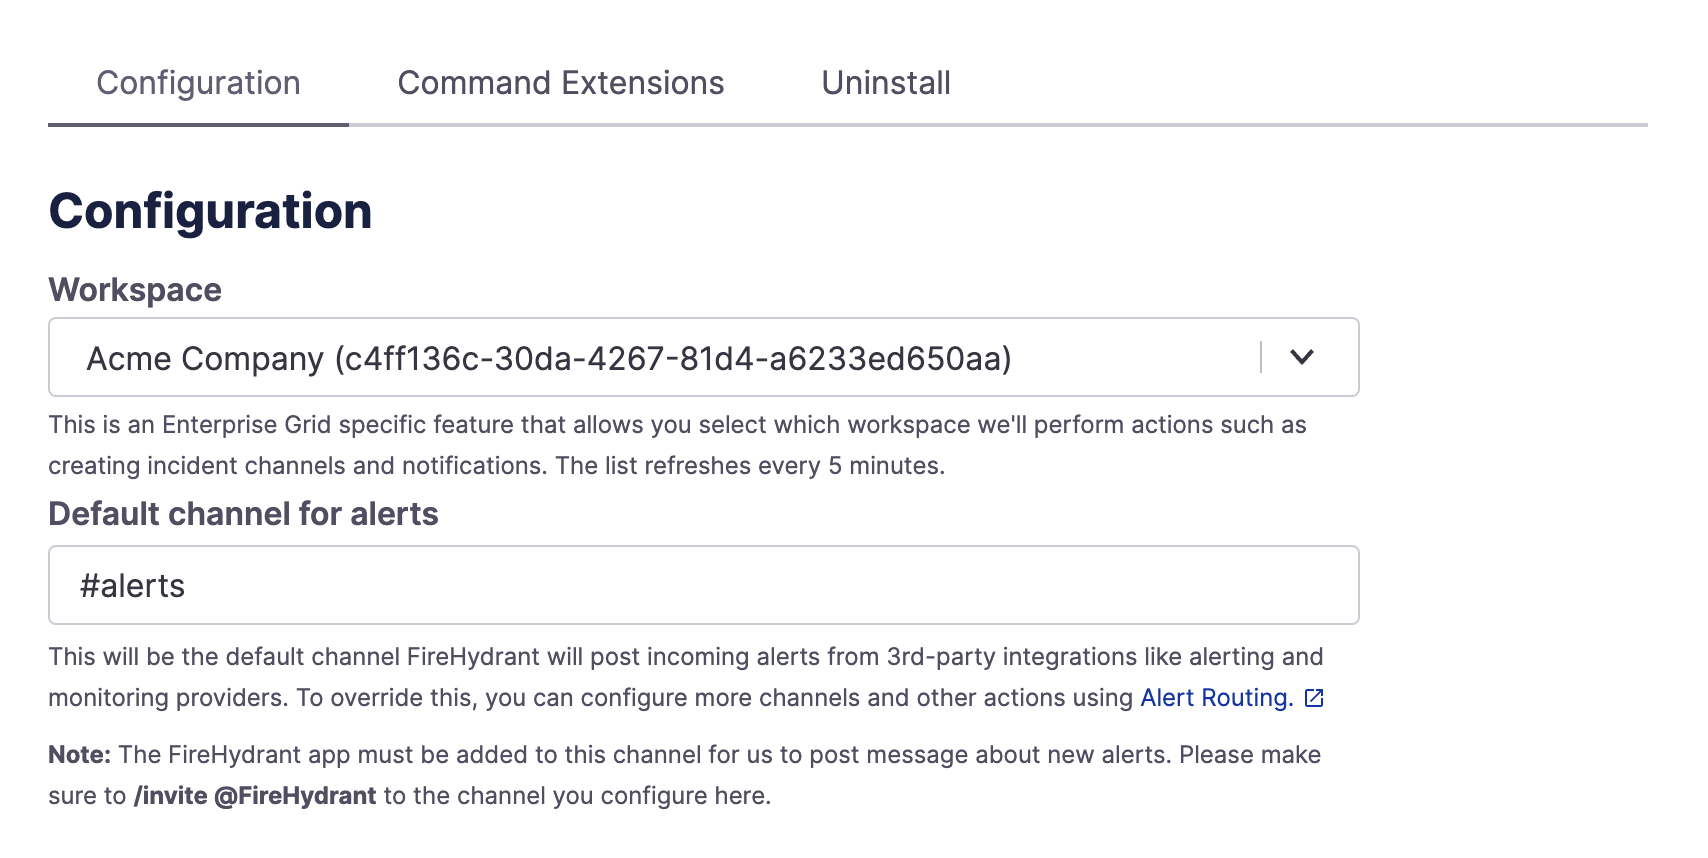
Default channel for alerts setting in Slack
Overview
To get started with alert routes, navigate to the settings page in FireHydrant for your alerting/monitoring provider. Alongside the configuration of your alerting provider, you’ll find a tab for Alert Routes as well as Alert Logs.
In the Alert Routing tab, you’ll find a default route that sends all your alerts to the channel you set in your Slack integration settings. Default routes are the fallback rule that will be executed if none of the other routes have been run.
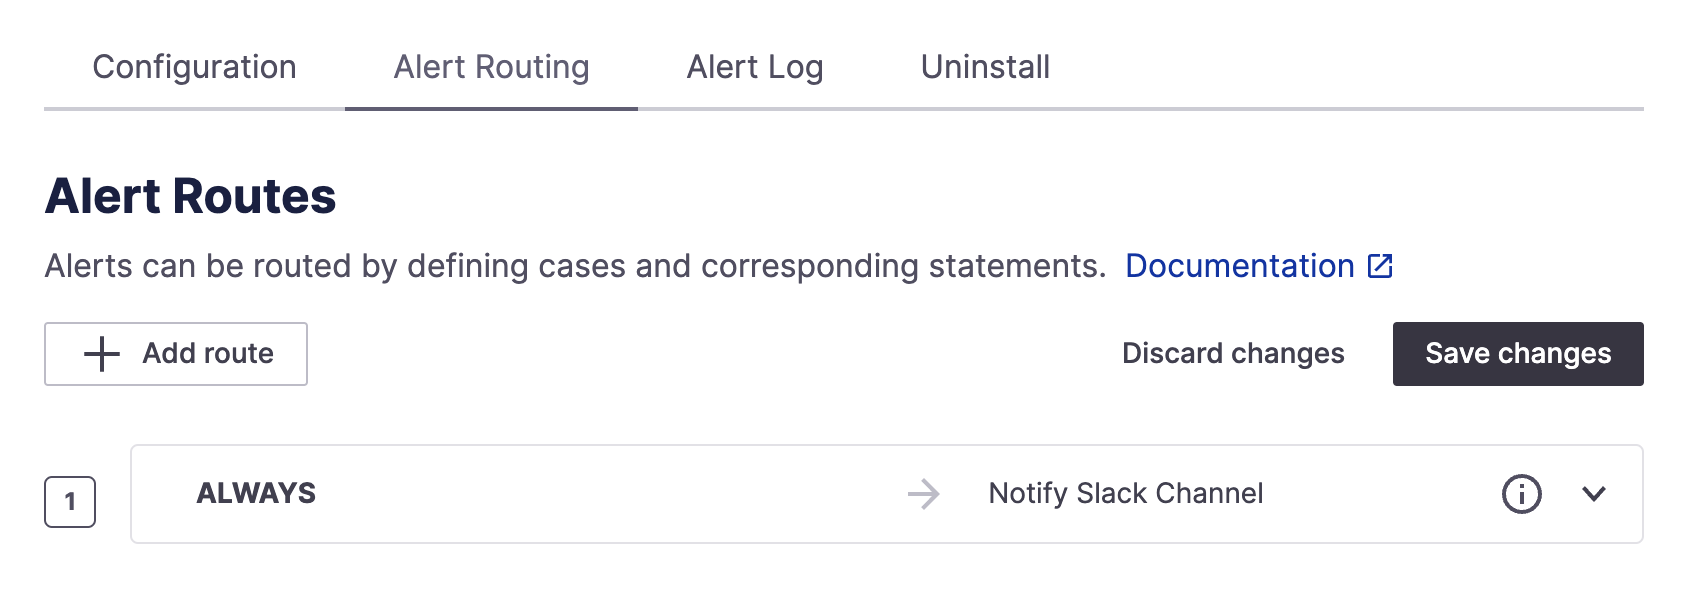
Default route for all new integrations
Here, you can add routes and actions for your alerts. For example, you could hypothetically implement the following scenario for PagerDuty:
- Incoming P1 alerts automatically create an incident
- If an incoming alert's title contains "test," ignore it entirely
- Otherwise, default to notifying the configured alert channel
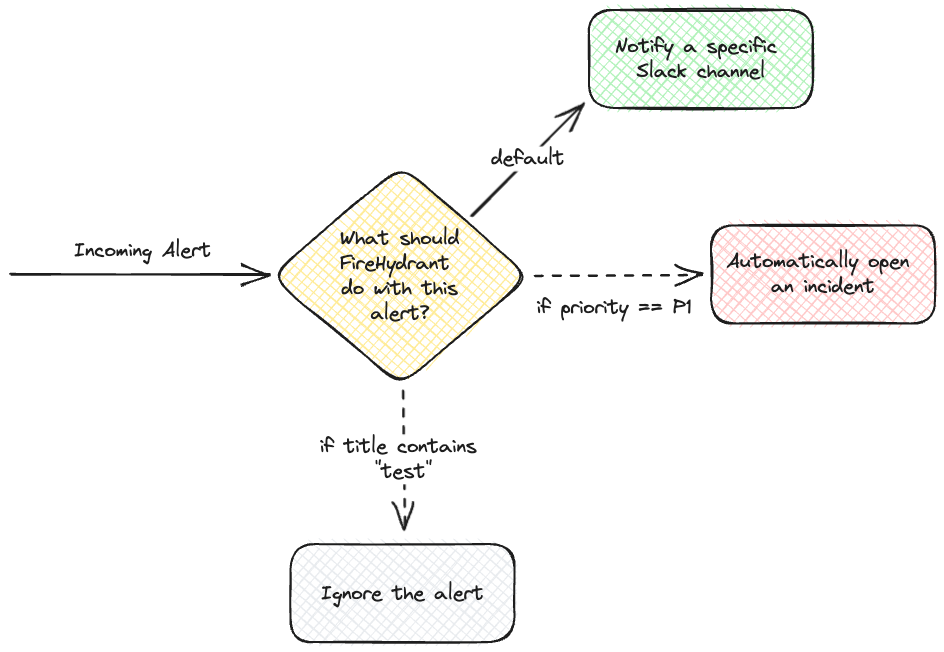
Visual representation of the above example
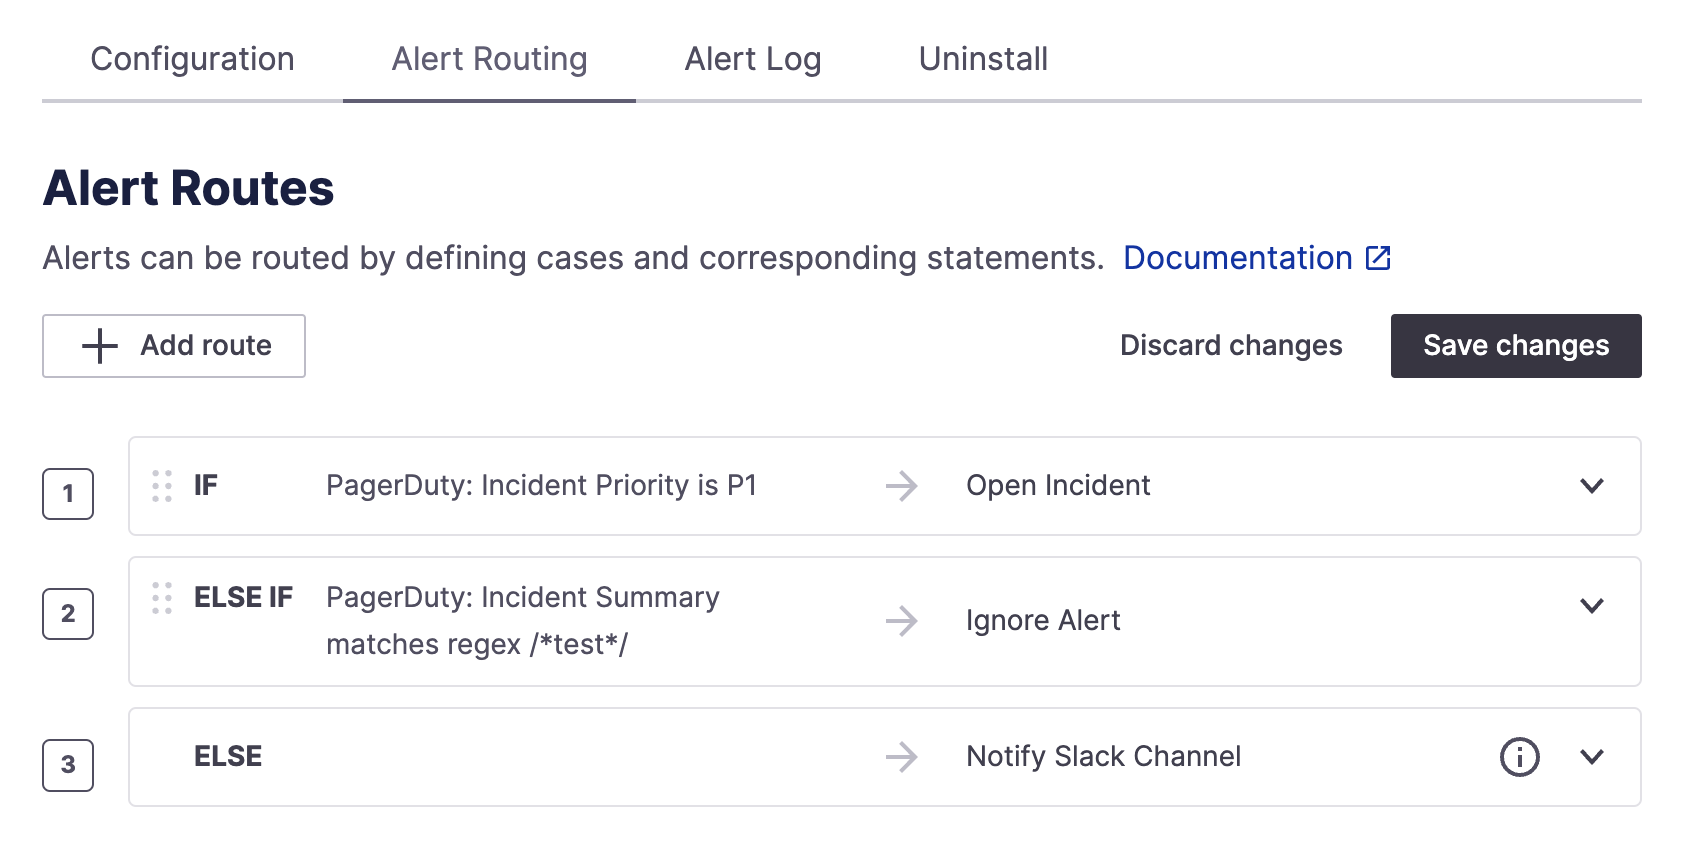
How it looks implemented in alert routing
Route Conditions
Every Alert Route has a Condition and an Action.
A condition allows you to set the logic that controls whether or not an alert route is processed.
Note:Each route executes exclusively. So once the conditions on a route have been matched, FireHydrant will stop evaluating the other rules, and we will perform the action associated with the matched route.
Conditions are configured from any of the data that has come through from the alerting provider. There are some standard fields from all providers, such as Summary, Priority, and Impacted Infrastructure. Still, any additional fields from your provider can also be pulled in from the webhook’s request body. Each provider should have its own documentation on what fields are available in that webhook body.
Conditionals can also be chained with either “OR” or “AND” conditions for each route.
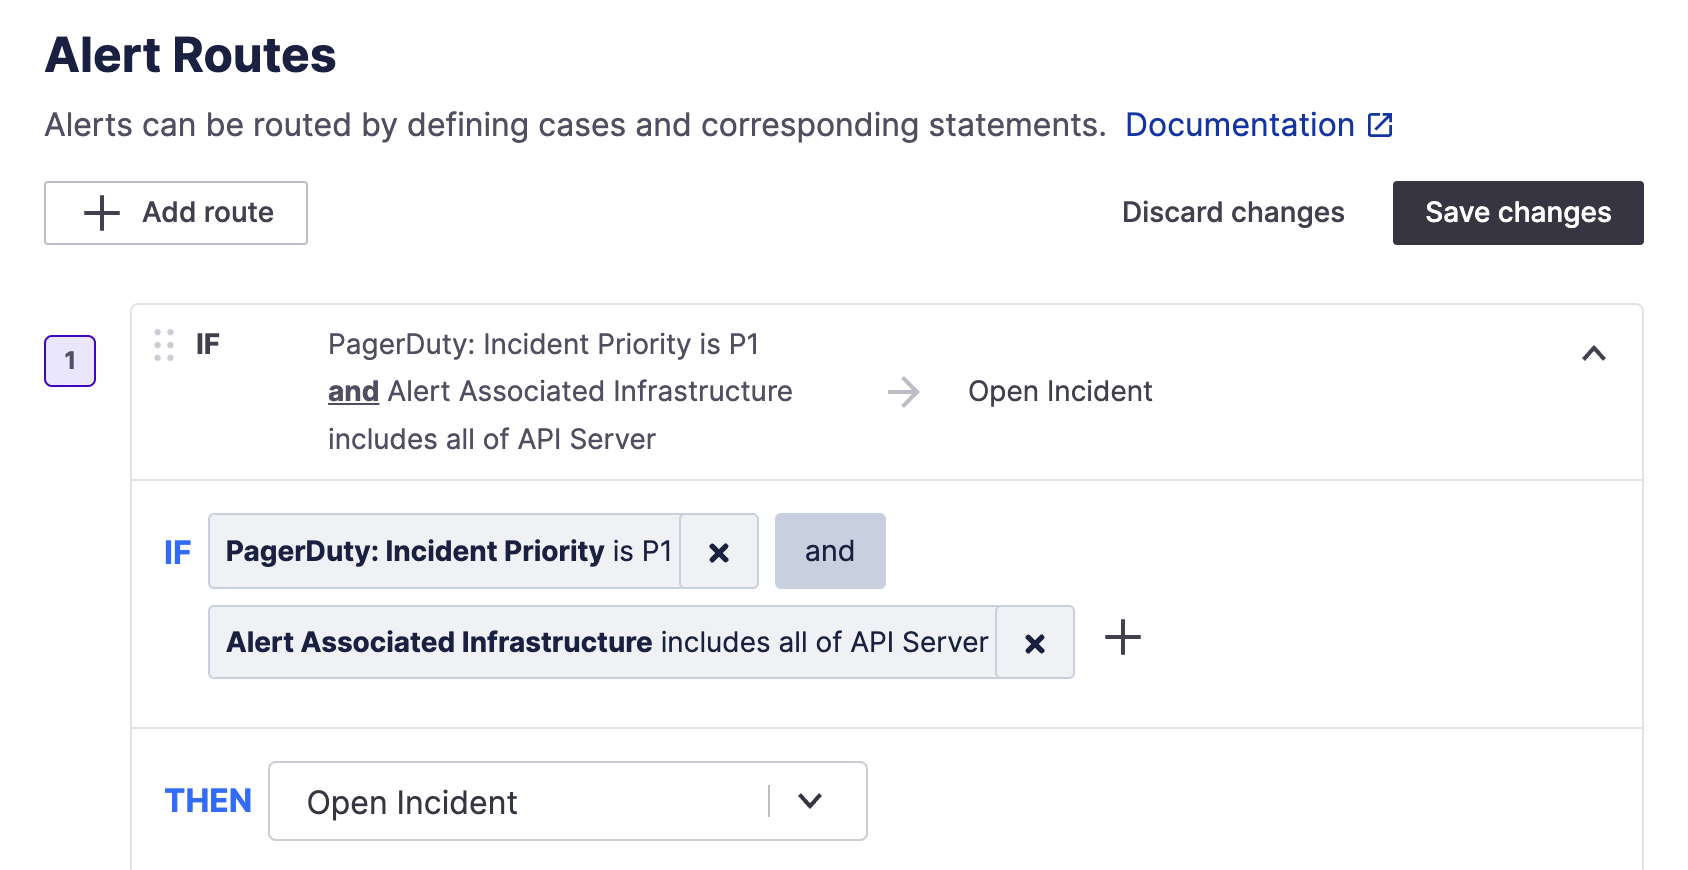
Example of a multi-condition alert route
Route Actions
For each route, you can choose between four actions:
- Automatically declare an Incident in FireHydrant
- Send an alert to a specific Slack Channel
- Create a log for this integration
- Ignore the alert
Automatically Declare an Incident
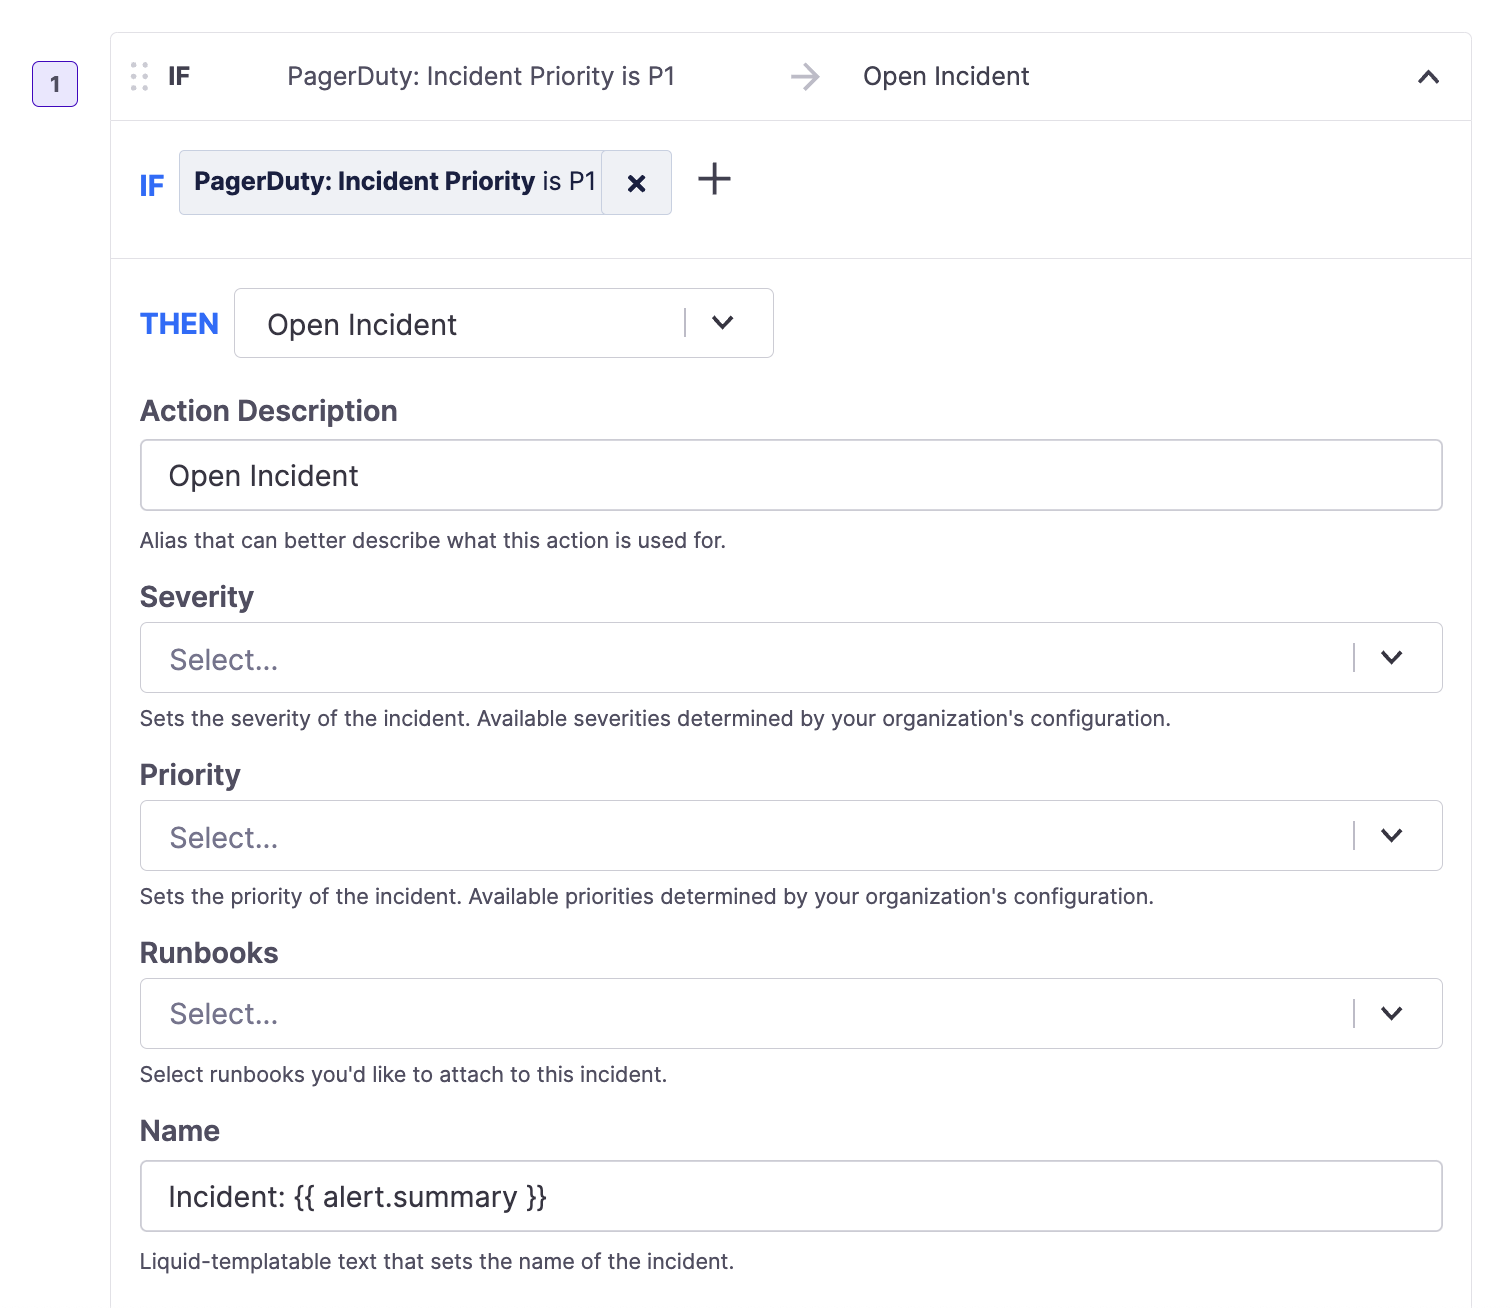
Declaring an incident in an alert route
When automatically opening an incident, you can specify the various fields on the incident. Any fields with input text support Liquid templating and {{ alert.* }}, the alert object we create internally, as well as {{ request.body.* }} which references the data available from the incoming webhook's body. See the Using Liquid Templating section below to learn more.
This allows you to declare an incident on FireHydrant with any set parameters and information utilized directly from the alert, and the alert will automatically be attached to the incident.
Alerting a Slack Channel
When sending alerts to a Slack Channel, you can create a custom template for the sent Alert title, and we’ll include a link to the original alert in the message.
You can specify a channel by hard-coded name (e.g. #backend-team), with the Liquid variable referencing the Slack integration ({{ slack_connection.alert_channel }}) or a parameter from the incoming alert if relevant ({{ request.body.team_slack_channel }}). Here's an example alert being sent to a Slack channel. See the bottom section below on Liquid Templating.

Example alert posted into Slack channel from a PagerDuty alert
From here, a user can manually look at the notification in the Slack channel and decide to open the incident, editing details ad-hoc as needed. Like automatically creating an incident, manually creating one from an alert posted into a Slack channel will also associate the alert with the incident created.
Logging an Alert
When logging an alert to FireHydrant, you can select the log level you’d like to provide (Info, Warning, Error, etc.) and specify the message included in the log. You can access any logged alerts in the Alert Logs tab of your integration.
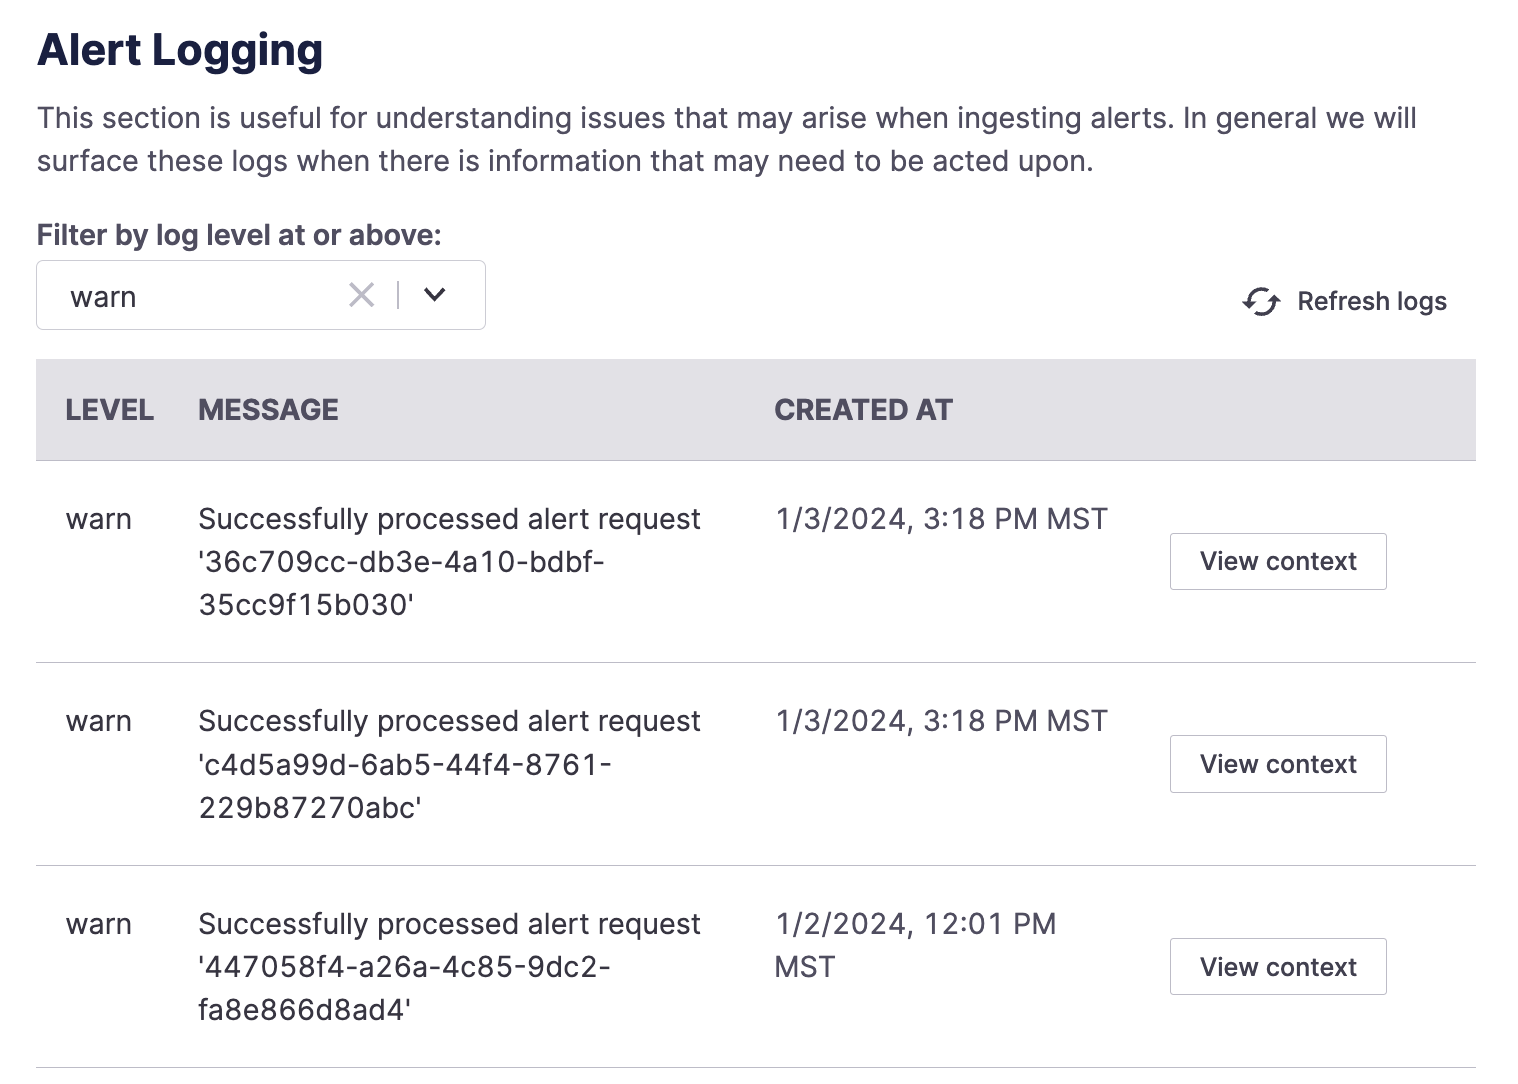
Example alert logs
Here, you browse a list of alerts, initially filtered to “Warn” level and above. Select another log level to see all alerts at that log level and above. To view further details about a log, click “View Context.” You may find additional details, including error messages and more.
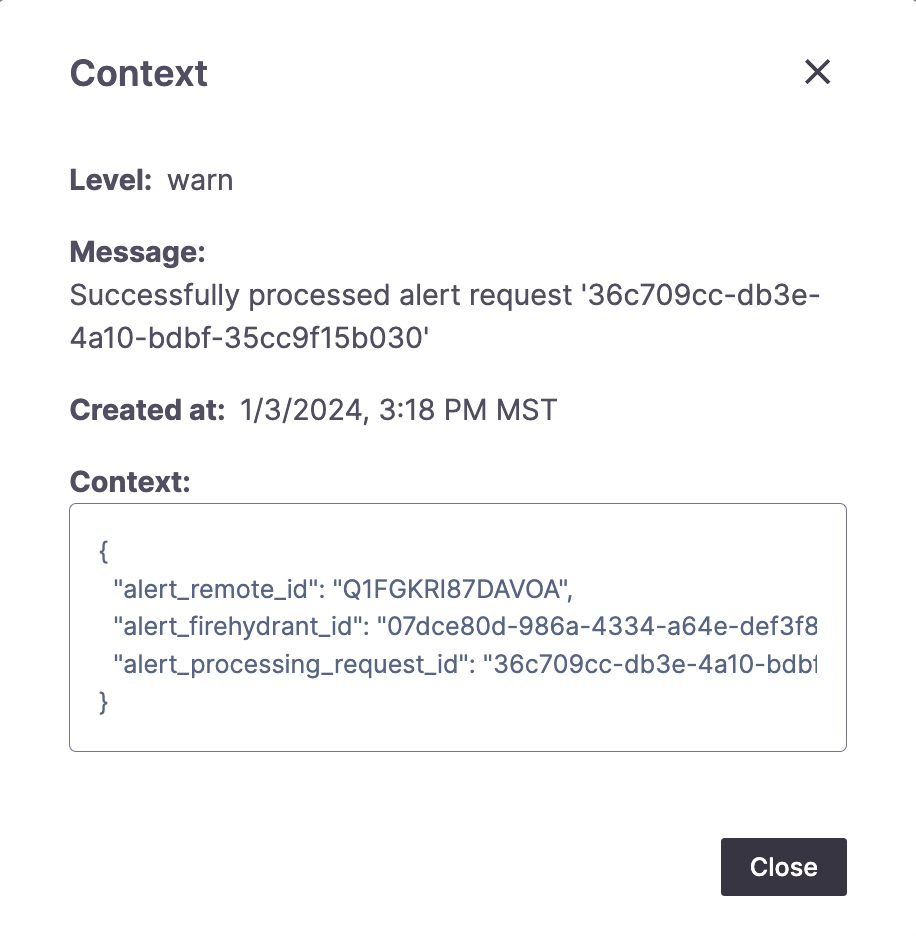
Example alert log context modal
Ignore the alert
This takes no action and does not log that the alert came in.
We generally recommend defaulting to Logging an alert as described above for debugging purposes. However, if there are inbound alerts you know are useless and noisy (e.g., tests), you can configure this action to reduce the logging volume.
Using Liquid Templating
Any parameter or data from the incoming webhook can be used in any of the text fields in Alert Routing using the request.body variable. For example:
Given the following example incoming alert body from PagerDuty:
{
  "event": {
    "id": "5ac64822-4adc-4fda-ade0-410becf0de4f",
    "event_type": "incident.priority_updated",
    "resource_type": "incident",
    "occurred_at": "2020-10-02T18:45:22.169Z",
    "agent": {
      "html_url": "https://acme.pagerduty.com/users/PLH1HKV",
      "id": "PLH1HKV",
      "self": "https://api.pagerduty.com/users/PLH1HKV",
      "summary": "Tenex Engineer",
      "type": "user_reference"
    },
    "client": {
      "name": "PagerDuty"
    }
  }
}
You would be able to make use of individual parameters like so:
**Occurred at**: {{ request.body.event.occurred_at }}
**Opened by**: {{ request.body.event.agent.summary }}
This flexibility allows you to pass in virtually any data needed from the requesting source and making use of it in Alert Routing.
Updated 5 months ago
