Create a Jira Issue
With Jira integration for FireHydrant, you can create a new Jira ticket at the start of your incident that will automatically sync all created action items and link them to a parent ticket.
Note:Currently, FireHydrant only allows one top-level incident Jira ticket per FireHydrant incident.
Prerequisites
- Ensure you have set up either Jira Cloud or Jira Server (On-Premise) integration.
- Ensure you've configured at least one project for whichever integration you use.
Usage

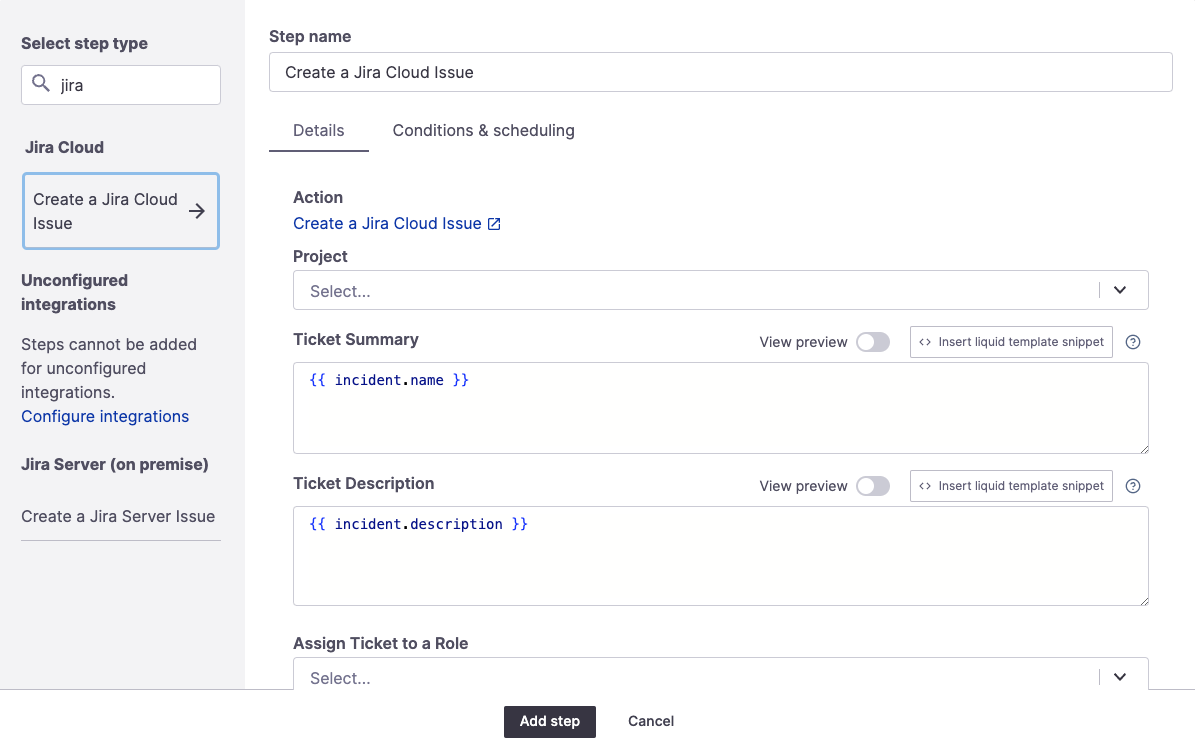
Create a Jira Cloud issue step. Jira Cloud and Jira Server Runbook steps look identical.
From the Runbook step menu search for jira. Select either Create a Jira Cloud issue or Create a Jira Server Issue, depending on which integration you've configured.
Note:Ensure you choose the specific Cloud or Server Jira steps and not the generic Create an Incident Ticket step under FireHydrant. This step is deprecated and we recommend against using it.
- On the step, select the Project you'd like to create the issue in and then fill in other details.
- By default, we fill in the Incident Name and Incident Description into the Summary and Description fields, which can be modified.
- For more information about variables and templating, visit the Template Variables page.
- **Optionally, you can assign the ticket in Jira to whoever's in a specific role in FireHydrant. Learn more about Incident Roles here. Note that this does require the individual user to have linked their accounts.
**Note:Assigning the ticket works for Jira Cloud only, not Jira Server.
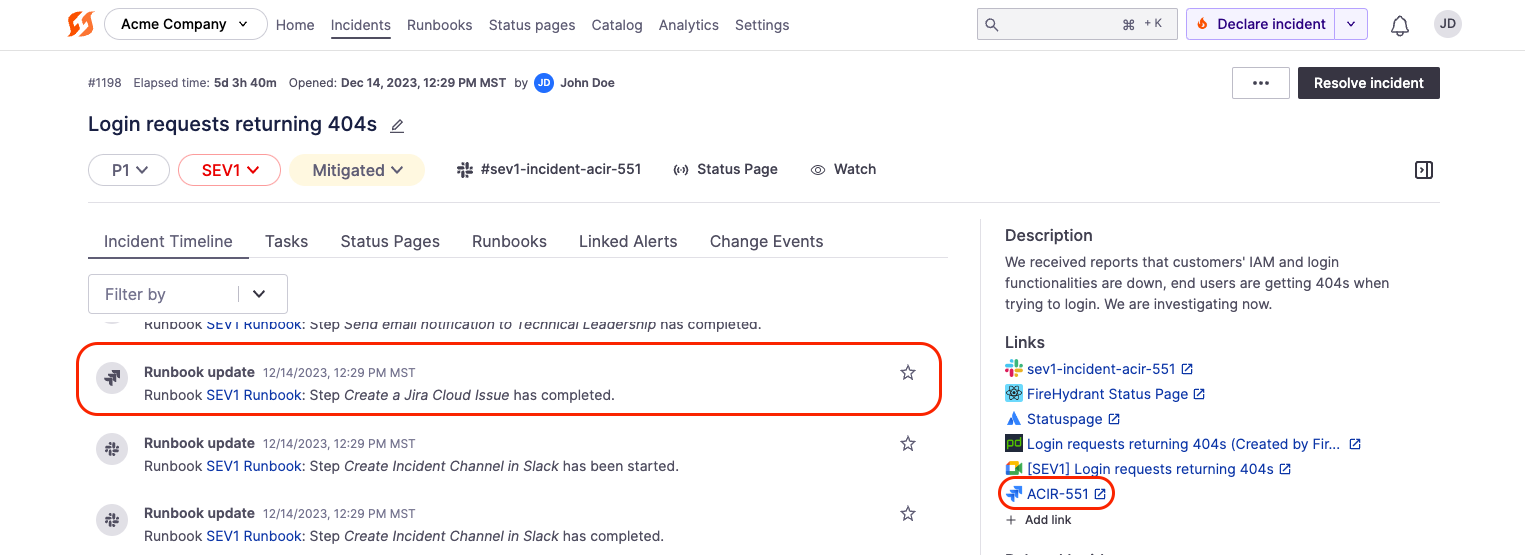
Once this step is configured in a Runbook, the next time you kick off an incident, and this Runbook attaches, FireHydrant will automatically create a Jira ticket and attach it to the incident!

Jira ticket created on an incident
Updated 5 months ago
