Microsoft Entra for Status Pages
With FireHydrant's status pages, you can lock them behind your SSO provider so that only employees or other organization members can access them.
Note:We currently only support OIDC for SSO-authenticated status pages. In addition, this limits access to anyone in your organization who can login via SSO, not only users with FireHydrant licenses.
1. Create Status Page
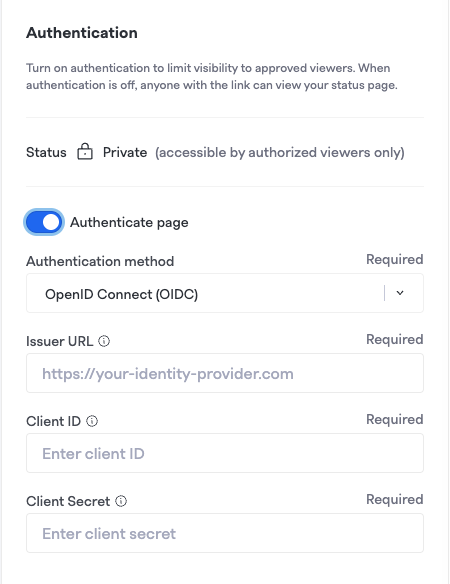
You'll first want to set up and configure a status page. Once you are on the final "Authentication" step, toggle "Authenticate page" and you can start working through these instructions to lock it behind authentication.
2. CreateAzure Active Directory OIDC Application
Reference documentation here: https://learn.microsoft.com/en-us/entra/identity-platform/quickstart-register-app#register-an-application
-
To create an OIDC application in Microsoft Entra, please have your admin follow these steps:
From the Entra ID > App Registrations page, click New Registration.
-
Add a name for the application, then enter the Redirect URI. The redirect URI is
https://<statuspage hostname>/oauth2/callbackwhere<statuspage hostname>is the DNS name you chose when creating your status page. When you are finished, click Register to create the app.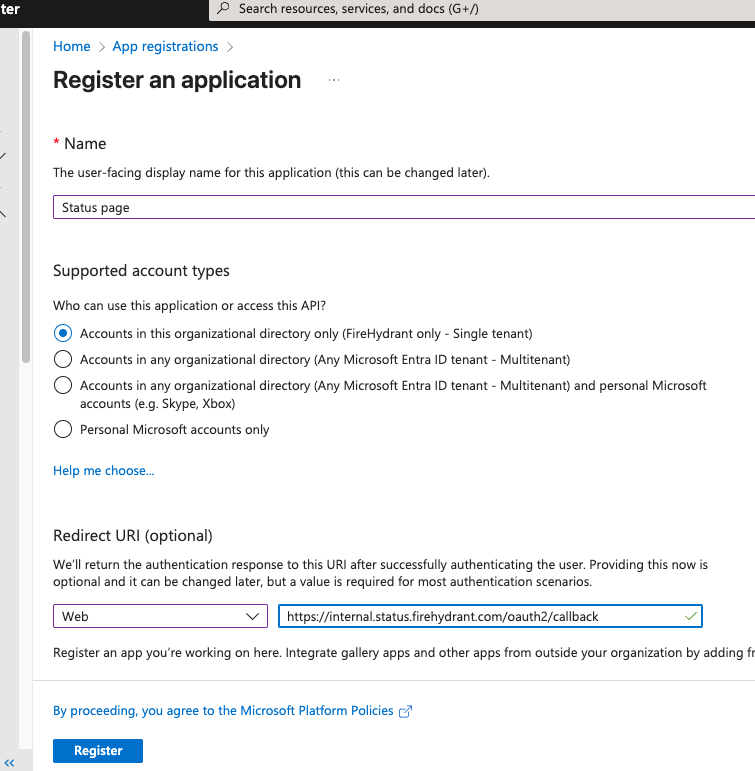
-
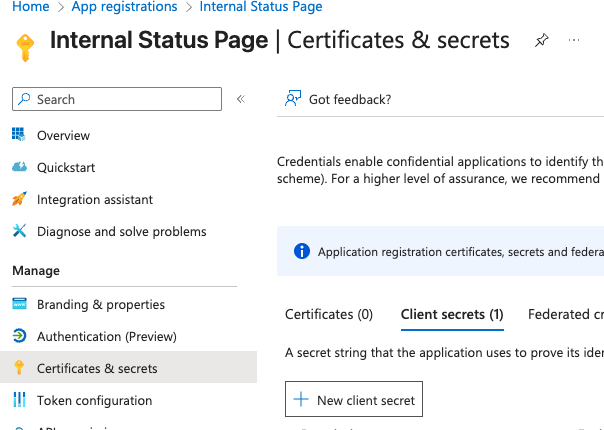
Once the app is registered, you will need to add a secret. In the Certificates and secrets section, click New Client Secret to add a new secret. Note that you will only be shown the secret once, so be sure to copy it somewhere immediately so you can enter it in the Firehydrant UI later.
-
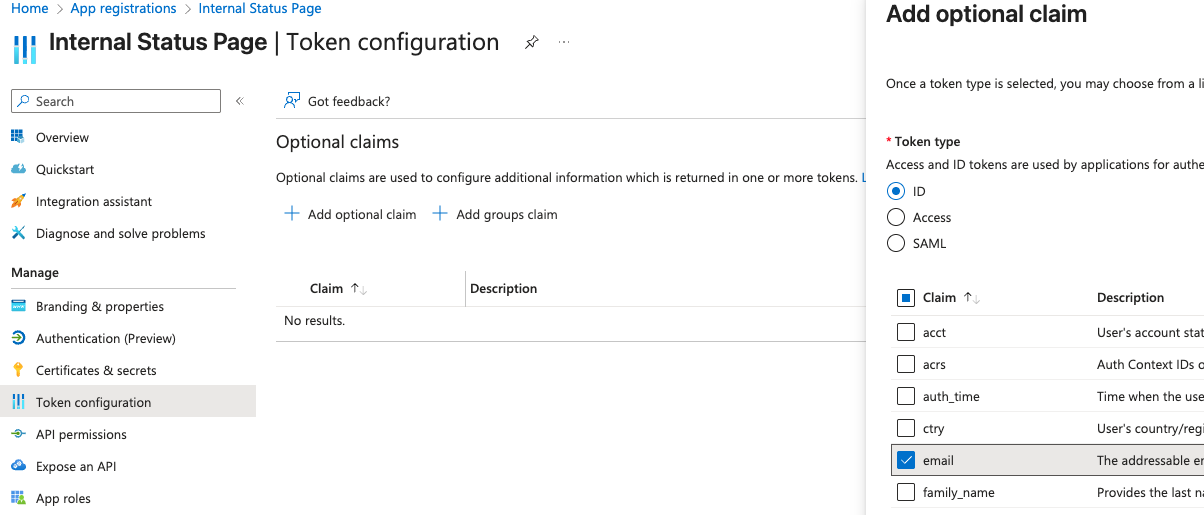
You will also need to add an optional claim. In the token configuration section, click the Add Optional Claim button. The token type is ID and the claim is email, as shown below.
3. Finish Configuration
Once this is complete, you’ll need to gather 3 pieces of information to add authentication to your status page:
- Issuer URL - For Microsoft Entra, this is available by clicking on the Endpoints button. Use the first endpoint, labeled Authority URL (Accounts in this organizational directory only)
- Client ID - This is labeled as Application (client) ID on the overview page.
- Client Secret - This was copied from step 3 above when the secret was created.
4. Publish and Verify
Once the Status Page is showing as verified on the Status Page overview, publish your new status page! When you attempt to access an SSO-locked status page, you should be redirected to your organization's SSO sign-on page.

Next Steps
- Learn how to use your FireHydrant status page
- Learn more about Posting Updates during incidents
Updated 6 months ago