Incident Fields
FireHydrant's incidents come with a powerful set of capabilities around incident fields: alongside default fields, you can also add custom fields, specify required fields, show/hide different fields, and even reorder fields according to your organization's needs.
Note:Modifying incident field settings requires Owner permissions within your organization.
Default Fields
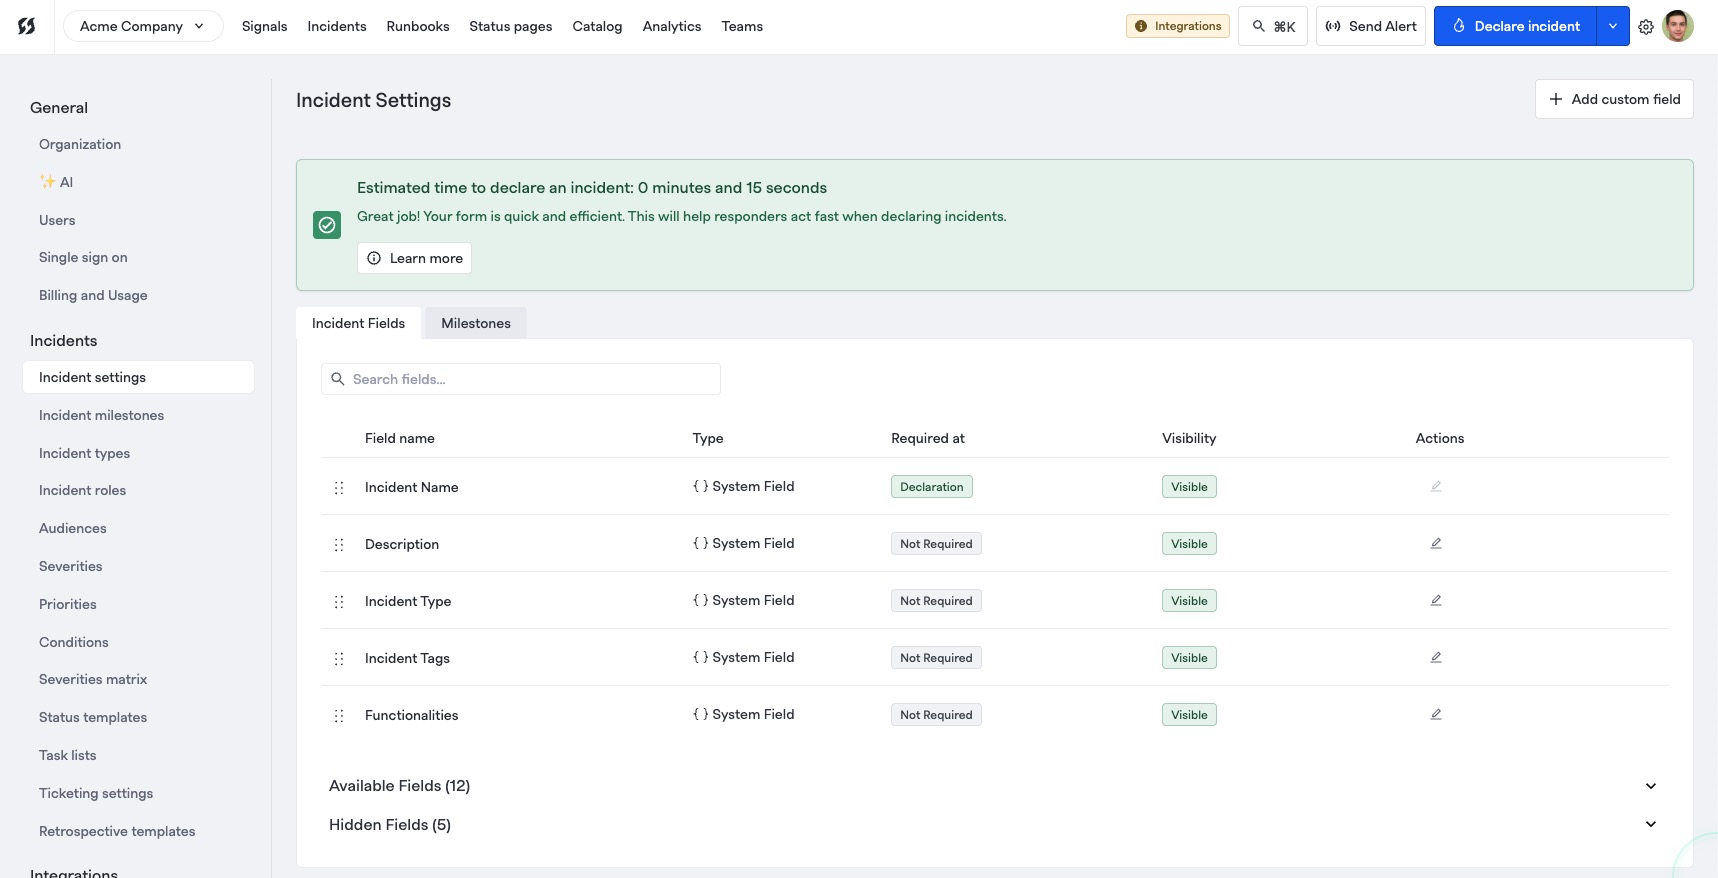
Example view of the Incident Fields settings
FireHydrant provides a comprehensive set of default fields for tracking key information on an incident:
- Incident Name (
string): The name of the incident. This is the only field that is required by default, but you can modify this behavior (see next section). - Private incident (
boolean): Whether or not the incident is private. To learn more, see Private Incidents. - Description (
string): A longer description and/or summary of the incident. - Customer Impact (
string): A field for describing the total impact to customers. You can also include links to Zendesk tickets, and FireHydrant will automatically link these tickets to the incident and post updates to those tickets. To learn more, visit Zendesk. - Severity (
string): How major an incident is. FireHydrant provides default values, but you can customize them for your needs. - Priority (
string): The priority of an incident. There is a strong correlation between how severe an incident is and how much it should be prioritized, so many FireHydrant users only use Severity. - Labels (
object): Custom key-value pairs of data for an incident. We generally recommend using custom fields instead of labels, but for historical reasons, labels are still supported. - Incident Tags (
array[string]): Tags for an incident. FireHydrant has a filtering system that allows you to find incidents and filter Analytics/metrics by various traits, including tags. - Environments, Functionalities, Services (
array[objects]): FireHydrant's Service Catalog is a valuable tool for not only tracking system components, but also collecting incident statistics and associating owning teams and responders. - Runbooks (
array[objects]): FireHydrant's automation engine. Runbooks help automate steps within the IM process to reduce toil and time to assembly. Runbooks are defined as templates and then may be "attached" to an incident either manually or automatically via conditions. - Teams (
array[objects]): Teams consist of either individual users or external escalation policies/on-call schedules. Assigning teams to incidents will log team metrics as well as pull in the users/on-call personnel into the incident channel. - Incident Type (
string): Selection of a specific incident type, which will pre-populate other fields. For more information, visit Incident Types.
Field Requirement and Visibility Settings
Requiring Fields
Name is the only field that is always required by default, but you can modify other fields to be required. As of right now, FireHydrant supports requiring fields at declaration, which impacts the forms shown when declaring incidents in Slack and in the web UI as well as API call.
You can also configure different required fields for different Incident Types. For more information, visit Incident Types documentation.
To modify field requirements settings:
- Navigate to the same incident settings page at Settings > Incident Settings.
- Click the Pencil icon next to whichever field you would like to edit.
- On this page, you can configure the following items:
- Requirement - Choose from Not required (default), Always required, and Required at and after milestone. If always required, then the field will need to be filled out immediately upon incident declaration. Otherwise, you can require the field at a specific milestone and thereafter.
- Visibility - Choose from Visible, Available, and Hidden. Note that if you choose to require a field, it will always be set to visible.
Note:If a field is Required, it will also automatically be set to Visible. See the next section.
Additionally, setting fields as Required will impact every place that incidents can be created or edited, including the web UI, Slack, MS Teams, and integrations like Zendesk.
Attempting to declare an incident with any required fields empty will result in an error via almost all methods: web UI, Slack, Alert Routing, and API. The one exception to this rule is Scheduled Maintenances, which will bypass any required fields since they cannot be filled out at maintenance start.
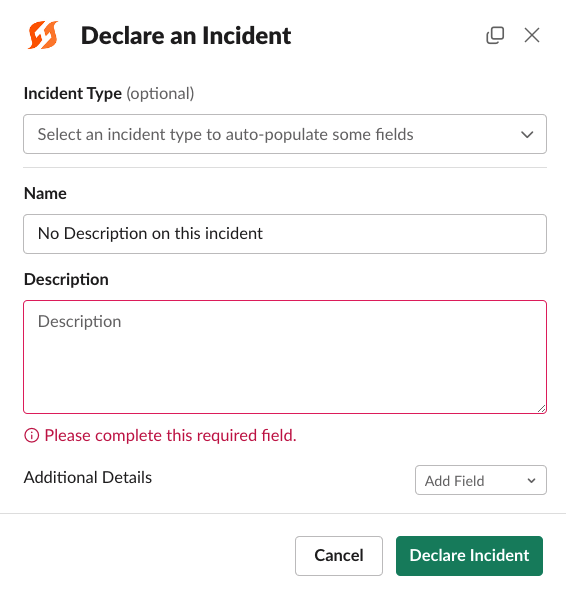
Example required field preventing incident creation in Slack
$ curl --request POST \
  --url https://api.firehydrant.io/v1/incidents \
  --header 'Authorization: FH_API_TOKEN' \
  --header 'Content-Type: application/json' \
  --data '{
  "name": "Example Incident with no Description from API",
}'

{
  "detail": "",
  "messages": [
    "description Must be set"
  ],
  "meta": {}
}
Above is an example of API output when a required custom field is not filled out.
Required Fields for Milestone Transitions
Organizations can enforce mandatory data entry at specific milestones throughout the incident lifecycle. This ensures that critical information is captured consistently, facilitating more effective incident analysis, reporting, and regulatory compliance.
To modify these settings, go to Settings> Incident Settings and click the Pencil icon next to the field you want to edit. Check or uncheck "Required at and after milestone," then select the milestone where the field should be required. The field will be required at the chosen milestone and any subsequent milestones.
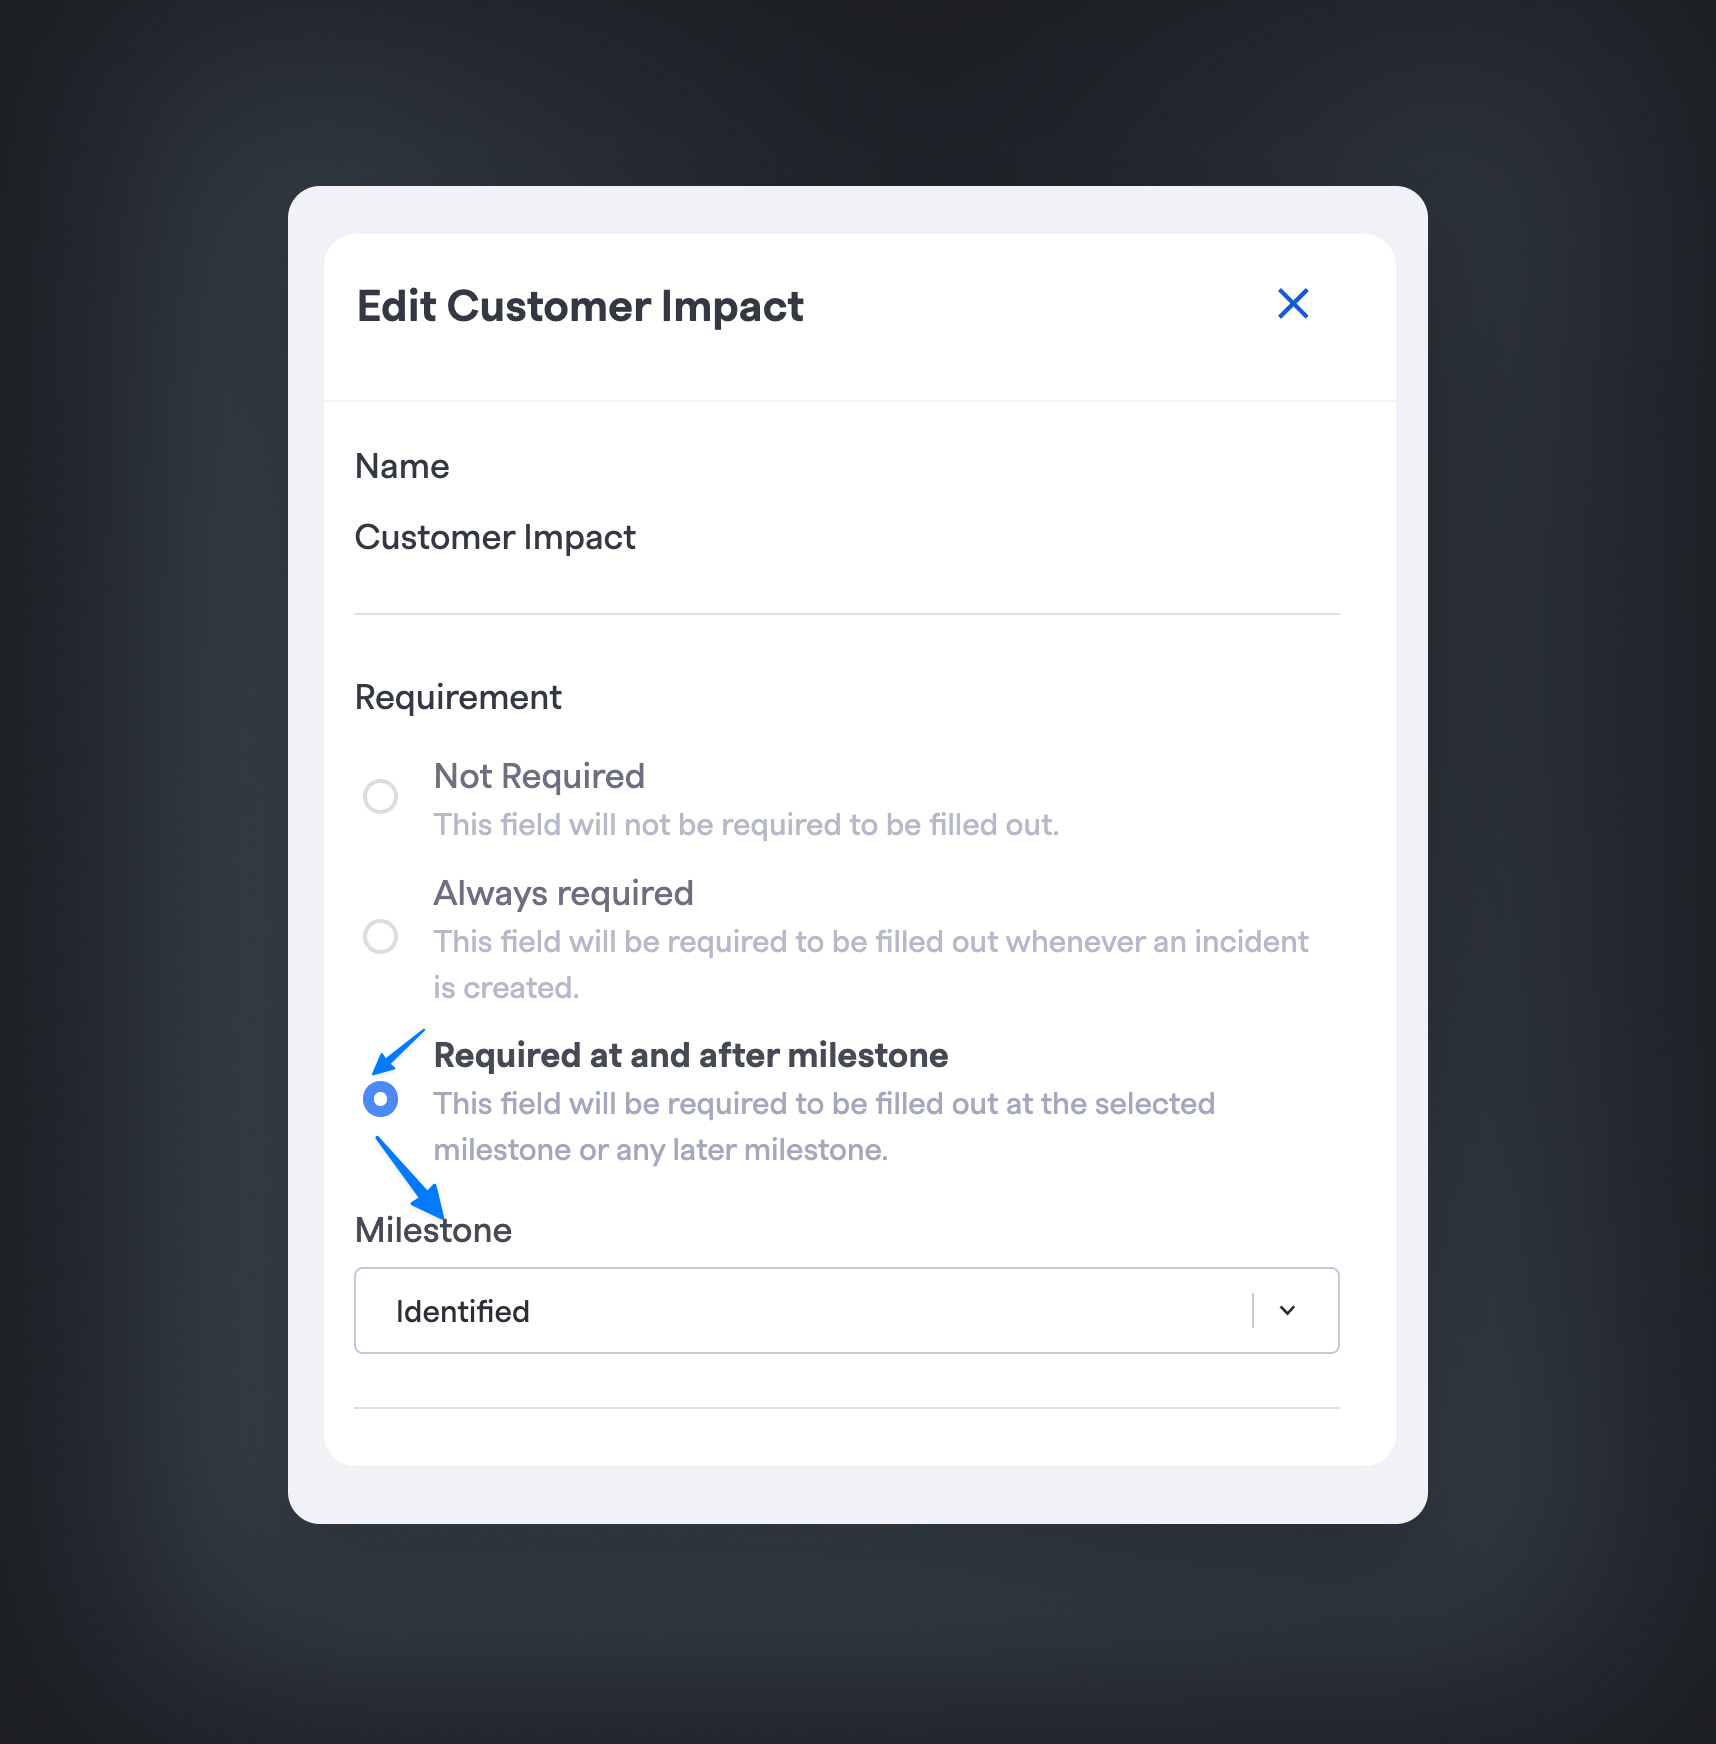
Set a field as required for a Milestone
Attempting to transition a milestone with any required fields empty will result in an error via all methods: web UI, Slack, MS Teams, and API.
Required Milestones
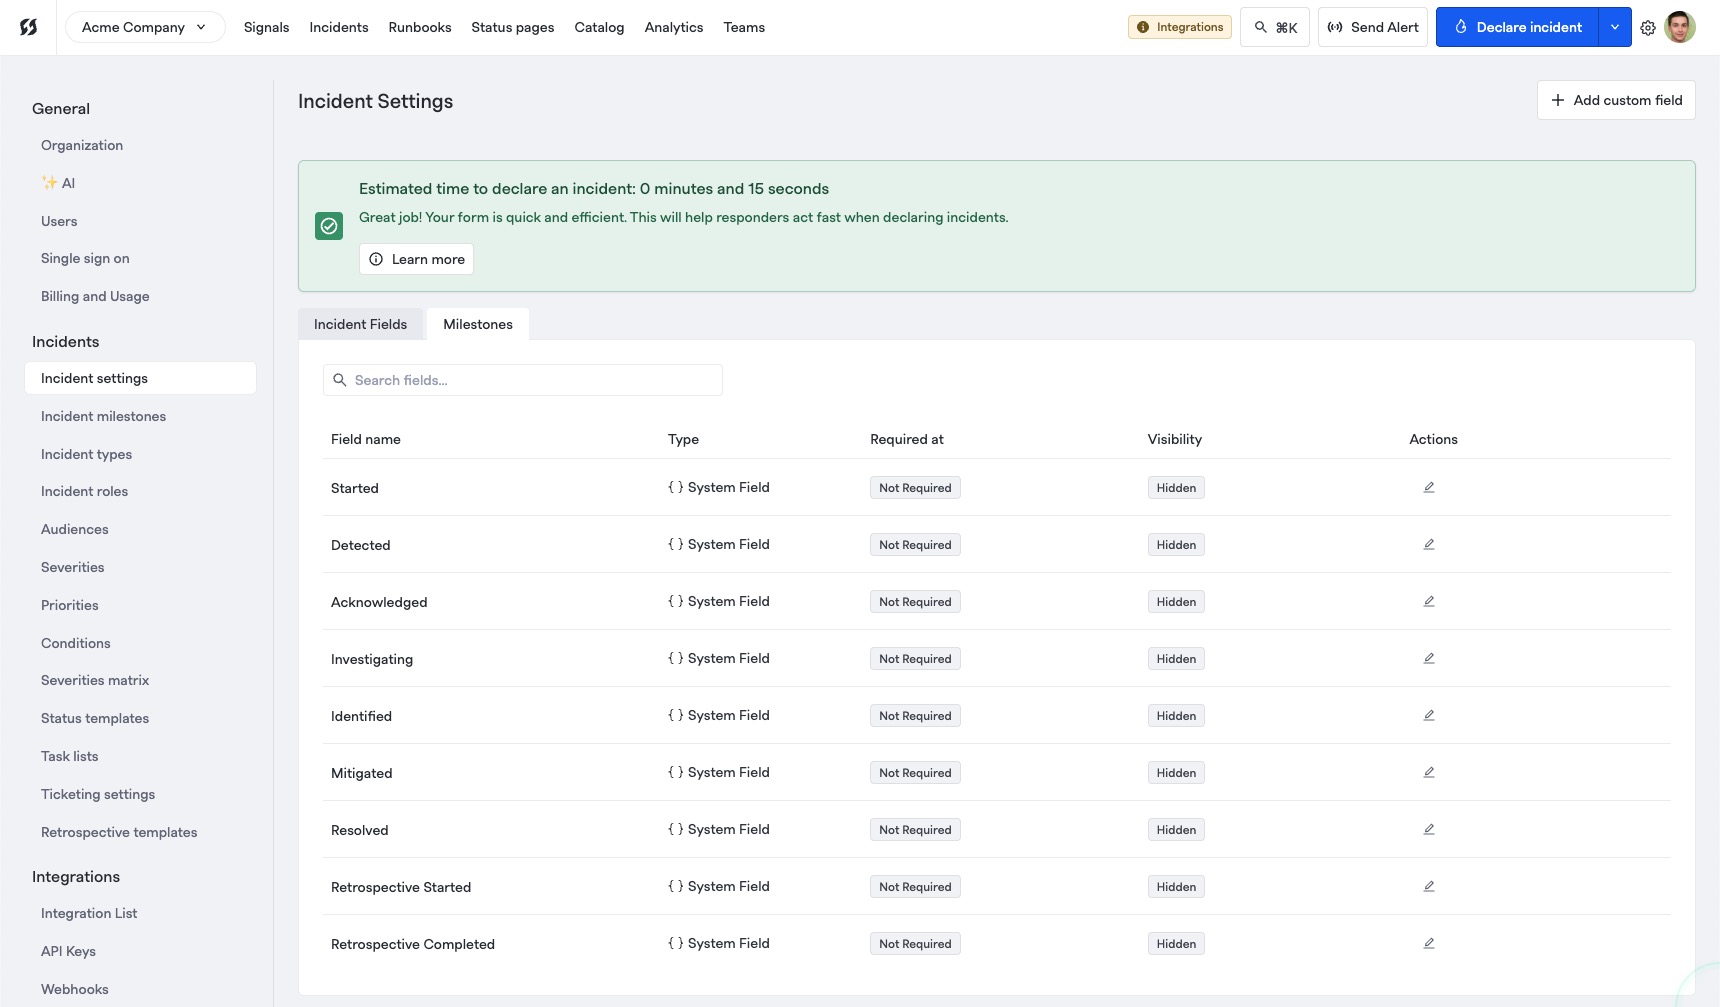
Milestones requirements in Incident Settings
Users may want to require milestones to be populated with timestamps to preserve data integrity and quality for their incidents.
To do this, users can go to their Incident settings page and then go to the Milestones tab. On this page, you can select and configure certain milestone timestamps must be filled out before reaching certain states. Some examples of common flows:
- Identified and Mitigated milestones must be filled out before resolving an incident
- All milestones must have timestamps before Retrospective Completed
- ...etc.
Once a milestone timestamp has been set as required, any attempts to update or transition the milestone will prompt the user to fill in this field if it is empty.
Showing/Hiding Fields
Given that so many fields are available, anyone reporting an incident could face analysis paralysis if they are presented with too many boxes and pieces of information to fill in.
Thus, modifying the visibility of fields at declaration time can cut down on the amount of noise and cognitive load for a responder so they can quickly fill out only what is relevant and declare as quickly as possible. You can modify every field's visibility settings except Name, which is always required and visible.
To do this, go to Settings> Incident settings and click the Pencil next to any field you want to edit, and select the appropriate setting under When declaring incidents:
- Visible means a field will be shown in the declaration form regardless of whether it is required
- Available means a field will not be visible at first, but in the UI and Slack during declaration, you will be able to find it under Additional fields and show it and fill it as necessary
- Hidden means the field is hidden entirely
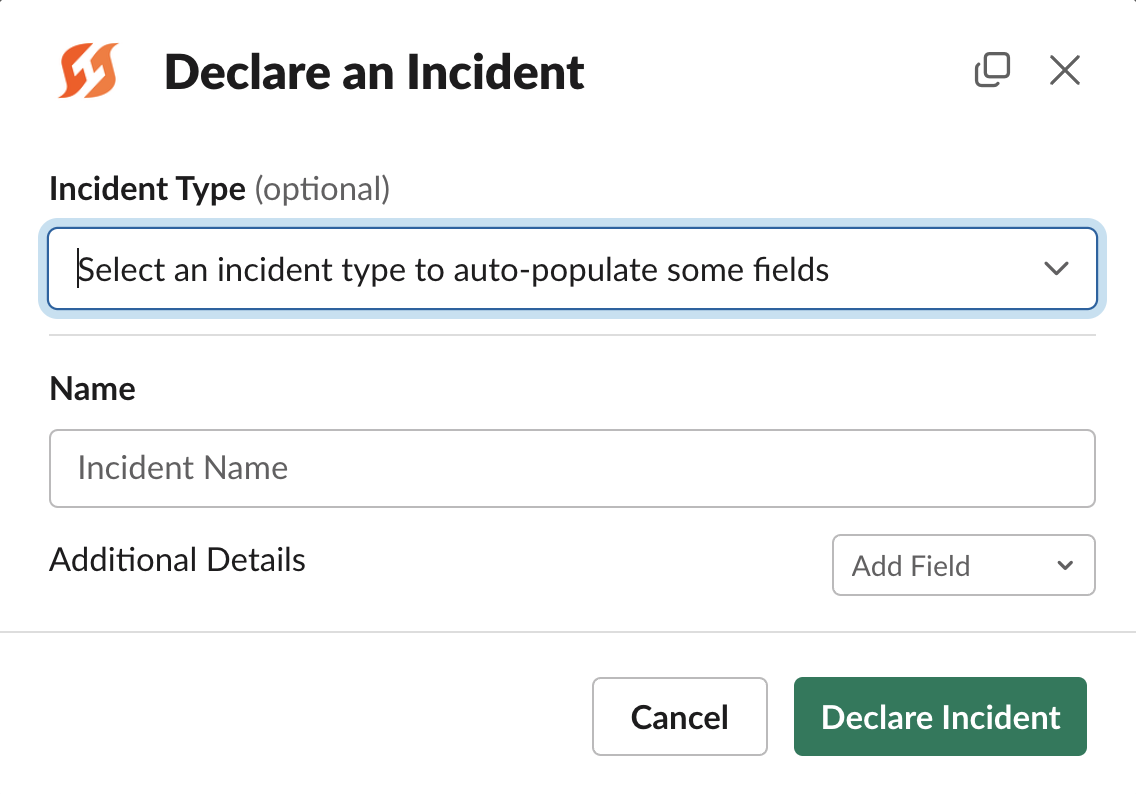
The result of hiding every field except for Name, which is always required
Using fields in Liquid templating
Incident fields can be referenced anywhere Template Variables are supported. You can reference the value of a field directly as a parameter under the incident object. For example:
Name: {{ incident.name }}
Description: {{ incident.description }}

...etc.
Our editors have autocomplete enabled for any field that supports Liquid templating, so you should be able to browse the full list of accessible parameters in-app:

Example Liquid autocomplete view
For more information, visit the Template Variables documentation.
Field Requirements Updates
Note that field requirements are taking on a snapshot-basis for each incident - if you create an incident, and then someone modifies a specific field to be Required afterward, this will not change the requirement on that existing incident.
The intention is to ensure changing requirements don't interfere or disrupt ongoing incidents.
Next Steps
- Learn about creating custom incident fields
- See how you can make declaring incidents as easy as possible by templatizing fields with Incident Types
- Tweak other settings such as Incident Roles, Severities and Priorities, and more!
Updated 4 months ago
