Conducting Retrospectives
Plans | Required Permissions |
|---|---|
|
|
This guide highlights some of the key features as well as how some of our customers conduct retrospectives on the FireHydrant platform
Prerequisites
- At least one Retrospective Template should be configured
- Must have
Manage Incidentspermission, as filling out retrospective fields is modifying incident fields
Collaboration Features
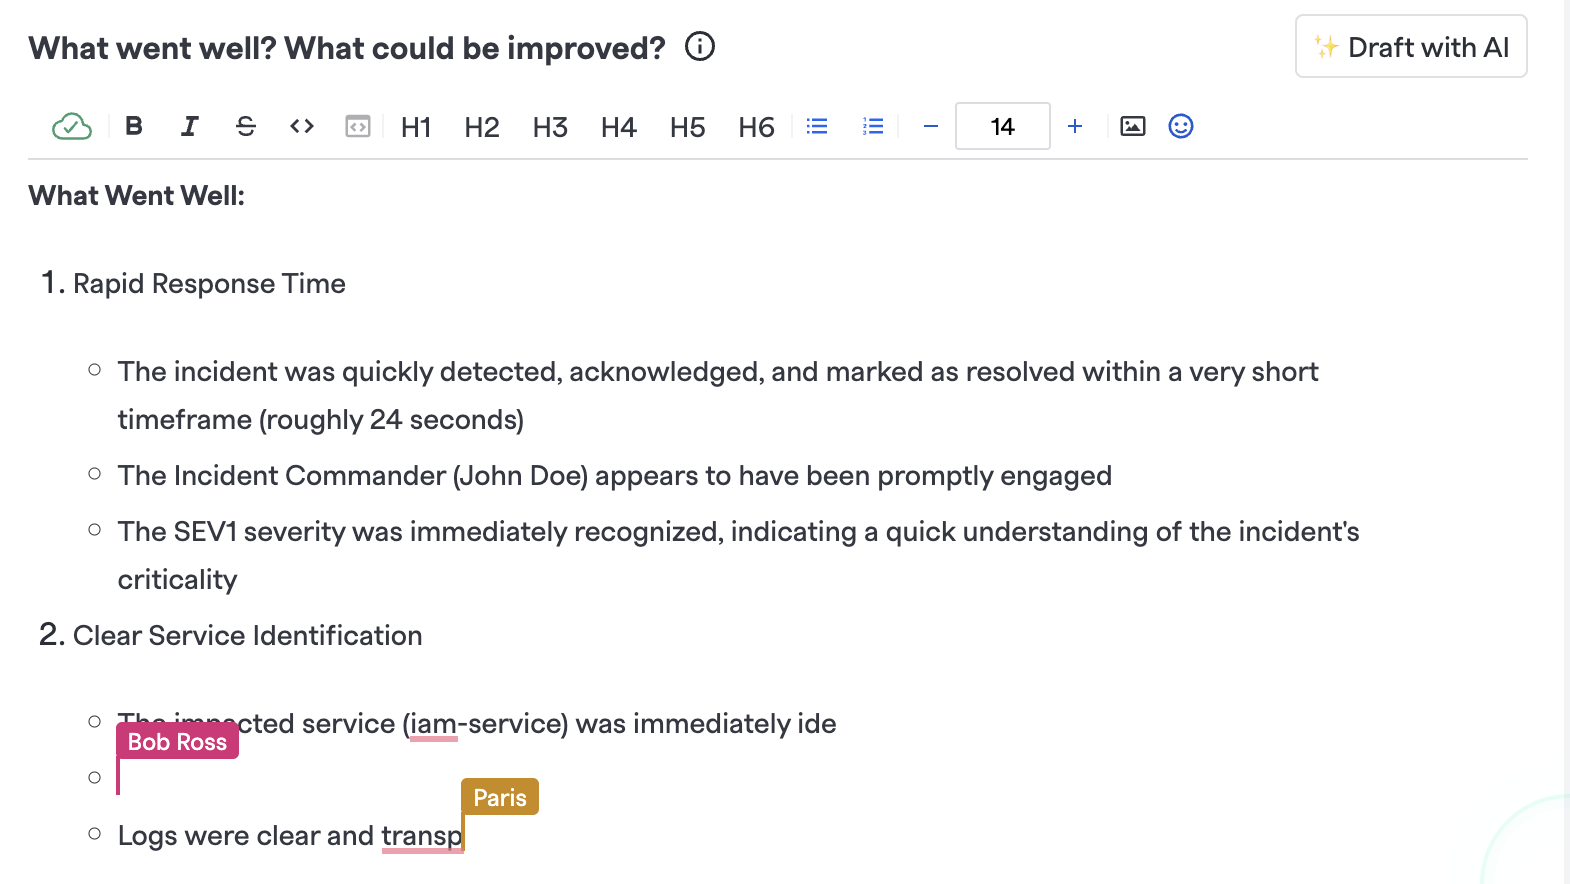
Enterprise customers have access to the collaboration features in FireHydrant's Retrospectives, which include seeing who's on the document looking at it at any moment as well as live cursor updates within freeform text boxes.
These features are handy for teams working through retrospectives together so that they can stay in sync!

Collaborative cursors in retros
Gathering Evidence

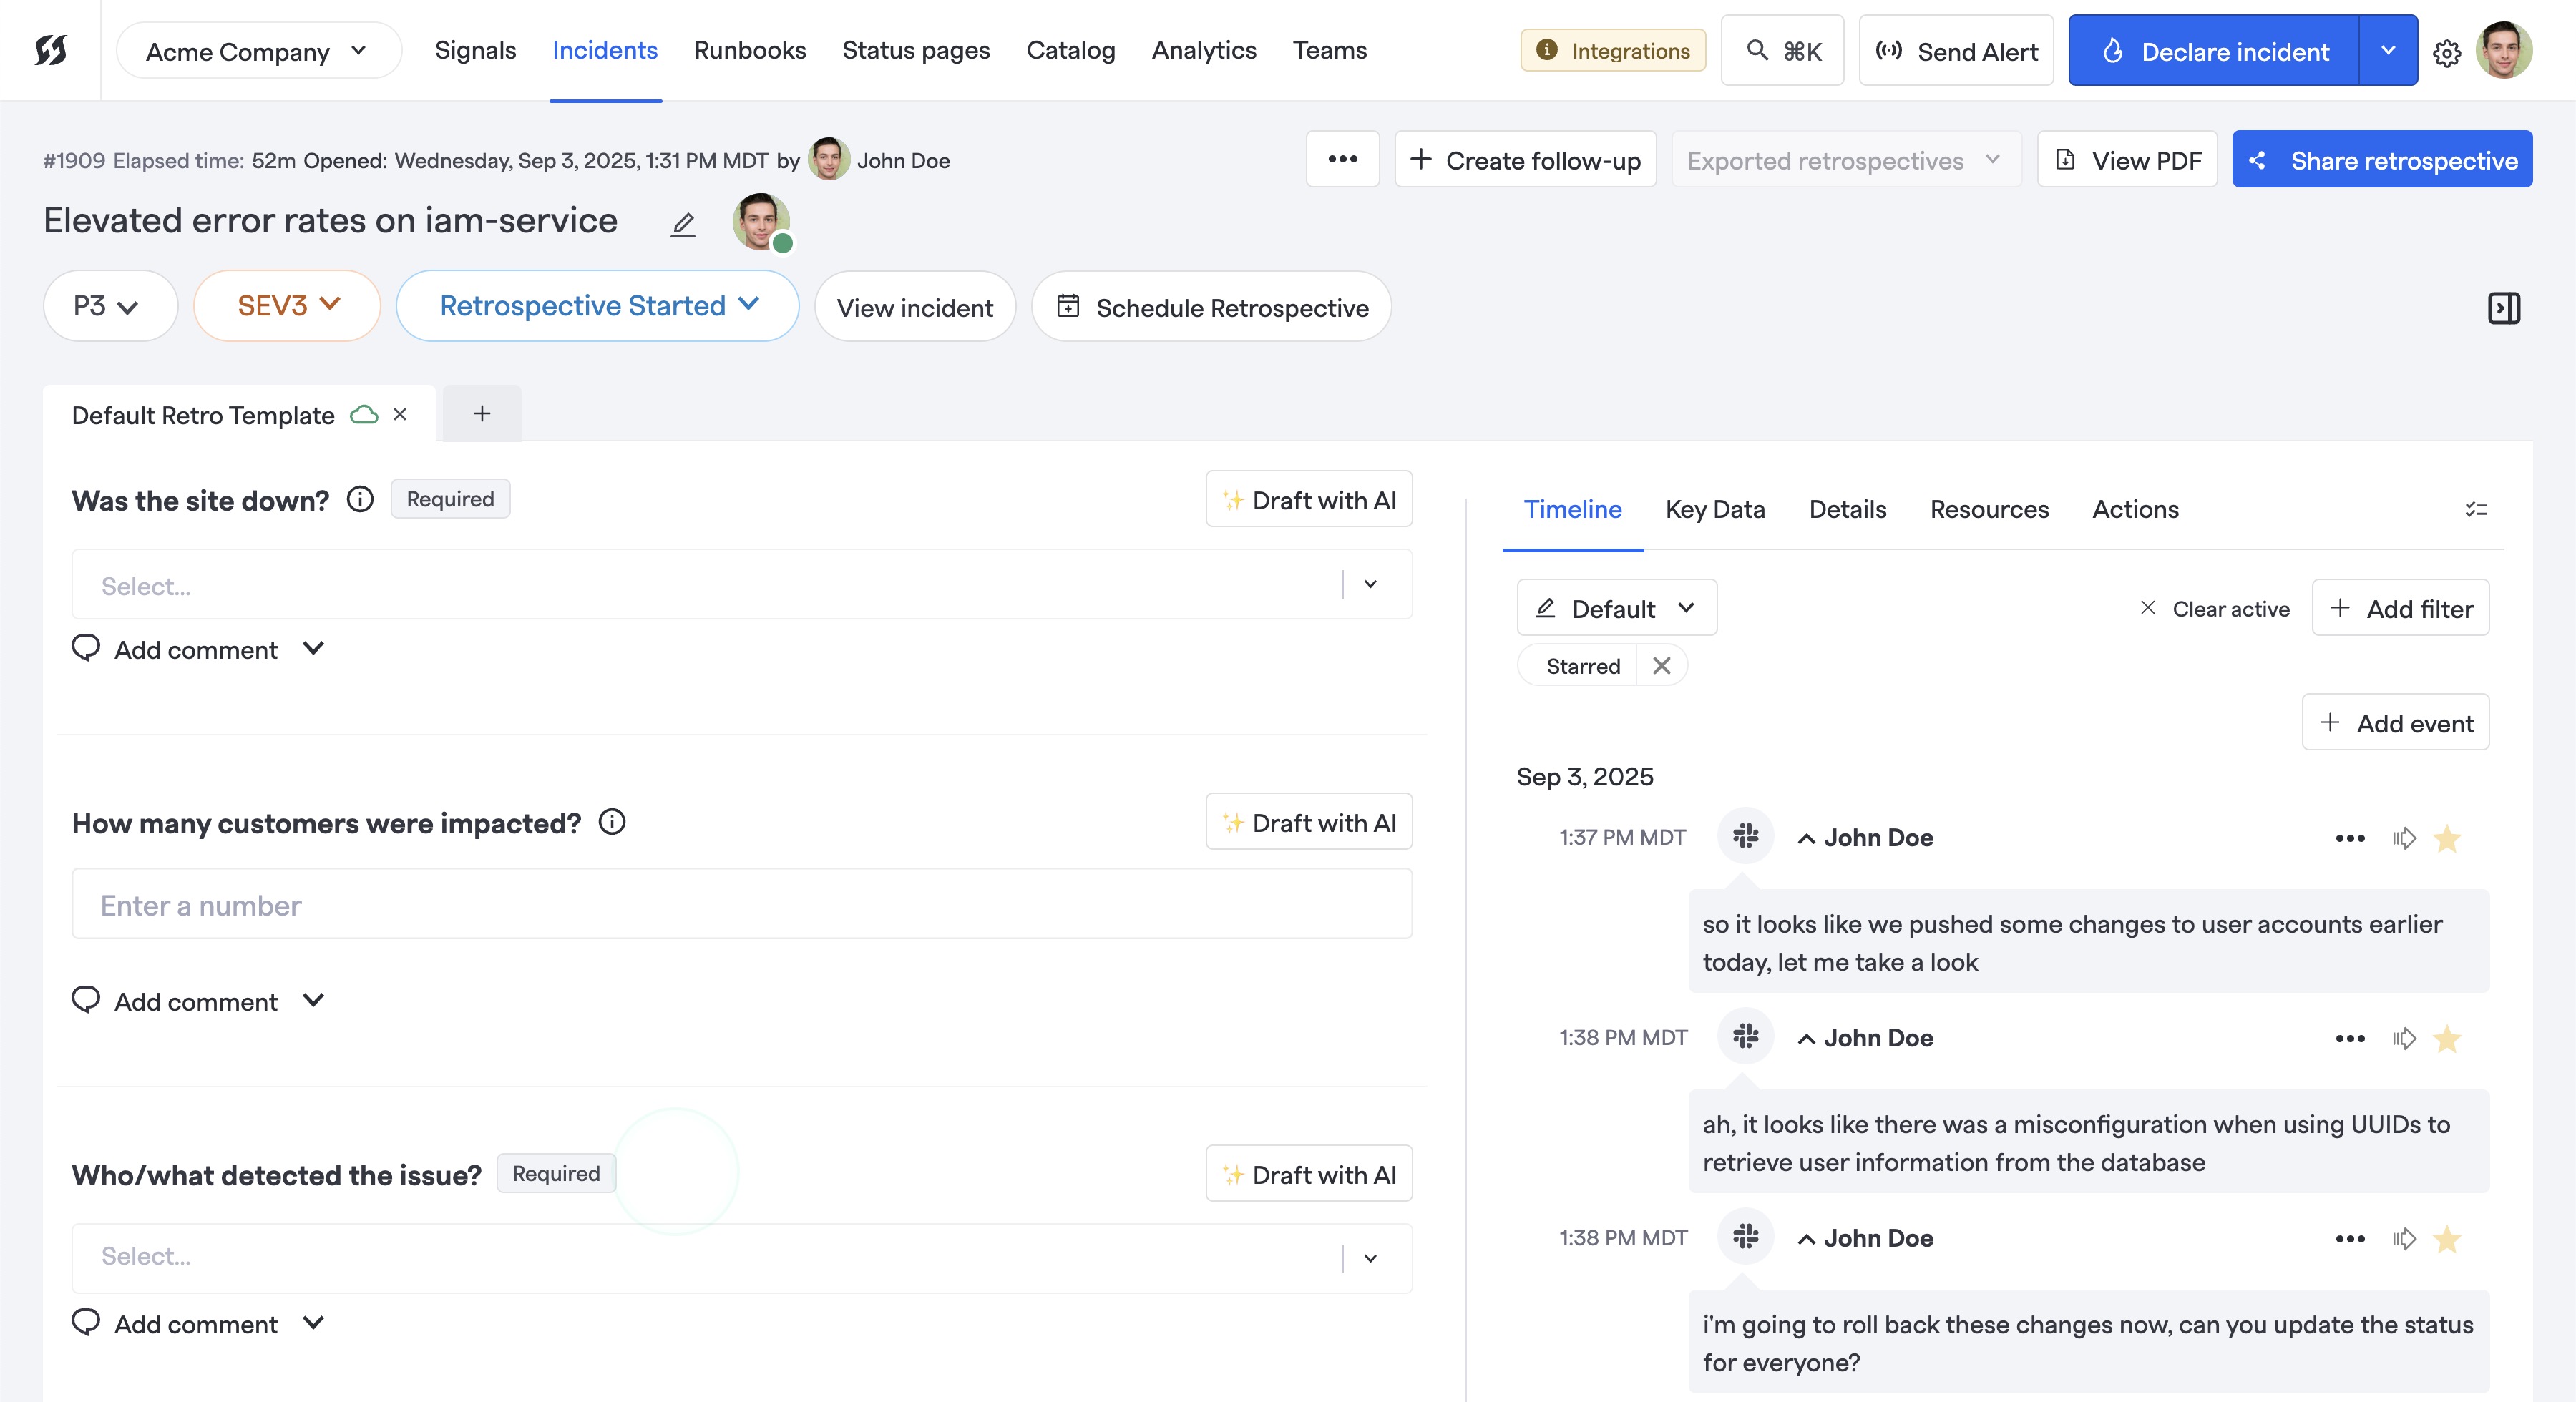
Example Retrospective view
FireHydrant has automatically logged all occurrences and accidents on the incident within the timeline. However, to differentiate the signal from the noise, responders will likely have been starring items as they come up (you can review this on Incident Timeline).
When you reach the Retrospective view, all of the Starred items will be showing by default as they're key. If you want to browse all/other events and star more, you can clear out the "Starred" filter at the top of the timeline.
In addition, you may want to check that all of your Milestones are filled out with the correct timestamps (or aren't missing any data), and that all of the tasks and actions on your incident were correctly updated if they were/weren't done and by whom.
Completing the Retrospective
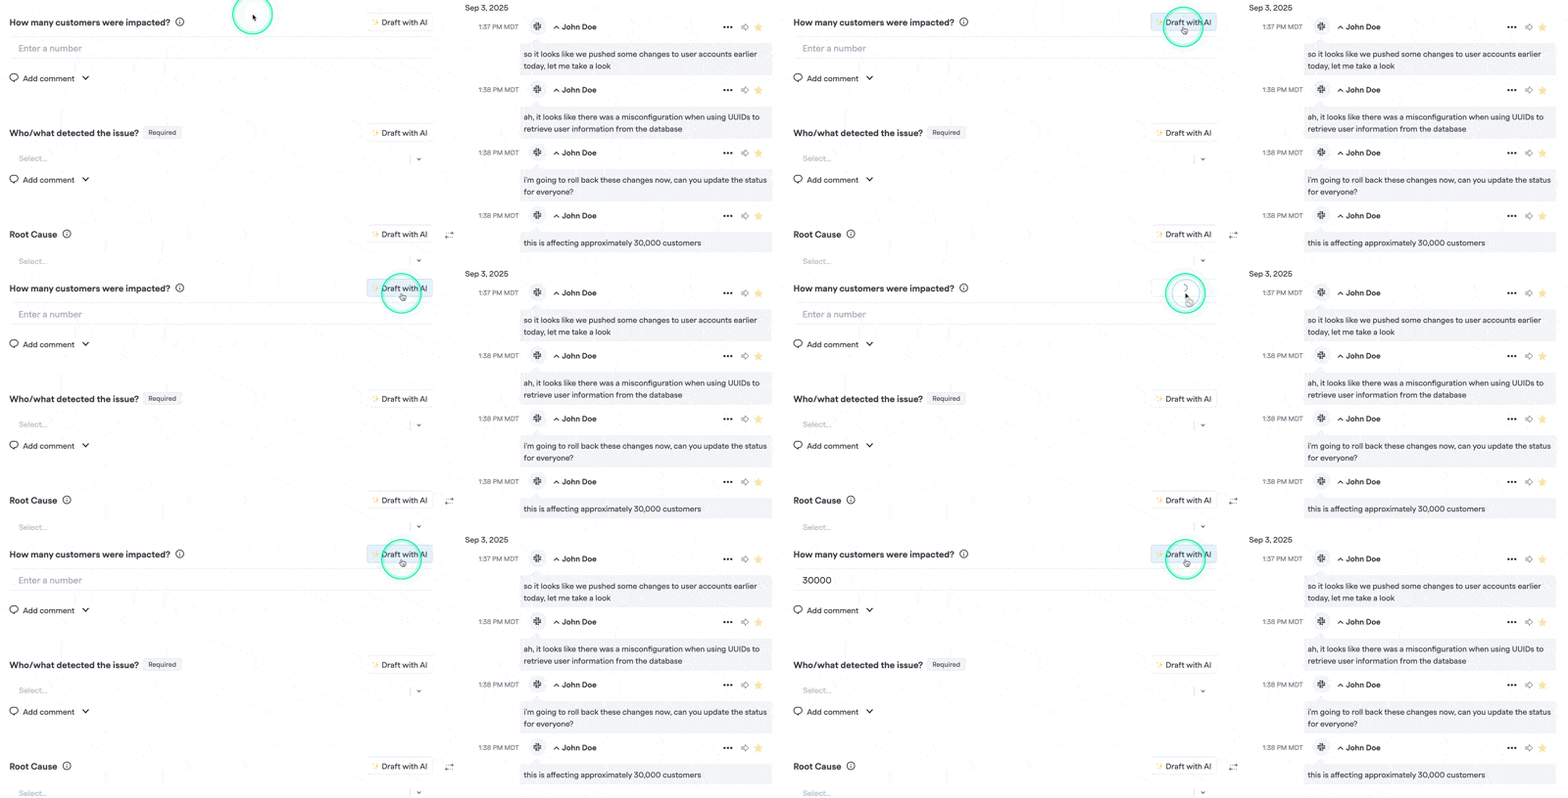
FireHydrant's AI Copilot can draft answers to your retrospectives using all of the context it has gathered throughout the incident. To do this, simply click on ":sparkles: Draft with AI" button next to the question(s) you'd like the AI to attempt to answer.

FireHydrant AI Copilot answering questions with given context
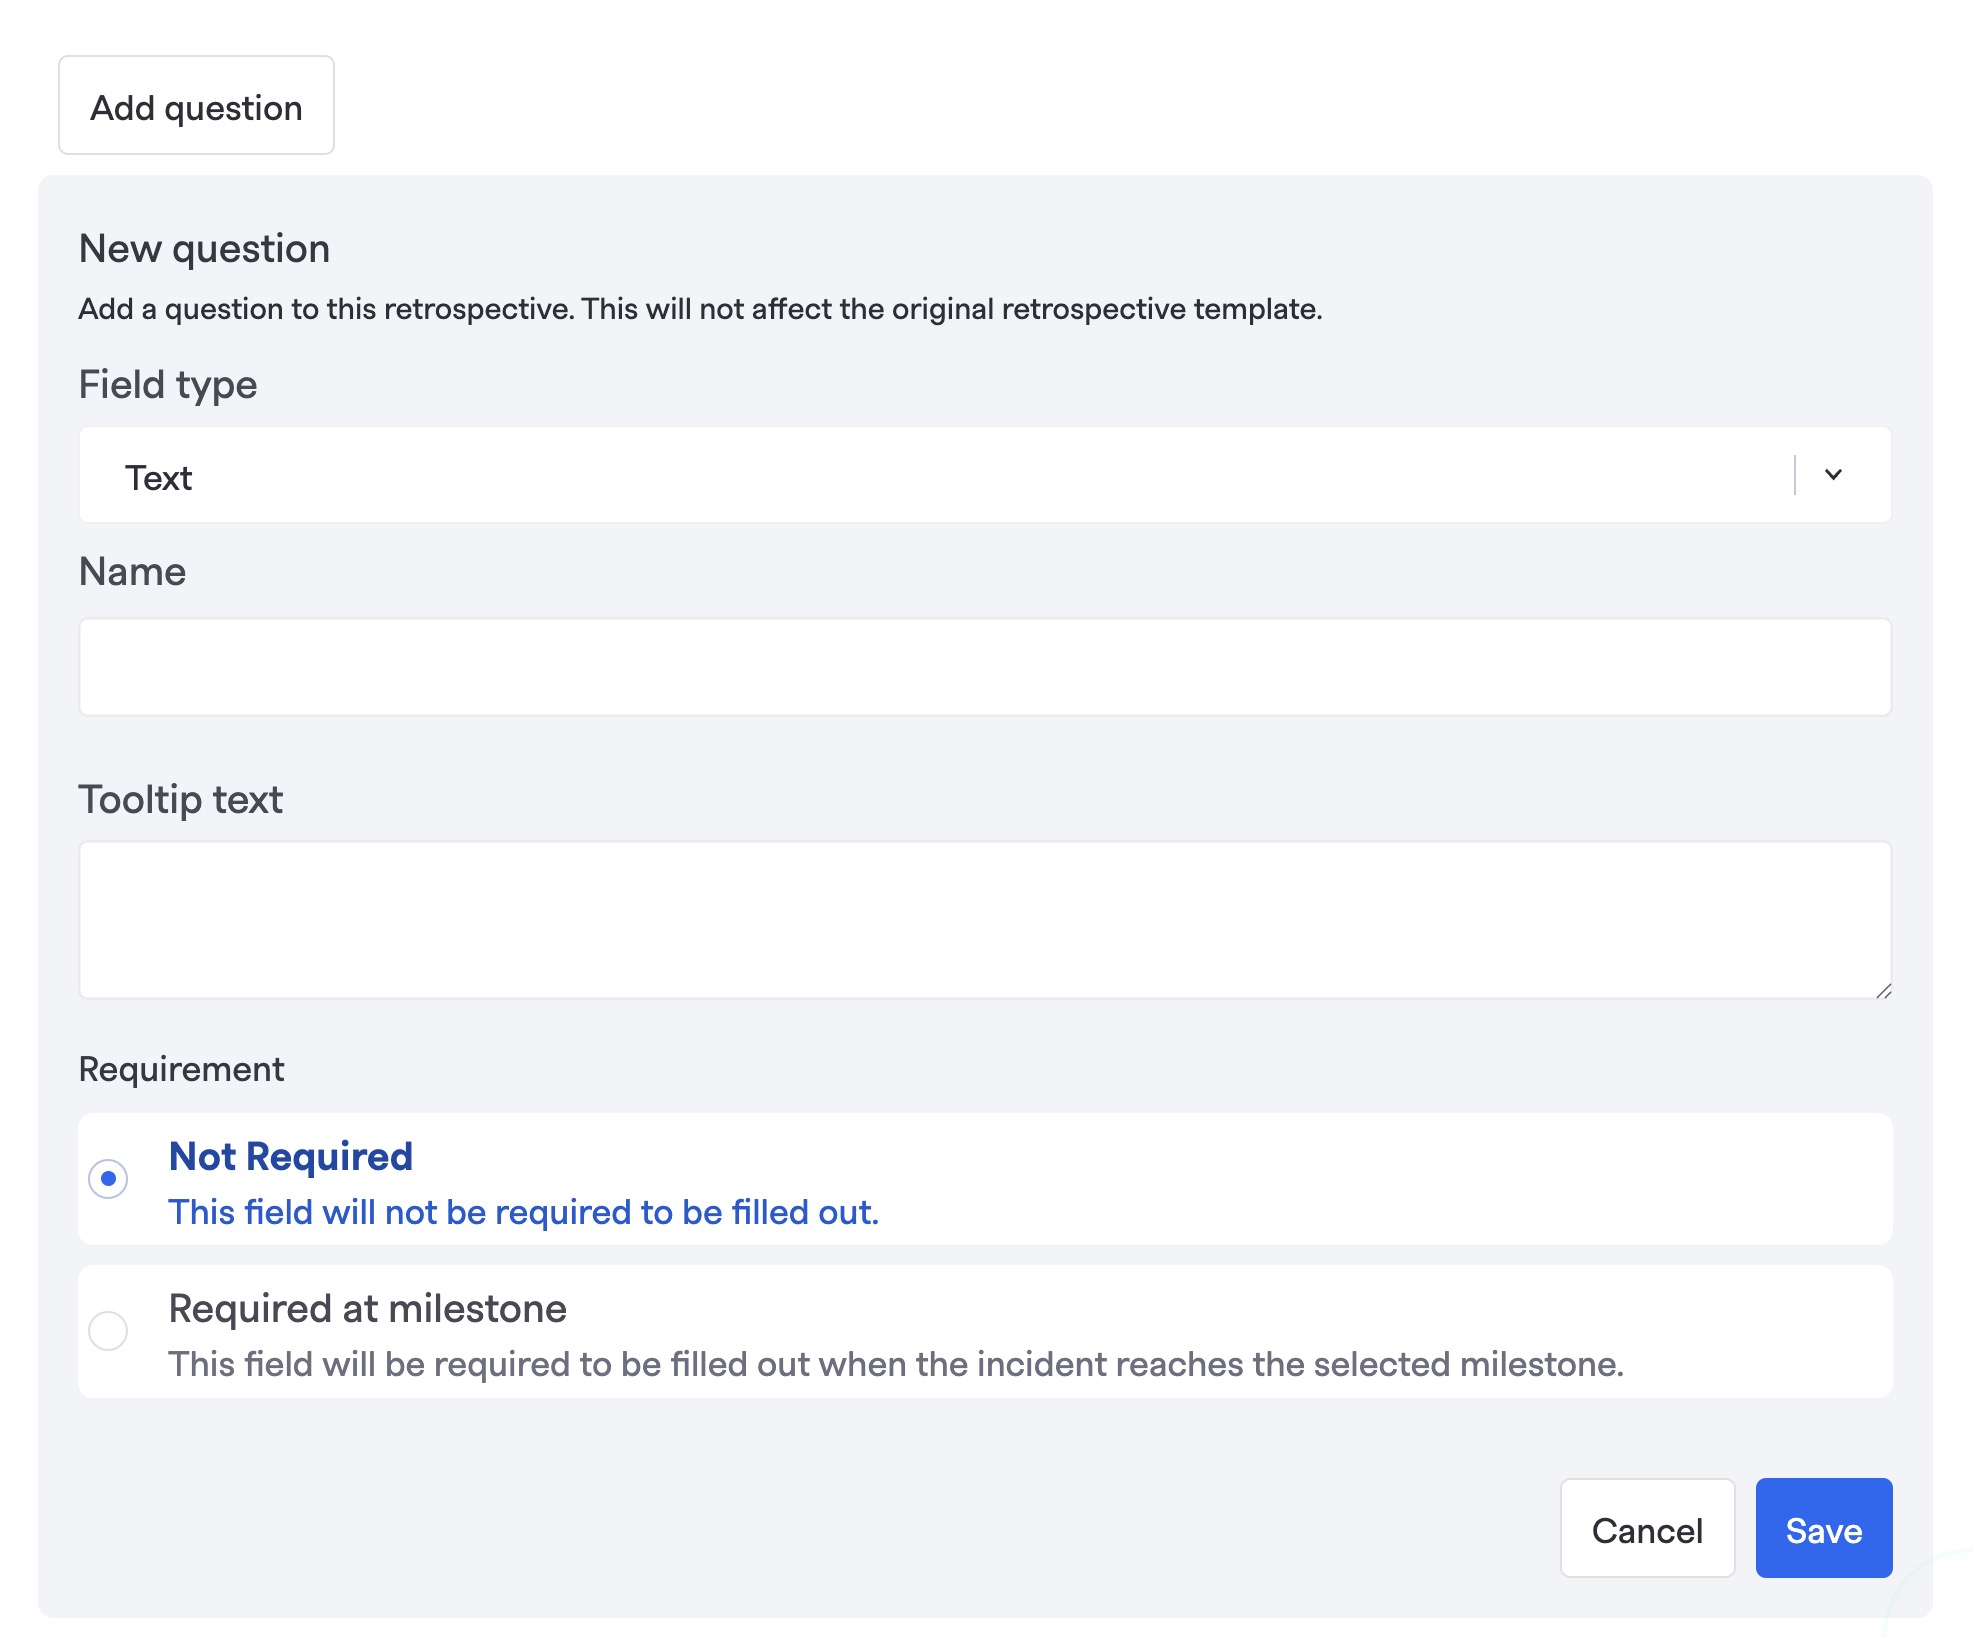
On top of answering the retrospective questions, you can attach additional retrospective templates at any given time and even add additional, ad-hoc questions.

Adding a question to the end of an already-attached template ad-hoc
Typically as a part of the incident review, users will also create and assign follow-up tickets. For this, FireHydrant has integrations with ticketing providers to automatically create linked tickets in external systems for tracking engineering work, while tying it back to the incident in FireHydrant.
For more information, visit:
Next Steps
- Once retrospectives are complete, it's time to Preview & Export them.
Updated 5 months ago
