Retrospective Templates
Plans | Required Permissions |
|---|---|
|
|
Creating a retrospective template allows your team to standardize and customize how you capture learnings from incidents. Every organization has unique needs when conducting retrospectives - from the questions asked to the data collected. With our template system, you can build multiple templates that match different incident types or team requirements, automatically include relevant incident data, and create targeted questions that drive meaningful discussion.
Prerequisites
- You'll need Owner permissions
Setting Up a New Template
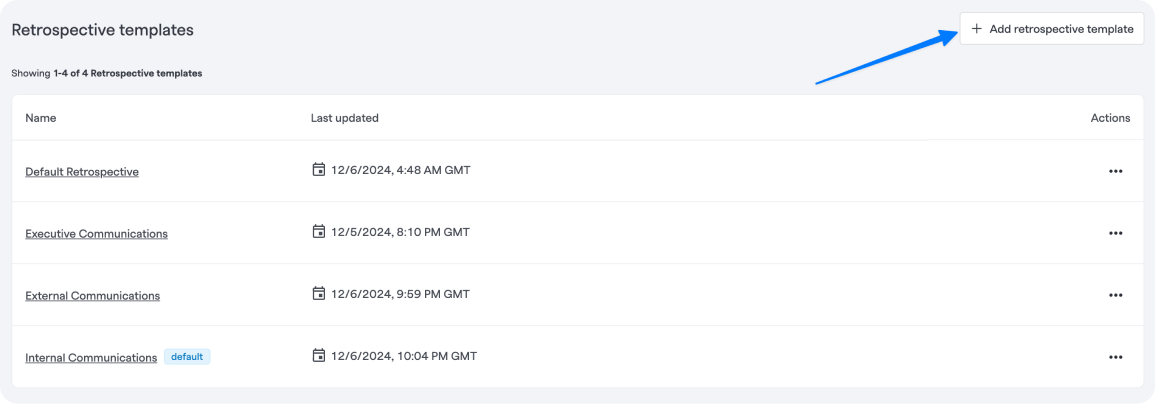
Adding a retrospective template
- Navigate to the FireHydrant Retrospective templates page
- Click Add Retrospective Template
- Enter required template information:
- Name: Give your template a descriptive name
- Description: Provide context about when and how to use this template
Adding Questions
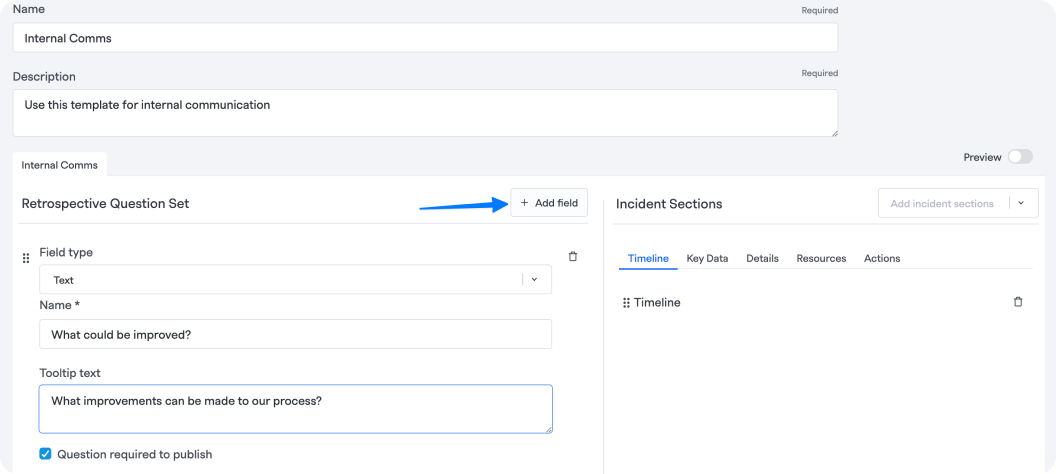
Add a question to a retrospective
You can add questions to your template in two ways: using recommended questions or creating custom questions.
Creating custom questions
- Click Add a Question
- Choose a field type:
- Text: For open-ended written responses. Note that this type also allows specifying full templates and preclude text. This may be useful for specifying a format or instructions for users
- Text Select: For single-choice dropdown selections
- Multi-select: For multiple-choice selections
- Numeric: For number-based responses
- Date: For temporal information
- Contributing Factors: For tracking incident causes
- Instructional Text: For adding guidance or section headers
- Configure the question:
- Enter a field name (required)
- Add tooltip text to provide guidance (optional)
- Select whether the question is required for publication
- Add any additional configuration specific to the field type
Using recommended questions
FireHydrant provides pre-configured question sets for common retrospective needs:
- Blameless retrospective ground rules
- Areas of improvement
- Lessons learned
- Recognitions
To add recommended questions:
- In the Retrospective Question Set section, navigate to the recommended questions section
- Select the desired question set/s
- Click Add Selected
Note:
Recommended questions and incident sections are only available for getting started. They are not available once you have created questions or added sections.
Pre-Templated Rich Text
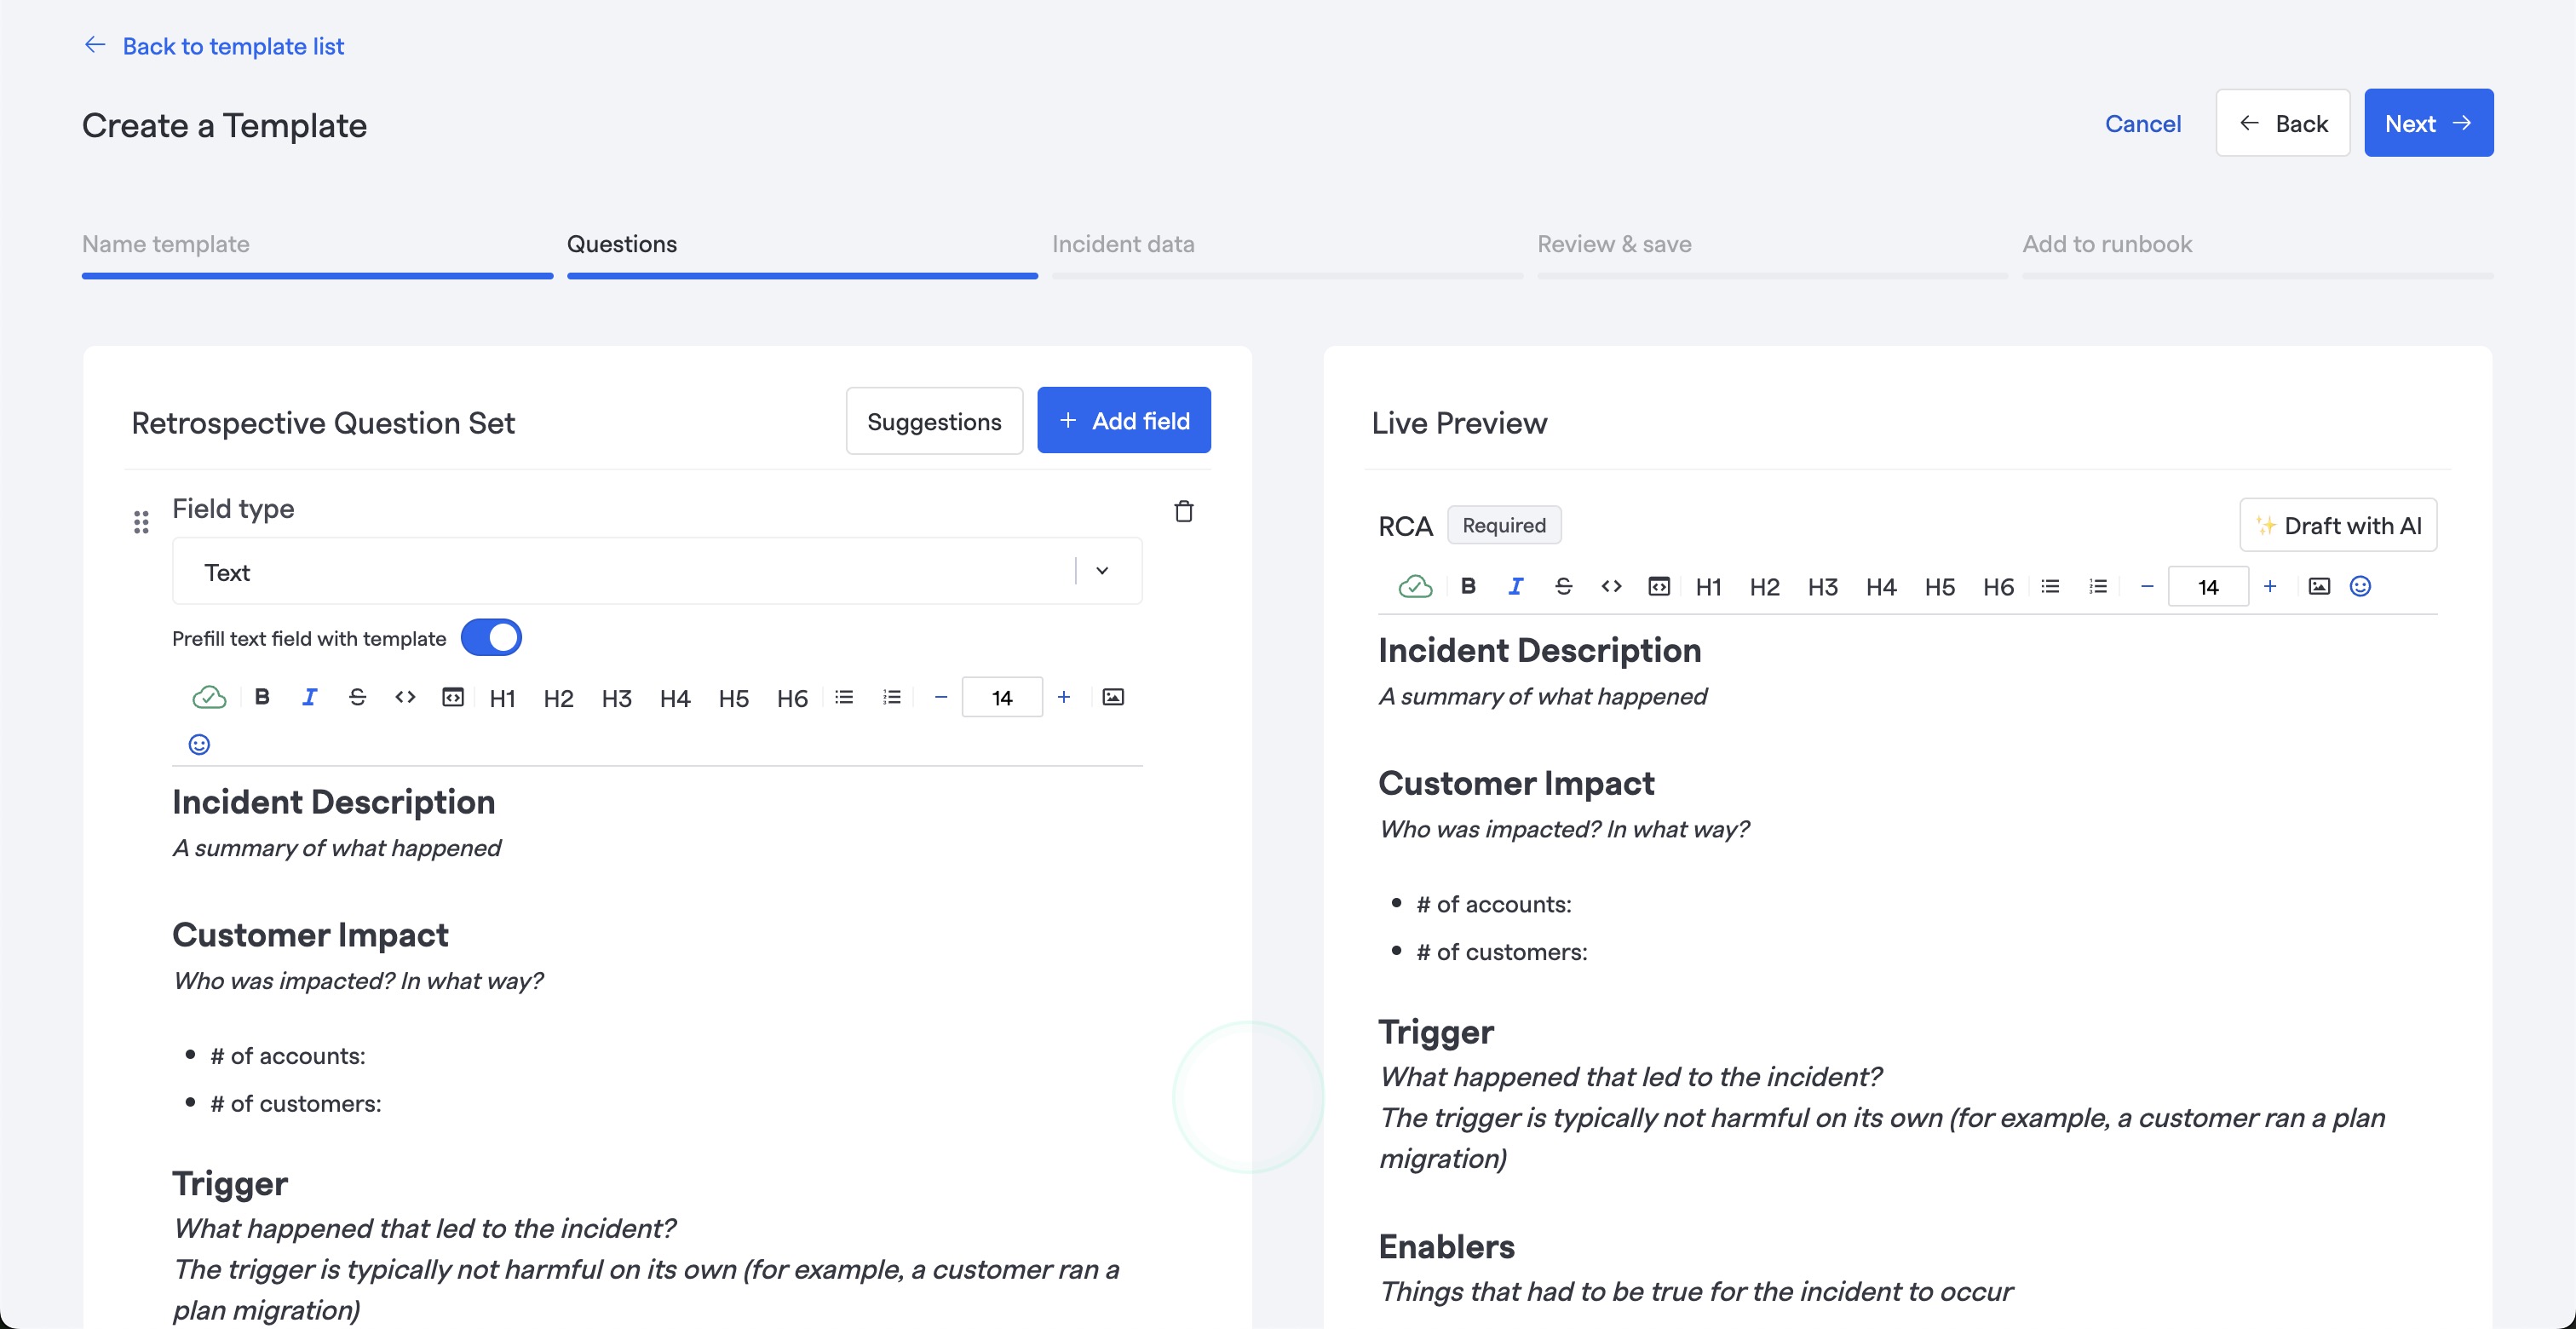
Retrospective question with pre-templated content
When using the Text question type, we support full rich text capabilities and collaborative editing with multiple users. In particular, you can set pre-configured question/text content as well, enabling capabilities like you would find in a Google Docs template.
Simply ensure you have checked the option to "Prefill text field with template."
Incident Sections
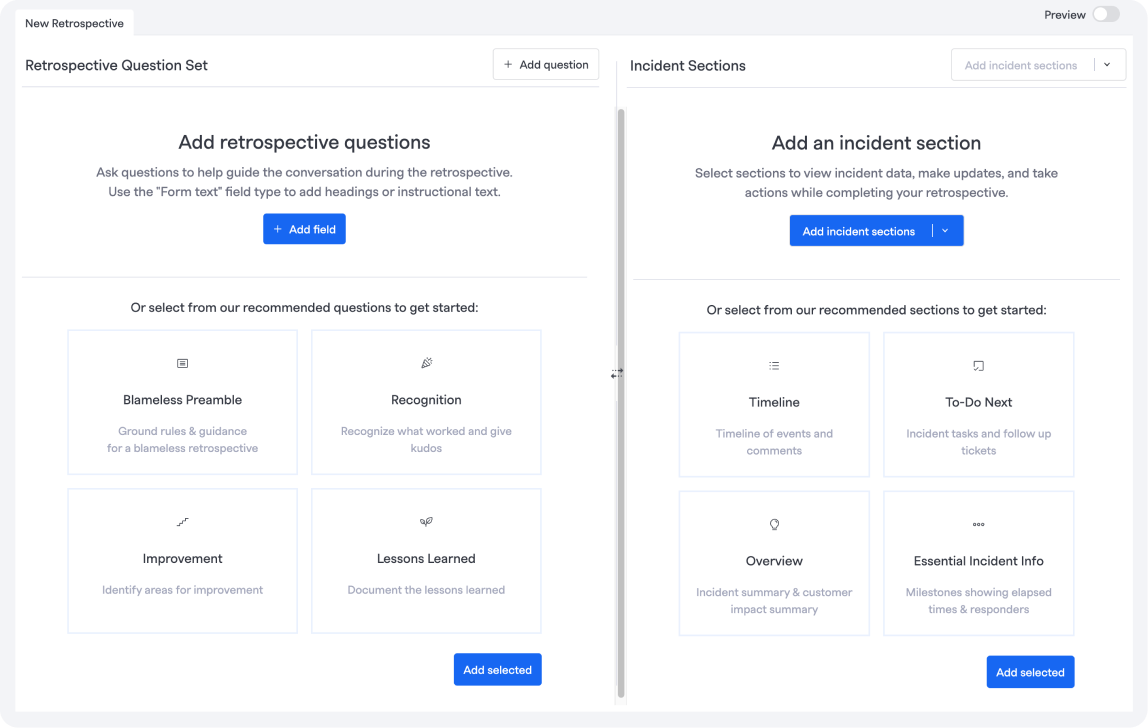
Recommended retrospective questions and incident sections
You can customize what incident data is shown in your retrospective by adding, deleting, and reordering various types of incident data, including:
- Timeline: Shows the sequence of incident events
- Key Data : Milestones, participants, and impacts
- Milestones: Key events during the incident
- Milestones with time elapsed: Shows duration between key events
- Responders: Team members involved in incident response
- Impact: Services, environments, and functionalities
- Details: Descriptions, summaries, and custom data
- Incident Summary: An AI generated summary of your incident based on incident data available in FireHydrant.
- Description: Incident Description
- Customer Impact: Summary of impact on customers
- Custom Fields: Any custom data fields configured for your organization
- Labels: Incident categorization and tags
- Resources: Reference resources from the incident
- Links: Links added to the incident
- Change events: Associate any change to your system to your incident
- Runbooks: Runbooks attached to the incident.
- Related Incident: Related incidents
Adding sections
-
Scroll to the Incident Sections area
-
Choose from available incident data types
-
Add your sections:
- Add new sections by clicking Add Incident Sections
- Remove sections by clicking the delete icon
- Reorder items within each section by dragging them to the desired position
Recommended incident sections
FireHydrant provides common incident sections for your retrospective needs:
- Scroll to the Incident Sections area
- Choose from available sections:
- Timeline: Shows the sequence of incident events
- Overview: Includes incident summary and customer impact
- Tasks: Includes tasks and follow-up tickets
- Essential Incident Info: Includes milestones and responder information
- Click Add Selected
Preview and Testing
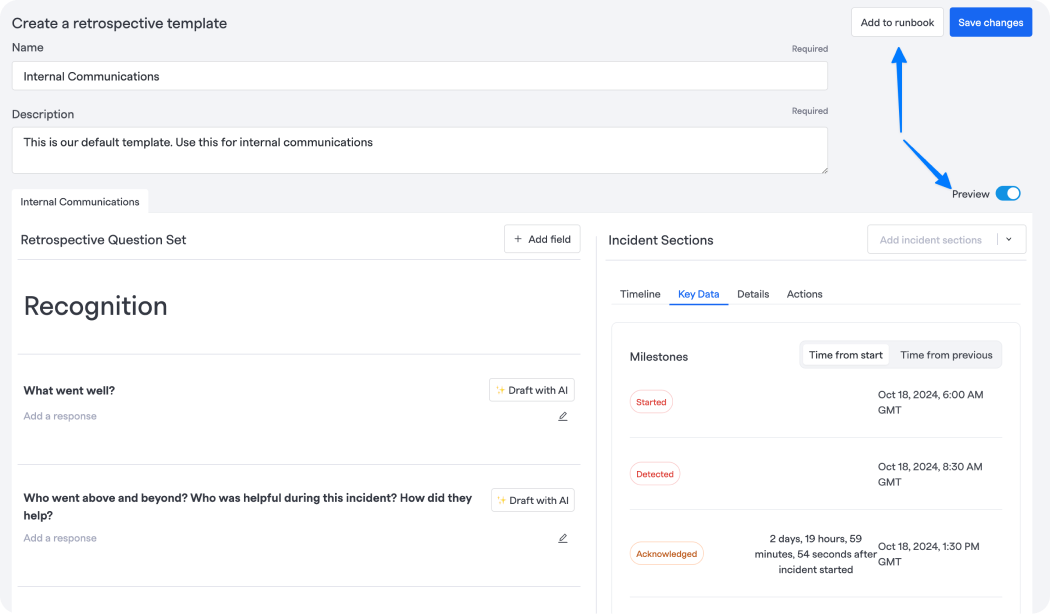
Preview a retrospective
- Click Preview to review:
- All questions and their formatting
- Incident section layouts
- Navigation between tabs (Details, Timeline, Actions)
- Save and test your template:
- Click Create Retrospective Template
- Select a Runbook from the dropdown
- Click Add and Test to see it in action
Making Adjustments
After creating your template, you can:
- Return to Retrospective Templates
- Select your template
- Make any needed changes:
- Add or remove questions
- Modify incident sections
- Update configuration settings
- Save your changes
Your template is now ready to be used in actual incidents. You can attach it to runbooks for automatic use or select it manually during incident retrospectives.
Attaching Retro Templates to Incidents
Templates can be applied in two ways, automatically via a runbook or manually from the respective view of an incident.
The added capability for Retrospectives is that you can automatically attach them to incidents based on various conditions in a Runbook. Using Runbooks, you can automatically attach Retrospectives to incidents based on any conditions set, ensuring the appropriate retrospective is instantly available.
Adding the Runbook step
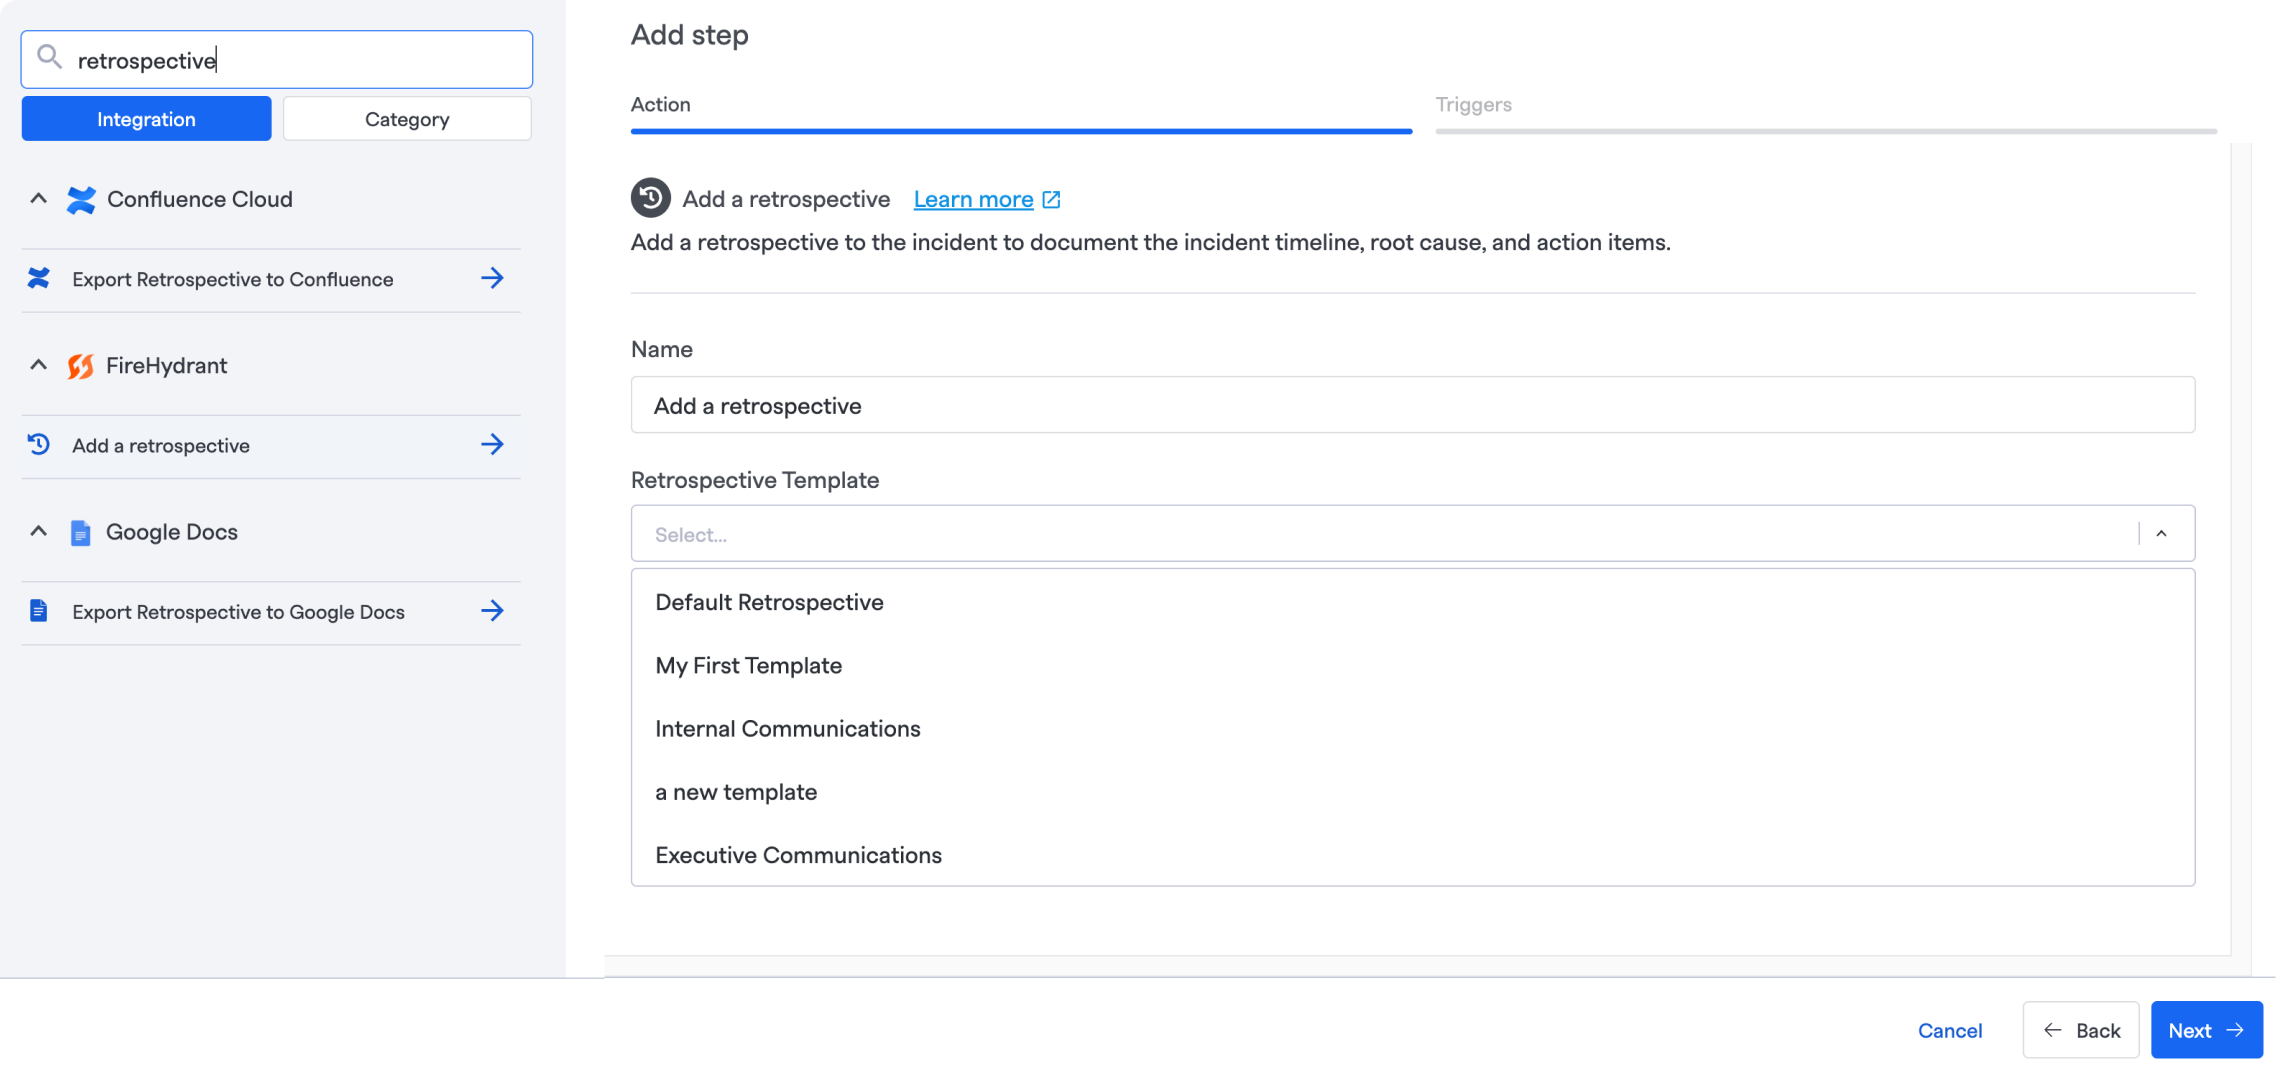
Add a retrospective step
- Go into a Runbook, click "Edit Runbook," then click '+ Add step.'
- Search for "retrospective" and click Add a retrospective. Then select the Retrospective you'd like added to the incident.
- Configure conditions for when the template should be applied.
For more information, examples, and best practices, visit Add a Retrospective.
Manually attach a template
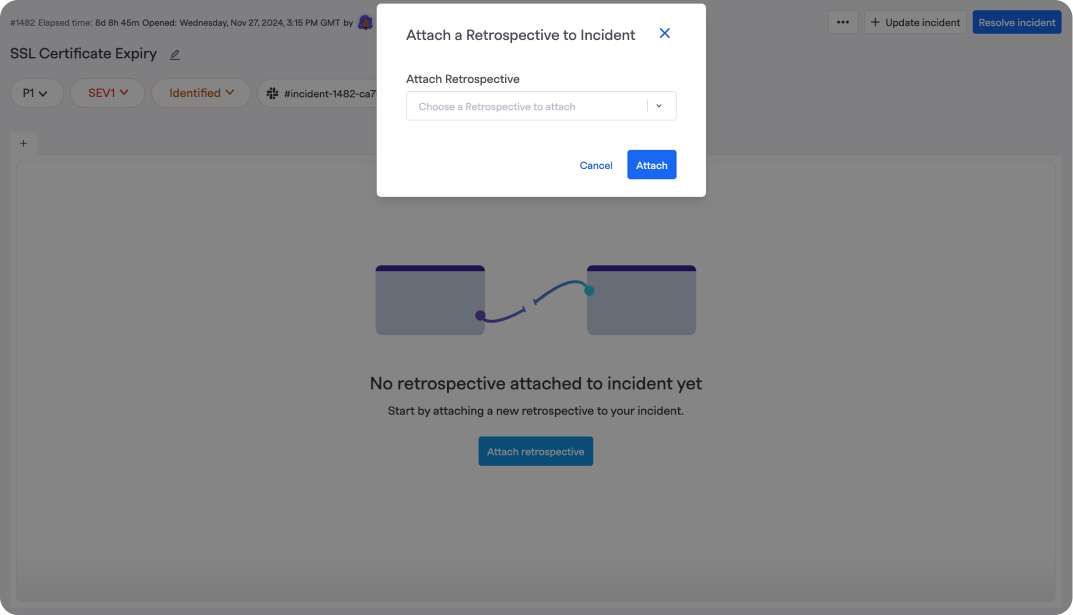
Manually attach a template
There are instances where you need to manually attach a retrospective to an incident.
- Open the retrospective view of an incident
- If there is a template attached, click the " + " next to current template
- If no template is attached click the "Attach template"
- Choose your desired template. Then click “Attach”
Updated 5 months ago
