Setup and Configuration
Note:This article is about FireHydrant's built-in status pages. For information about Atlassian Statuspages, visit Atlassian Statuspage documentation instead.
FireHydrant Status Pages
You can create a new Status Page in FireHydrant by clicking Status Pages in the top nav, then "+ Create status page." Throughout the creation process, you will be able to see a preview of all changes made on the right hand side panel. If you do not see this preview, you will need to widen your window.
General Settings
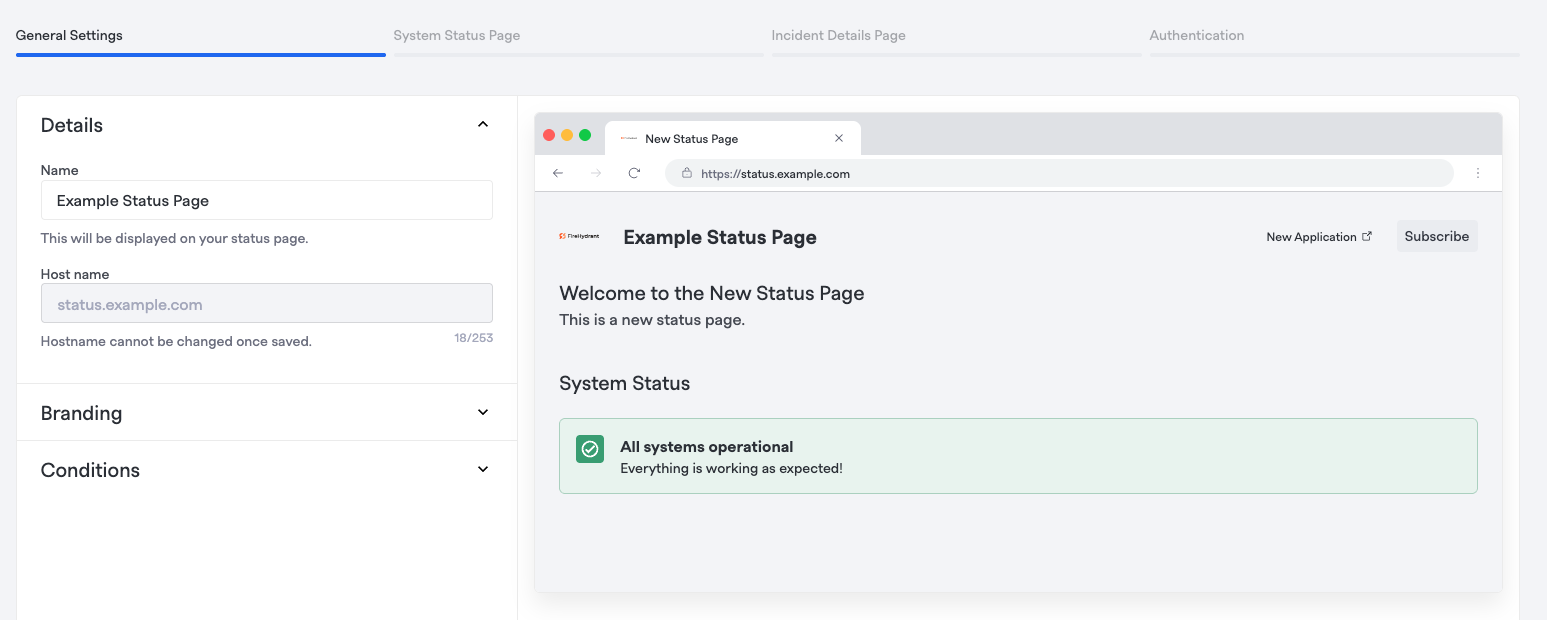
Within the General Settings tab of the status page setup, you will be setting the host name, branding to include your logo, and configuring the conditions to show on all created status pages.
Details
| Field | Description |
|---|---|
| Name | (Required) The name FireHydrant uses internally to refer to your status page. This is not visible to external viewers |
| Host name | (Required) The host name of your status page. THIS CANNOT BE CHANGED ONCE SET |
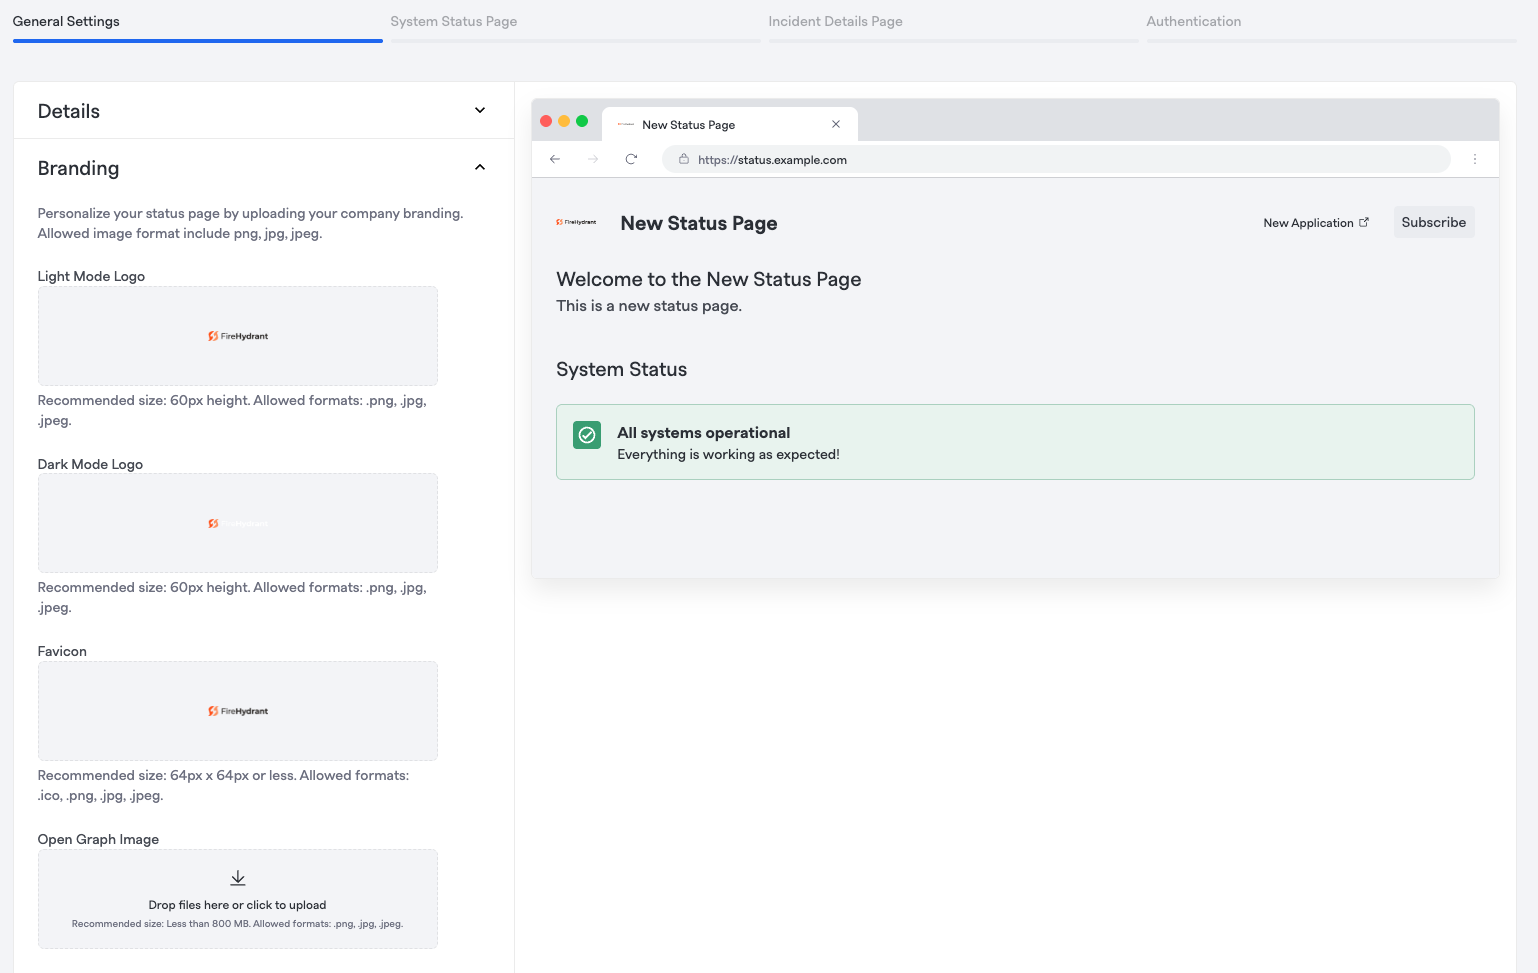
Branding
| Field | Description |
|---|---|
| Light Mode Logo | A logo to display when a user is viewing the status page in light mode. Default is no logo. |
| Dark Mode Logo | A logo to display when a user is viewing the page in dark mode. Default is no logo. |
| Favicon | Default is no logoFavicon for your status page. Default is no favicon. |
| Open Graph Image | The image displayed in social media or link previews when linking the status page on other websites. Default is no image. |
Conditions
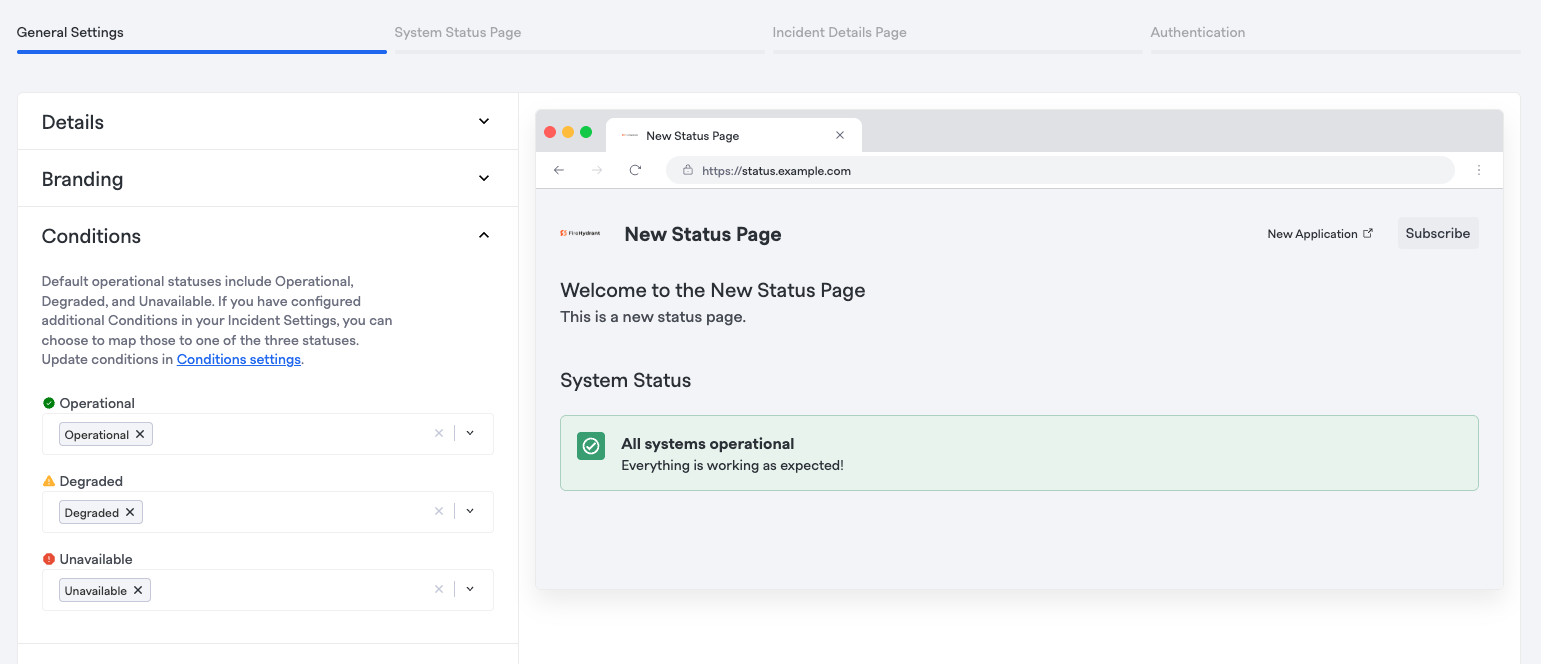
By default, FireHydrant comes with "Operational", "Unavailable", "Degraded", and "Bug" as available conditions.
These can be configured and customized in your settings under Settings> Incidents > Conditions in the application. To learn more, visit Service Catalog Conditions.
| Field | Description |
|---|---|
| Operational | What condition(s) to show as "Operational" on the status page. Typically, "Operational" is inserted here. |
| Degraded | What condition(s) to show as "Degraded" on the status page. Typically, "Degraded" is inserted here. |
| Unavailable | What conditions to show as "Unavailable" on the status page. Typically, "Unavailable" is inserted here. |
System Status Page
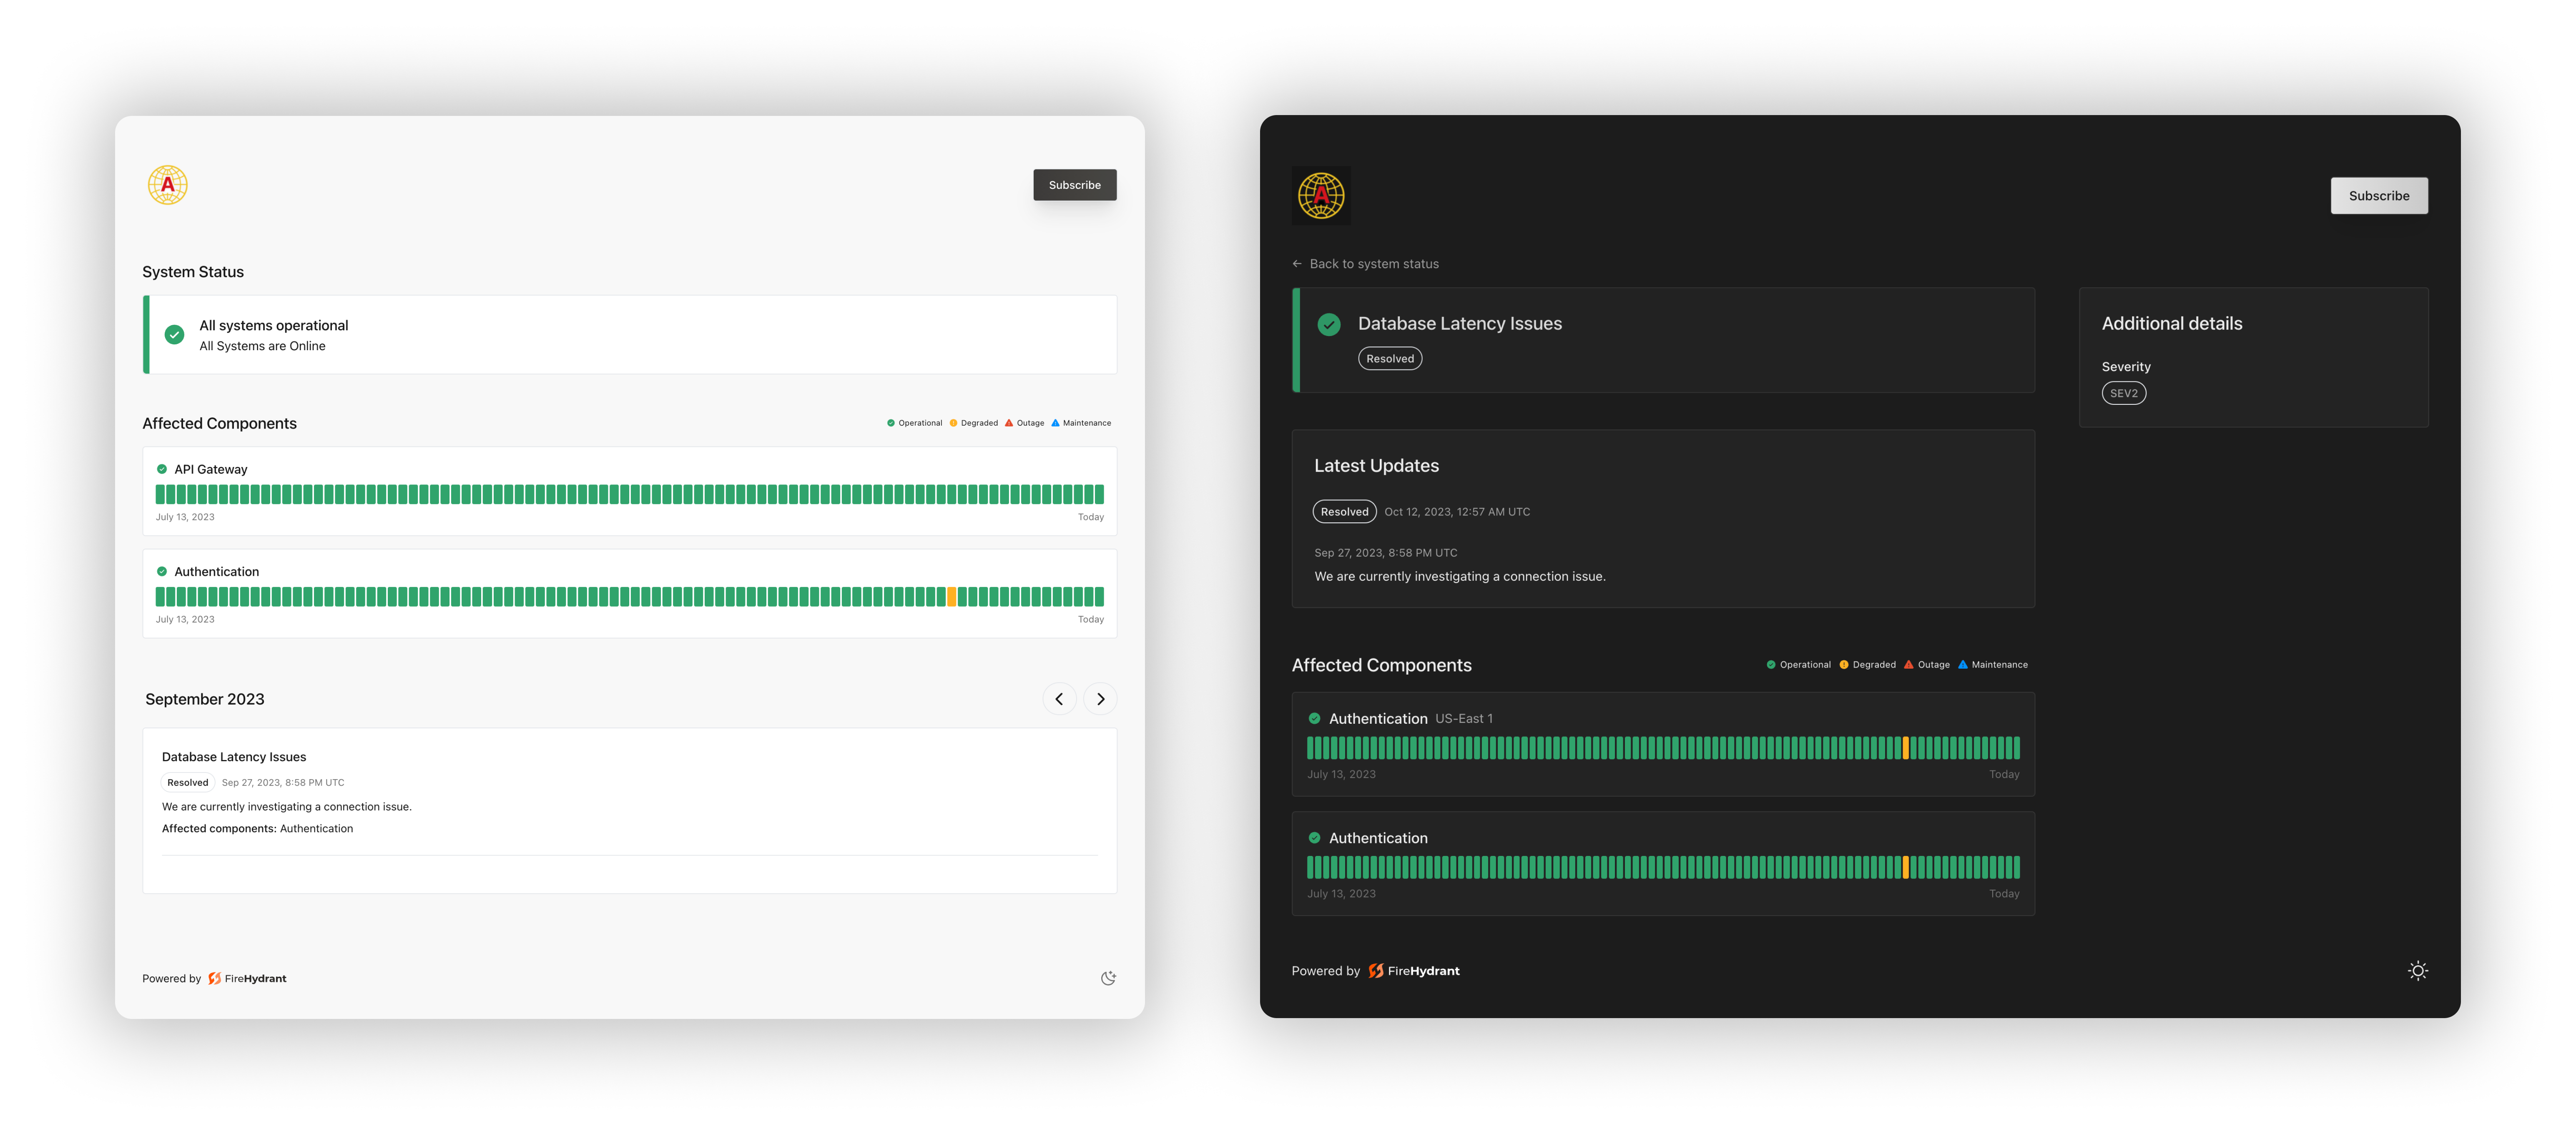
The following configuration will apply to the system status page. This will be the page initially presented to your viewers when navigating to your status page. The system status page shows the overall system status as well as the status of any component and component groups you designate.
Content
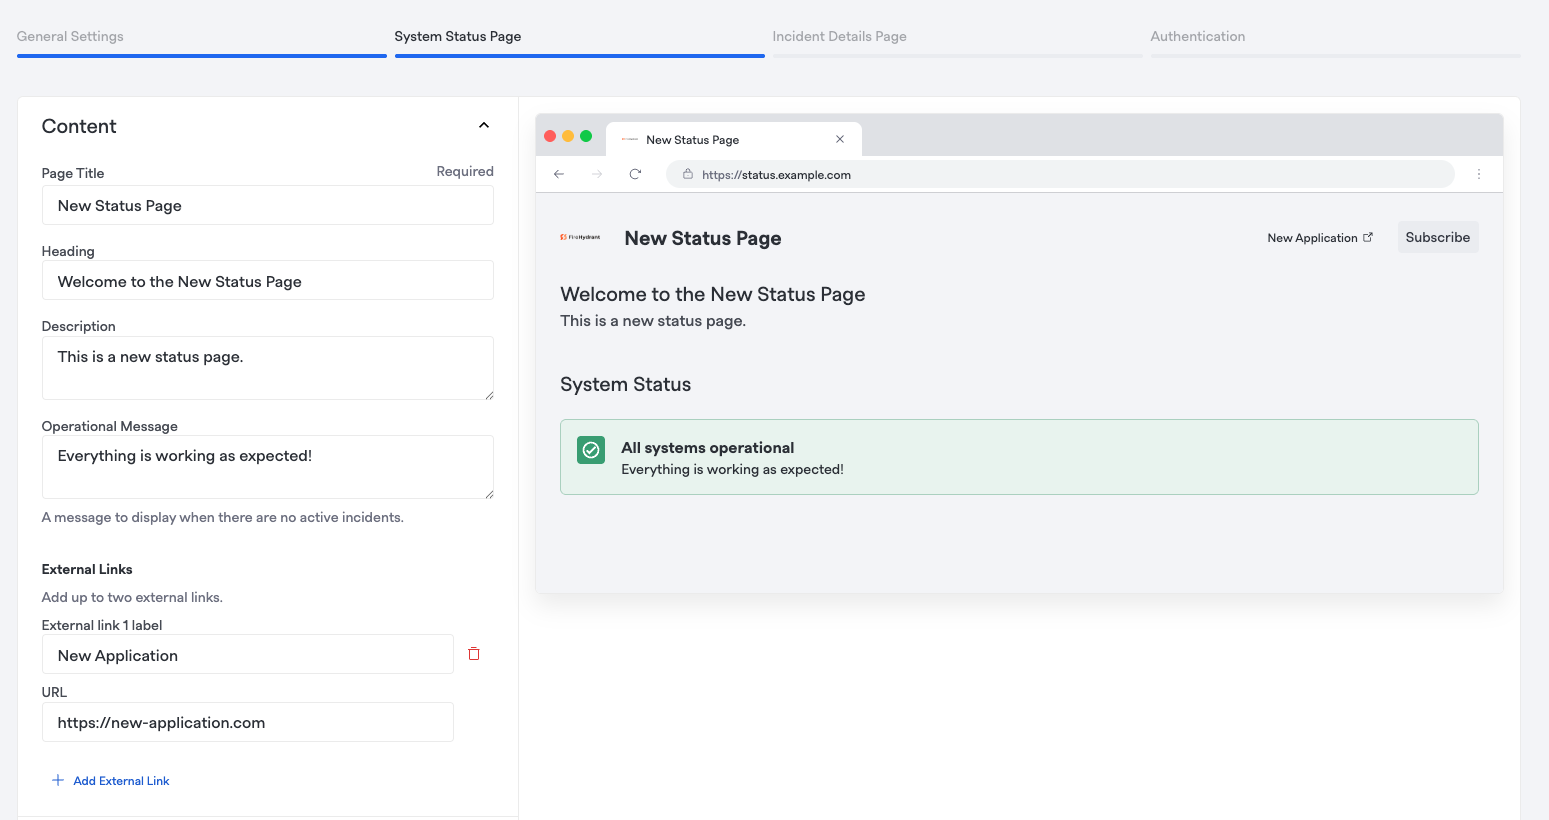
When users navigate to your status page, they will see an overview page, showing the current system status and the status of any configured components. Customize the system status page by configuring the following options.
| Field | Description |
|---|---|
| Page title | (Required) An externally-facing page title displayed when there's no logo and the name of the page tab or window. |
| Heading | A greeting/headline for the page. Defaults to nothing |
| Description | A message to help your viewers understand the content and goals of the page. Defaults to nothing |
| Operational Message | A message to display when all systems and services are operational. Defaults to "Nothing to report." |
| External Links (maximum of 2) | Arbitrary additional links to display on the page in the header area. |
Components
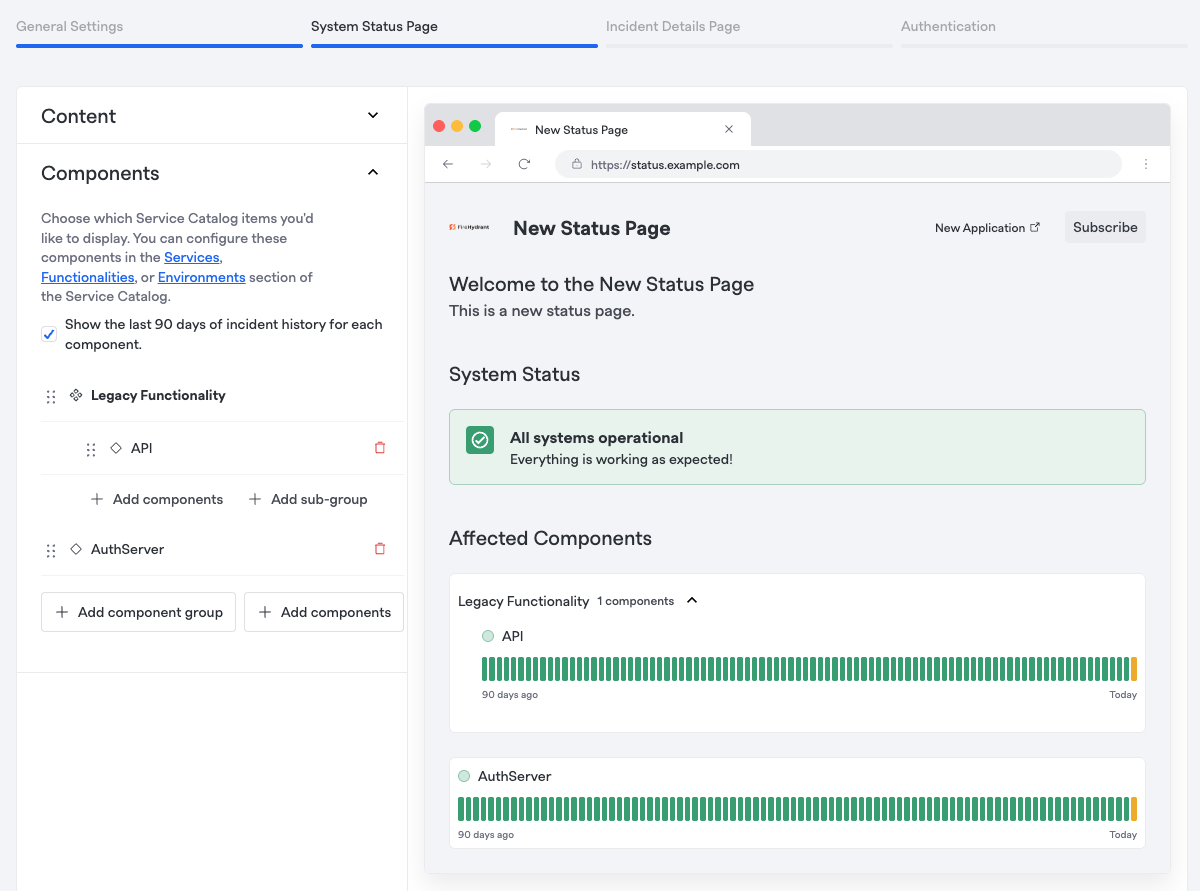
Designate which Service Catalog items you'd like to display on the status page. We typically see people show their Functionalities, but you can choose from Environments, Functionalities, or Services to display. You can add components to groups and subgroups to roll-up component conditions.
To create a group, click "Add component group." Then, you'll be prompted to name your group and add components. Once you added at least one group, you can nest any additional groups underneath another group, creating subgroups. When components are grouped, they will create a roll-up status and 90-day history of status based on the child components.
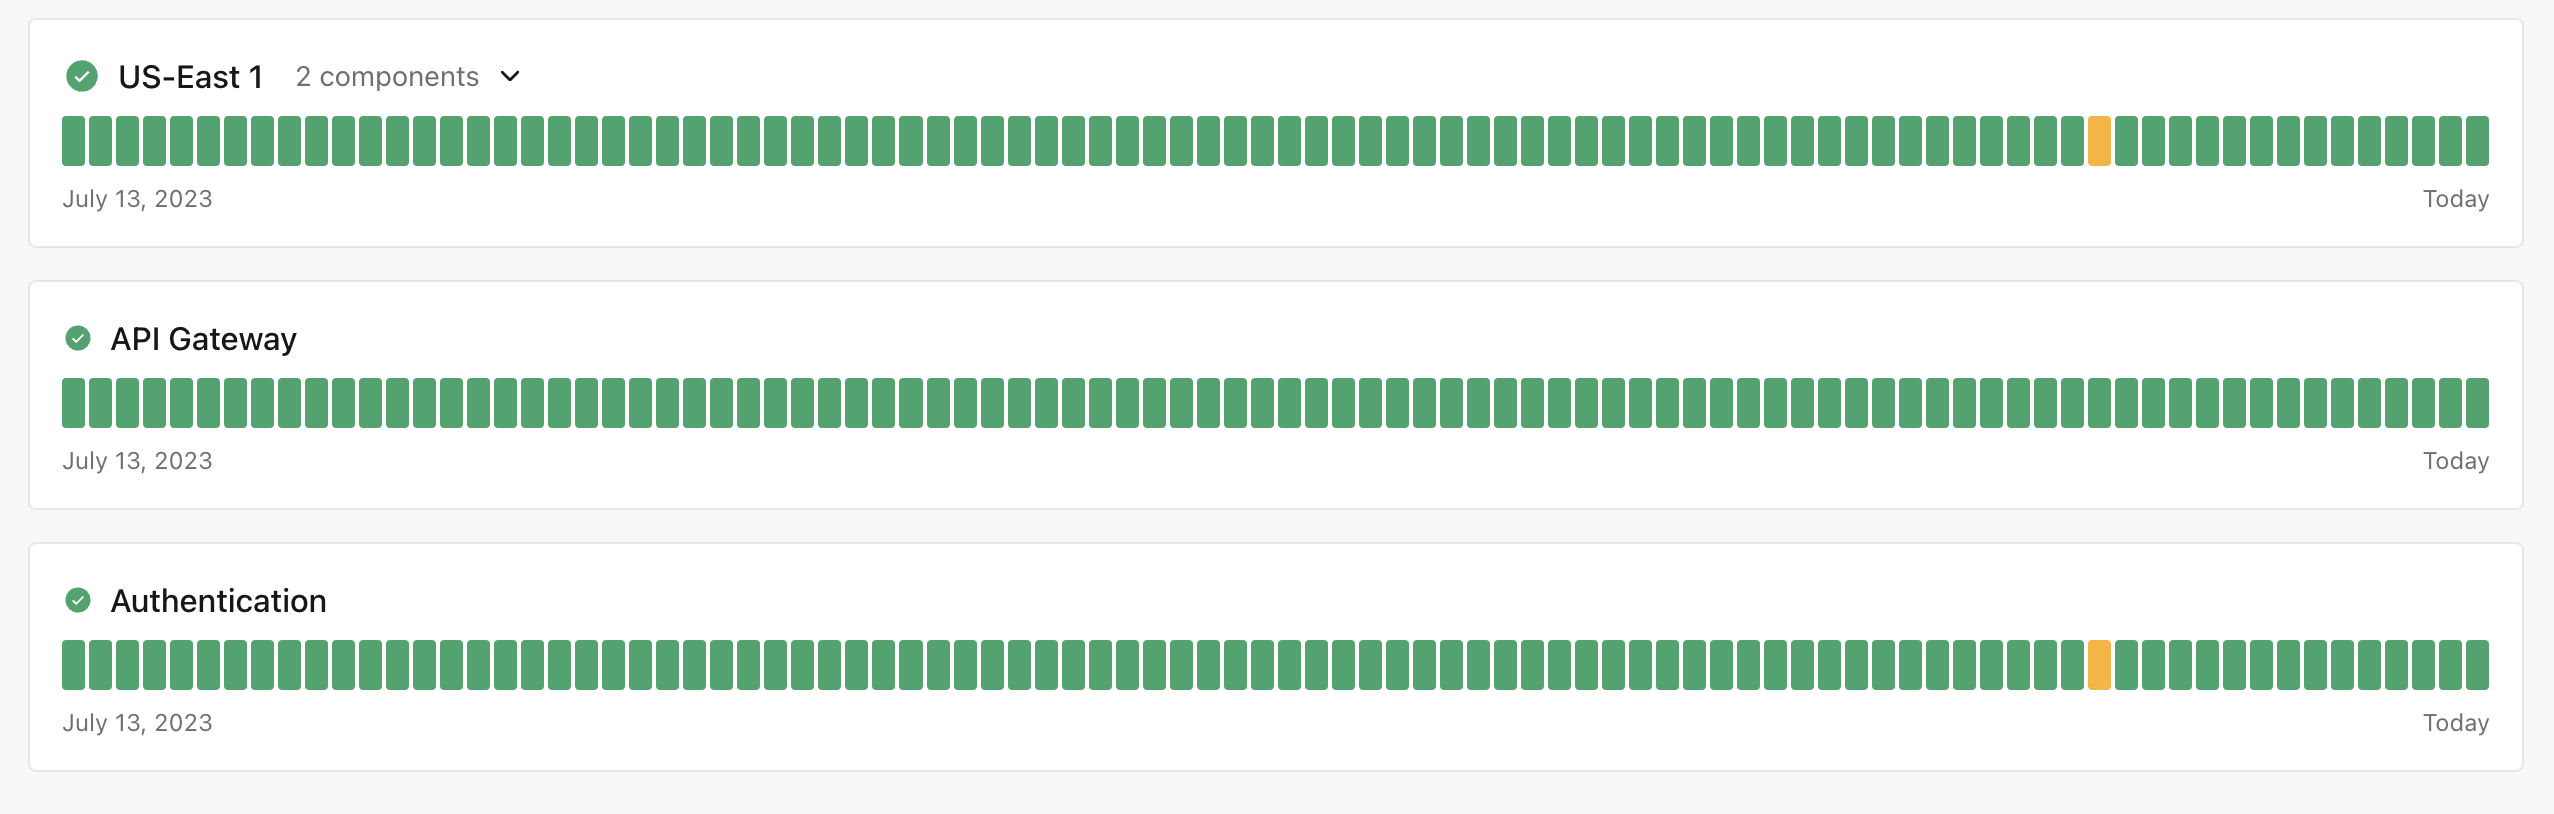
Example of status pages with 90-day history and component grouping "US-East 1"
Incident Details Page
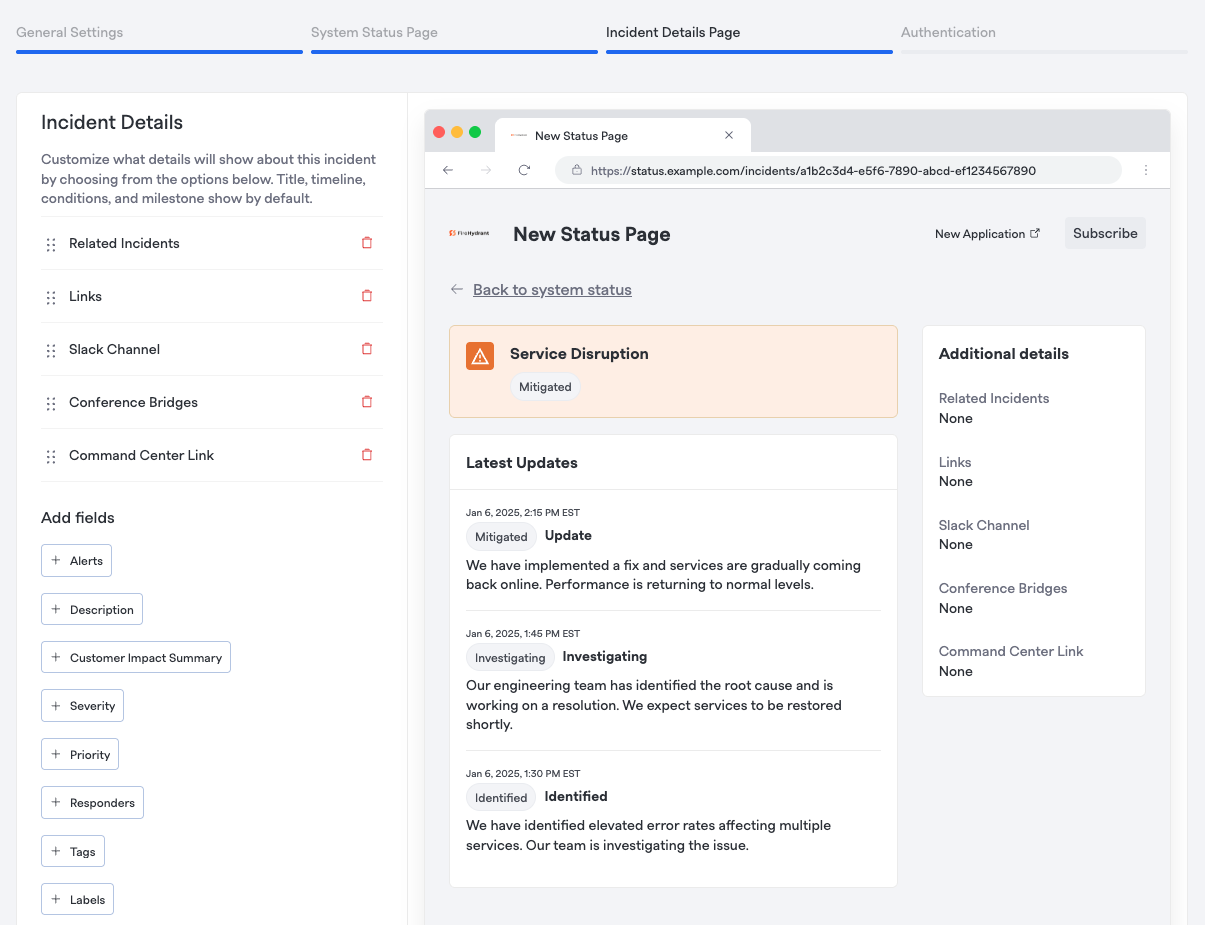
In the event of an incident, your viewers will also have the ability to follow incident updates on an incident specific status page. You may configure this page to include any number of incident fields on the right hand side.
Aside from standard Incident Fields, there are specific items available to show on status pages:
- Related Incidents - Normally shown in the The Command Center, you can also display related incidents on the status page
- Links - The list of links attached to the incident, including tickets and external links but excluding conference bridges and incident channels
- Slack Channel - If you want to show the link to the incident Slack channel (e.g., the status page is authenticated and internal), you may do so
- Conference Bridges - If you want to show the links to any bridges (e.g., the status page is authenticated and internal), you may do so
- Command Center Link - If you want to show the direct link to the incident in FireHydrant, you can (would require logging in to FireHydrant to access anyway)
Authentication
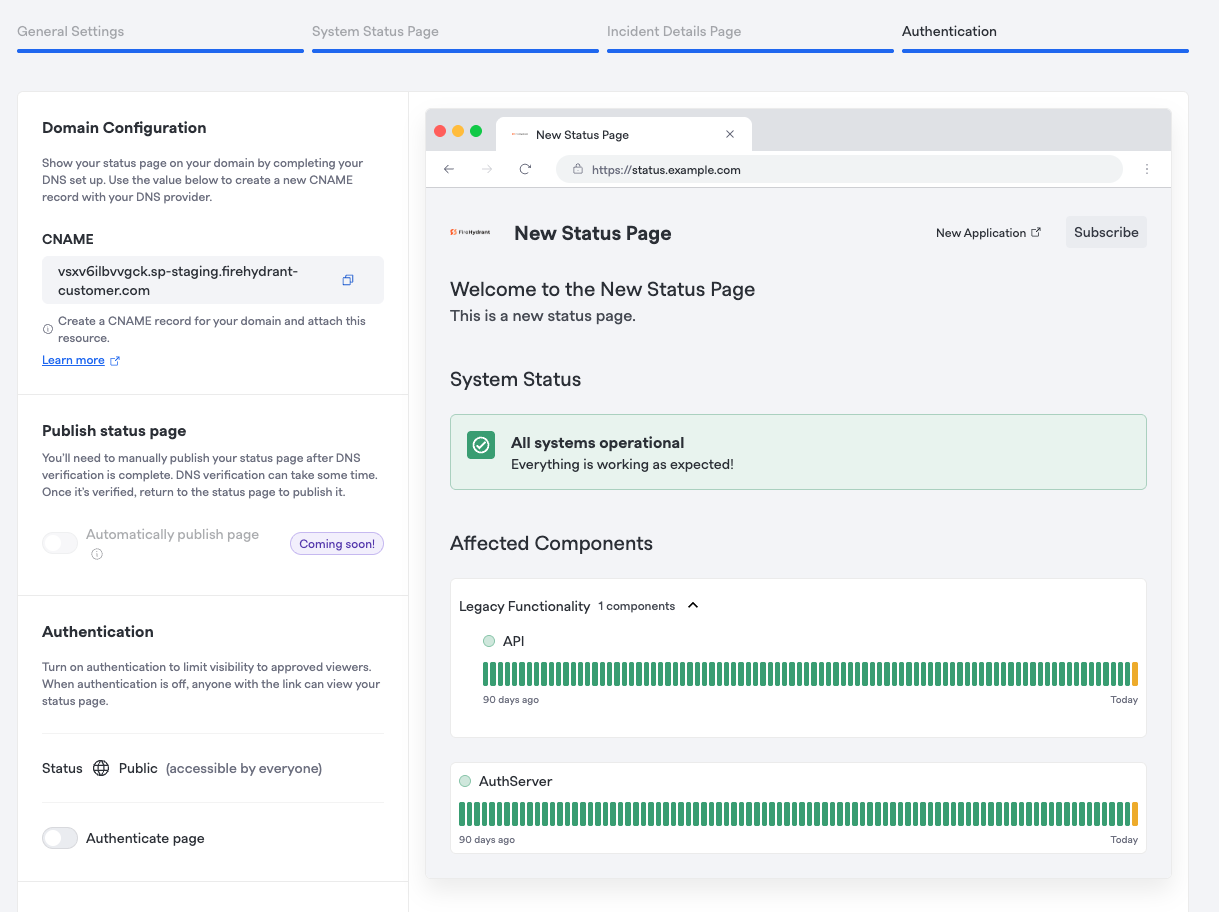
Domain Configuration
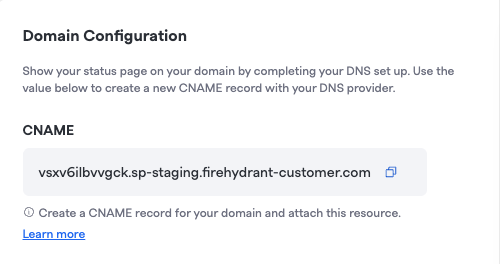
After creating your page, you are presented with a CNAME target to point your domain at our system. You can see more notes on configuring your CNAME record below in CNAME Configuration.
Publish Status Page
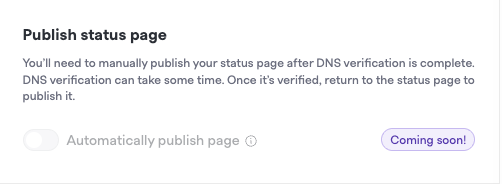
We will soon be enabling the ability for you to automatically publish new status pages upon DNS verification. When this feature is available, you will be able to enable this toggle and the created status page will be published and available as soon as the DNS record has been verified within our system.
Authentication
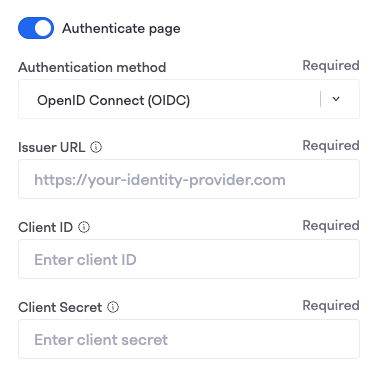
You can limit the audience of your status page to your employees or other groups of customers by configuring authenticated status pages. To enable, visit the appropriate instructions for your SSO provider:
Note:If you have existing authenticated Status Pages, please reach out to our support team to transition to the new configuration.
DNS Verification and Publishing

Once your Status page has been fully configured, we will automatically verify your DNS record, and upon successful verification will prompt you to publish your Status Page from the Status Page overview. You may also unpublish, edit, or delete the status page from this table as well as view the list of subscribers per status page.
CNAME Configuration
You will want to find and use the documentation for whichever DNS provider you use. Generally, you'll need to create a CNAME record for your domain/subdomain and point it to the generated CNAME value FireHydrant provides. The example below is from Namecheap and points the acme subdomain of this domain to the status page:
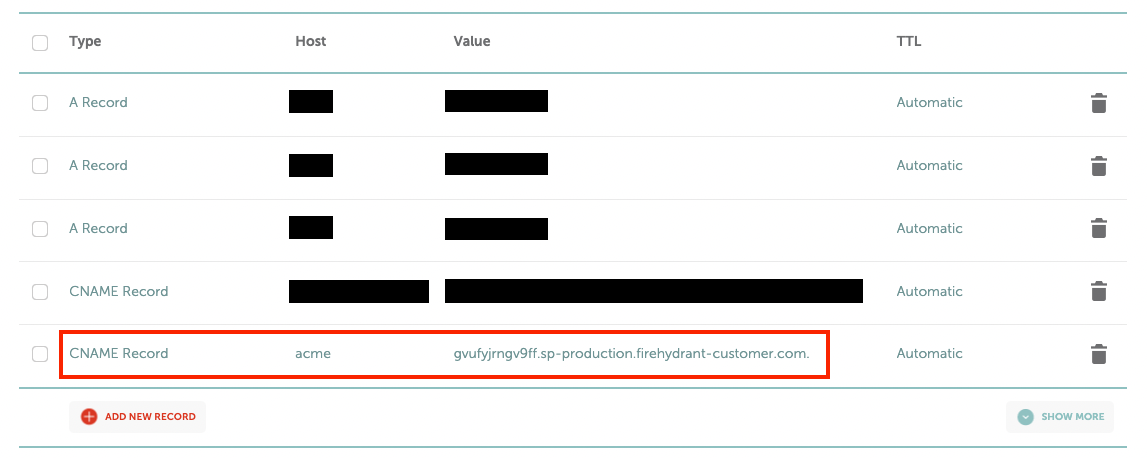
Example of configuring a CNAME record in Namecheap
Depending on the DNS provider, it can take from several minutes to hours before the records propagate. Check your provider's documentation to see how long the expected wait time is. Then, to confirm that your DNS is configured correctly, use dig from the command line or Google's DNS toolbox.
➜ ~ dig +short acme.example.com aabbccddeeff.sp-production.firehydrant-customer.com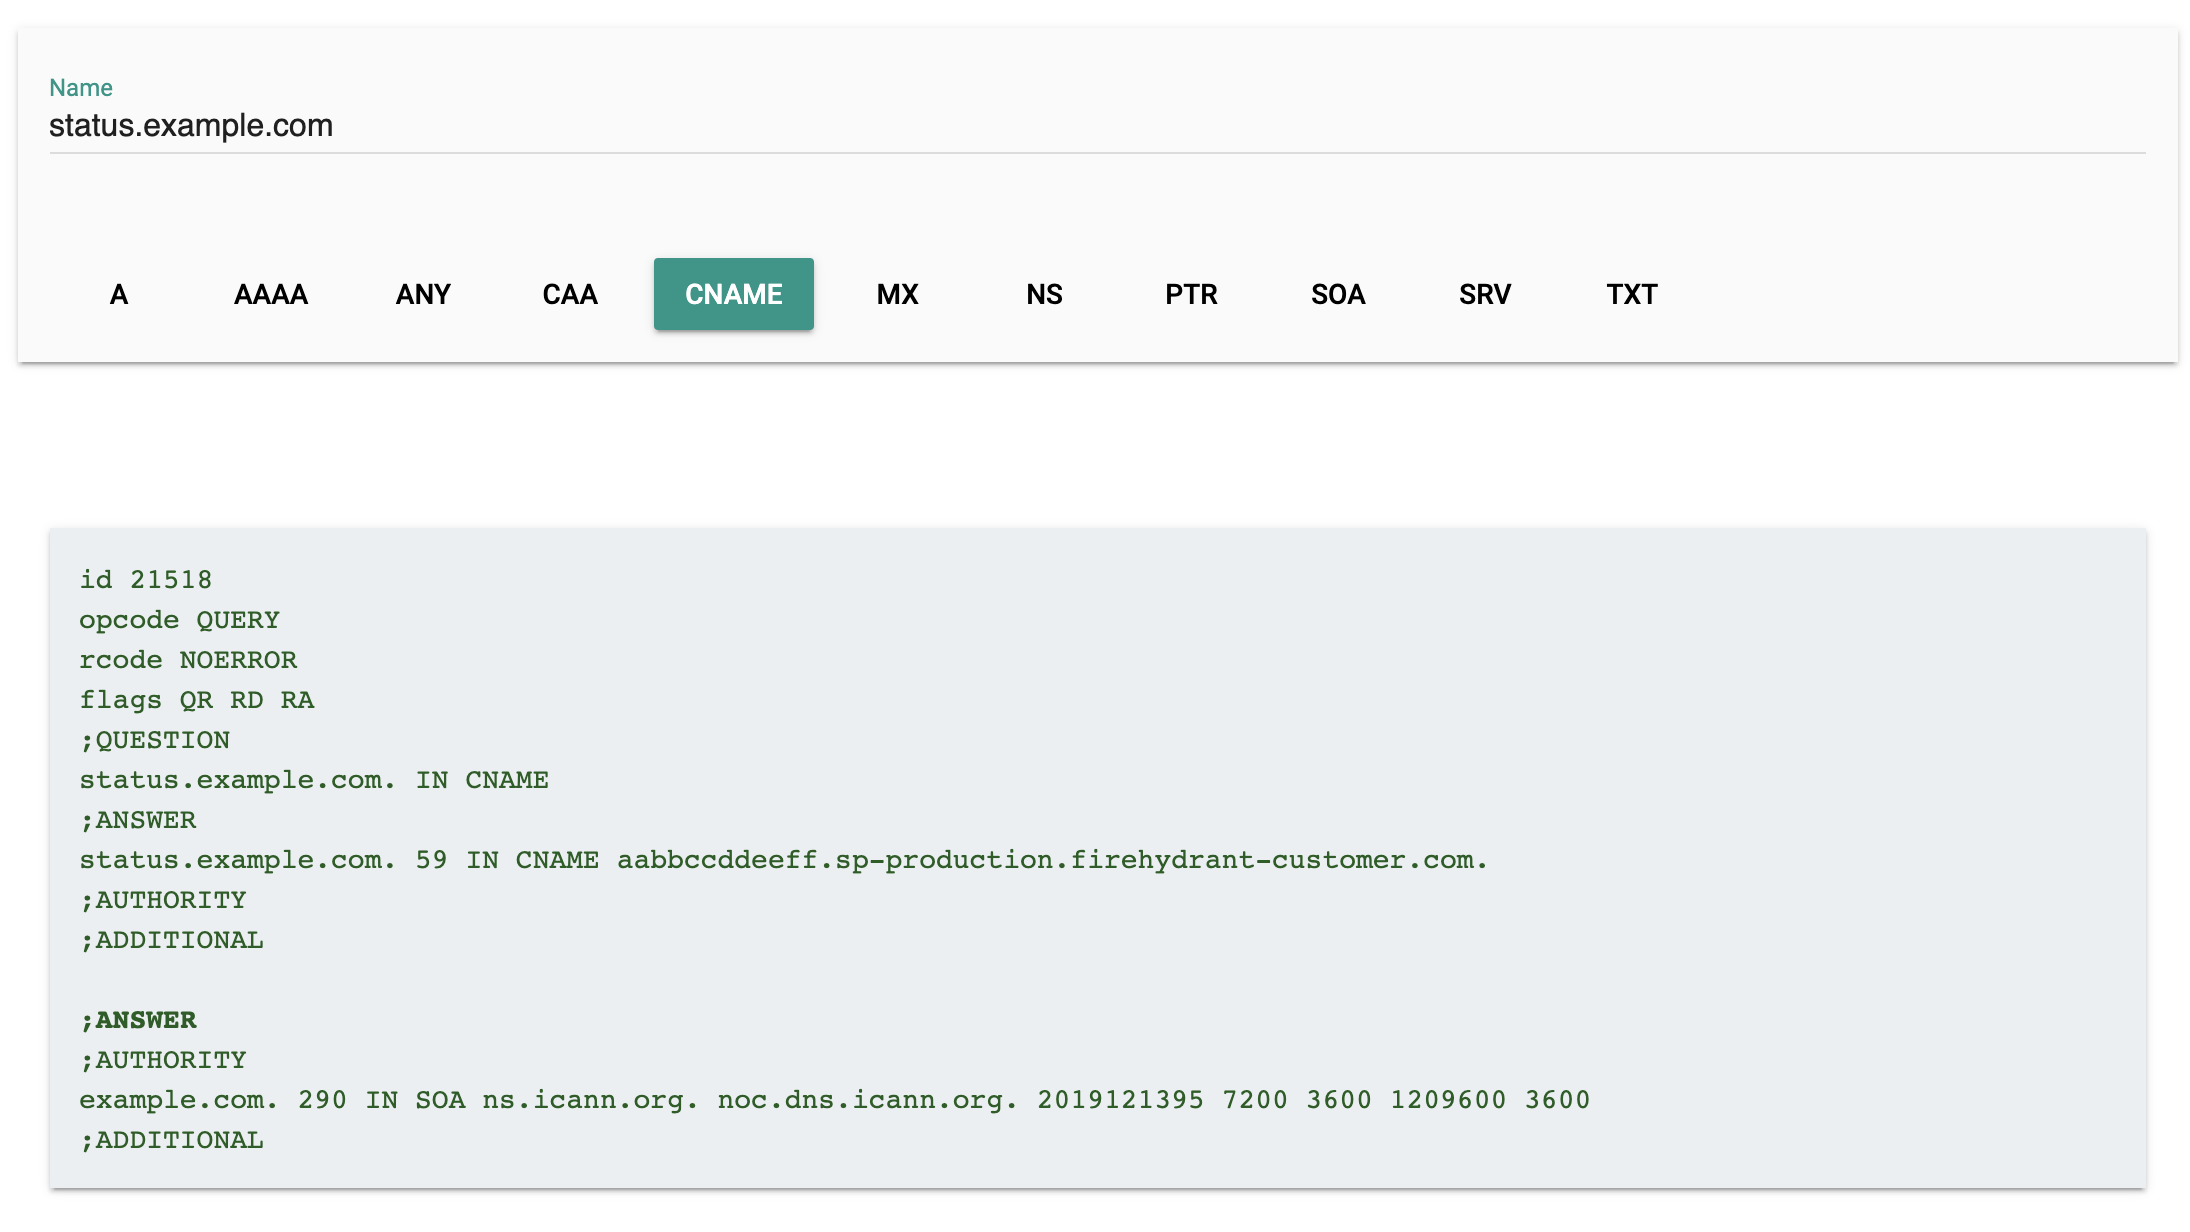
Using Google's DNS toolbox
CAA Records
CAA records are a way to specify publicly that you've only authorized certificates for your domain to be made with very specific parameters. FireHydrant's status pages use self-issued certs with Let's Encrypt, which can sometimes cause issues with CAA records that exist for custom domains.
If there is a problem with FireHydrant status page certs and your CAA, you may see a warning from your browser when visiting your custom status page domain, such as: The certificate is not trusted because it is self-signed.
To fix this, we recommend amending the CAA record to include Let's Encrypt. These are the lines you'd need to add:
issue "letsencrypt.org"
iodef "mailto:[email protected]"
Managing Subscribers
Once your status page is published, you can manage subscribers from the status page overview. The subscribers page allows you to:
- View all subscribers — See the list of email addresses subscribed to your status page
- Add subscribers — Invite additional subscribers by entering their email address
- Remove subscribers — Delete subscribers from the list when needed
The subscriber list automatically updates when subscribers are added or removed, so you can see the current state of your subscriber base at any time.
Next Steps
- Learn how to use your new FireHydrant status page on incidents!
Updated 3 months ago