Opsgenie
FireHydrant's Opsgenie integration enables various capabilities within the platform:
- Automatically create FireHydrant incidents from Opsgenie alerts
- Notify different channels based on incoming alert content
- Page out to teams and services in Opsgenie from FireHydrant
- Automatically pull in on-call responders from Opsgenie escalation policies to incident channels
- Importing services from Opsgenie to FireHydrant's Service Catalog
- ...and more!
Installation
Prerequisites
- Ensure the Opsgenie account authorizing the integration has API access.
Connecting Opsgenie to FireHydrant
First, you need an Opsgenie API key.
- Go to the Opsgenie Integrations page Settings> Integrations and click Add integration.
- Search for and select API. Provide a name for this API integration and click Continue.
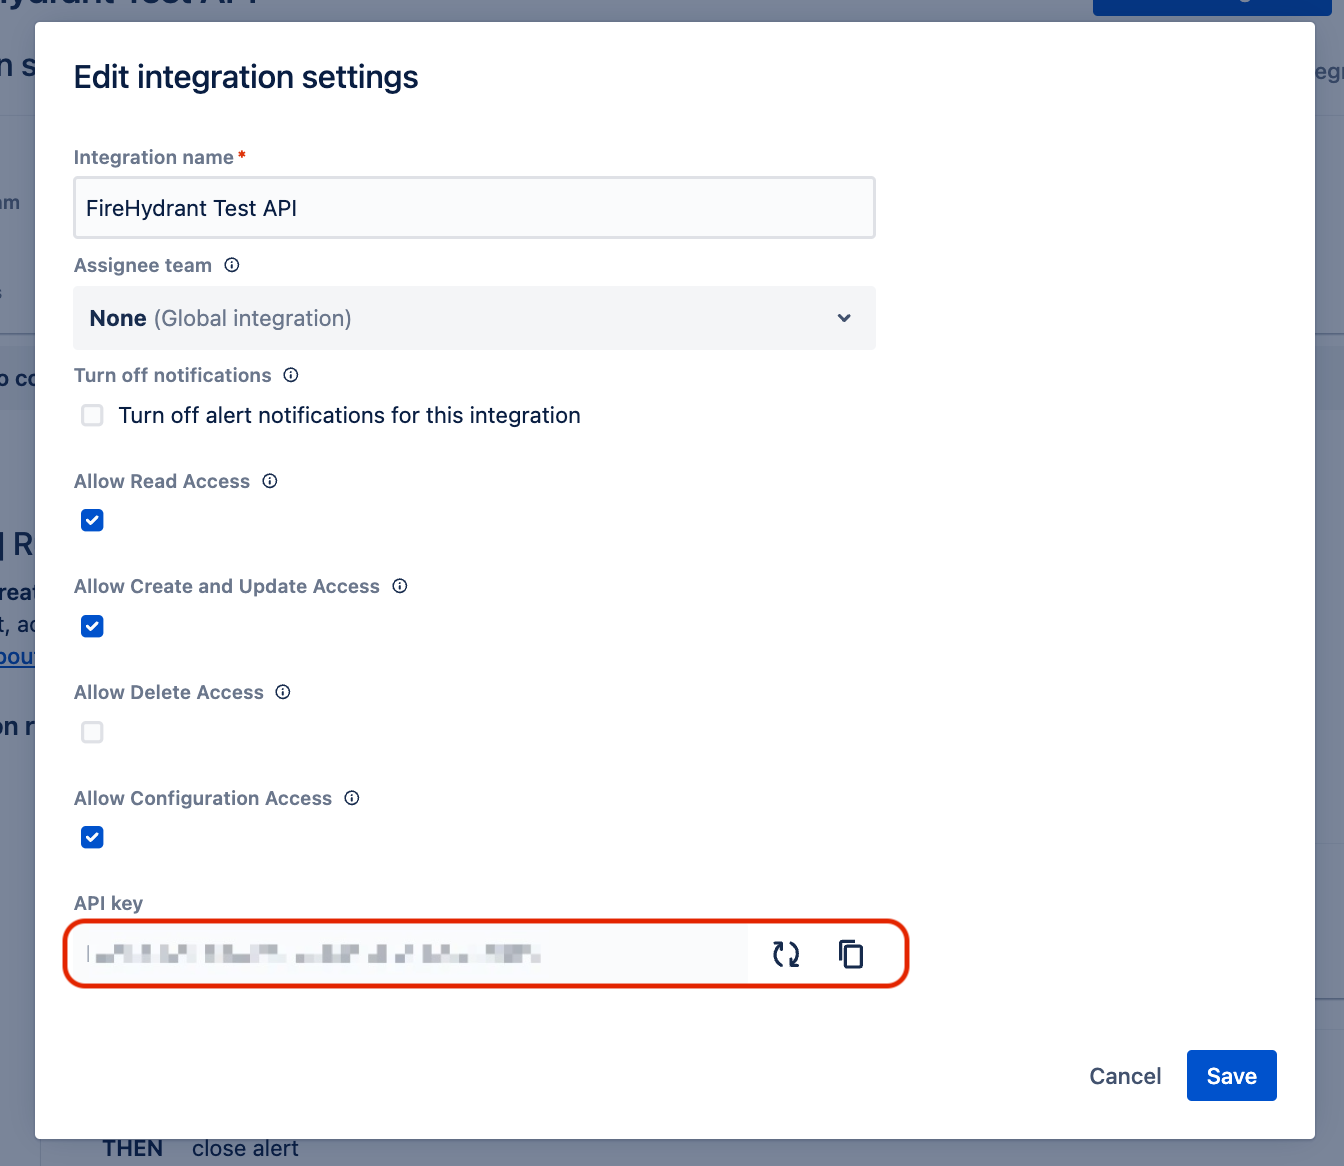
- On the API settings page click Edit. By default, all permissions will be selected, and you will want to ensure that "Allow Read Access", "Allow Create and Update Access" and "Allow Configuration Access" are selected.

Creating an API key in Opsgenie
- Copy the API Key that is generated for you and press Save. Review the "Incoming Rules" and press Turn on integration to finalize API set up.
Now, take that API key and connect Opsgenie to FireHydrant.
- Go to Settings> Integrations list and click on the Opsgenie integration.
- On the Opsgenie page, click Setup Opsgenie and enter the API key you copied.
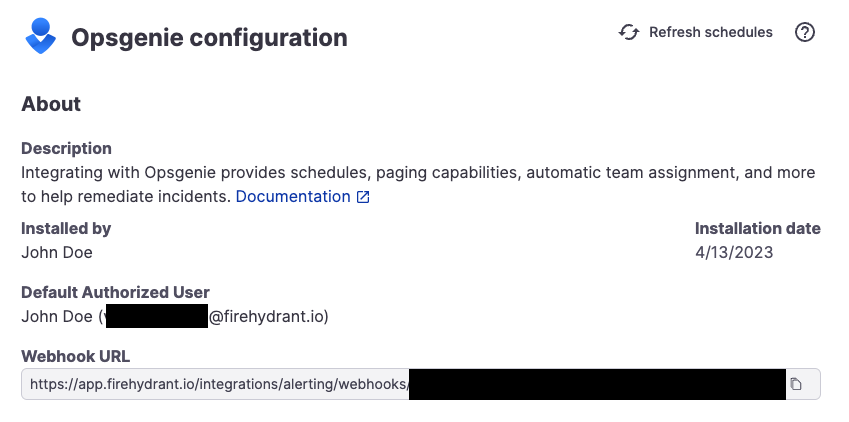
Once finished, you should be back on the Opsgenie integration page and a webhook URL will be generated. Make a note of it for the next section.
Setup Outgoing Webhook
After configuring the connection, you will need to configure an outgoing webhook from Opsgenie so FireHydrant can correctly sync incident states.

Copy this webhook URL after connecting Opsgenie
- In the Opsgenie integration settings page on FireHydrant, copy the webhook address provided by FireHydrant.
- In the Opsgenie app, go to Settings> Integrations and click "+ Add Integration."
- Search for the Webhook integration and click on it.
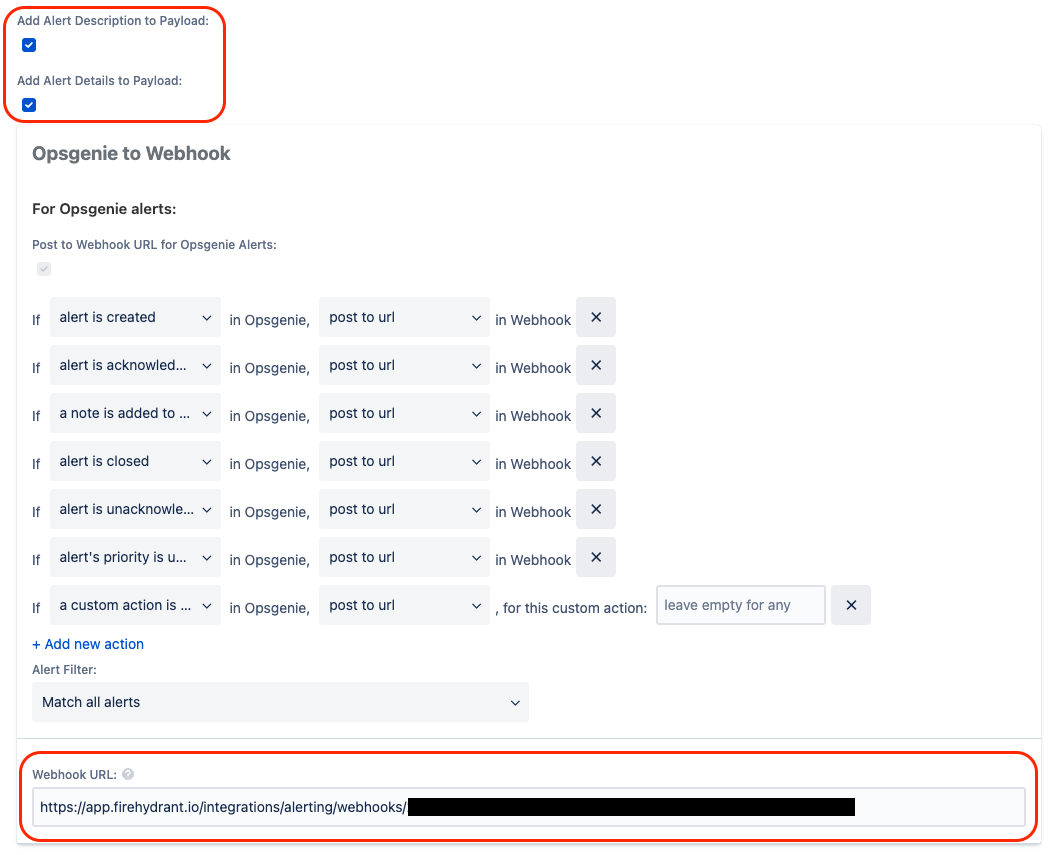
- Check the Add alert description to payload and Add alert details to payload boxes on the configuration page. You may choose to edit what events you want to trigger an alert to FireHydrant by modifying the triggers, but we recommend leaving this as the default.
- Paste the copied webhook into the Webhook URL field and hit Save.

Default settings for Opsgenie outgoing webhook
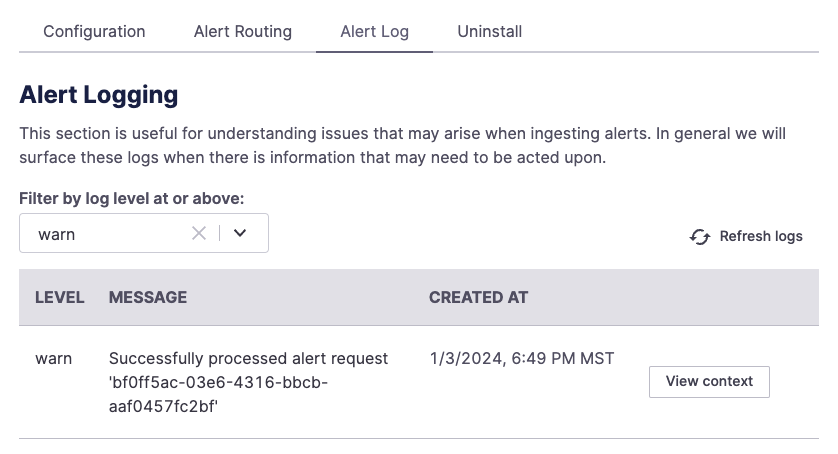
Now, you should be all set! You can create an incident or alert in Opsgenie to test this outgoing webhook. By default, an event should be registered under the "Alert Log" tab of the Opsgenie integration setting page on FireHydrant.

Example alert after configuring outgoing webhook
Opsgenie Alert Routing
Once your Opsgenie instance is configured, you can set up Alert Routes to take action on your alerts based on the data included in the alert. You can automatically open new incidents, send alerts to any Slack channel, log an alert in FireHydrant, or simply ignore it. To learn more about routing, see Alert Routing. Below you'll find the list of parameter mappings for Opsgenie.
Opsgenie Caveat and Noise
For Opsgenie, if you create an Incident in Opsgenie with Responders, you'll get multiple alerts: one "associated alert" that notifies nobody and another alert that pages Responders. This seems to have been a deliberate decision by the Atlassian team, but this can cause a lot of noise on FireHydrant.
We don't currently have a way we can tell apart between the two alerts, so if you are using FireHydrant Alert Routing in conjunction with Opsgenie, we recommend only creating Alerts and not Incidents on Opsgenie when possible to avoid duplicate notifications/actions on FireHydrant.
Parameter Mappings
Here is the table of routable parameters on FireHydrant and the corresponding key/value from the inbound Opsgenie webhook(s). The $ refers to the webhook body content as a JSON object.
An explanation of Opsgenie's Webhook content can be found in their docs here.
| Parameter Name | Opsgenie Webhook Body | Notes |
|---|---|---|
| Opsgenie: Action | $.action | The action taken that triggered this Webhook |
| Opsgenie: Impacted Services | $.alert.details.impacted-services | The services marked impacted on the alert from Opsgenie side |
| Opsgenie: Created At | $.alert.createdAt | When the alert was created |
| Opsgenie: Description | $.alert.description | Description of the alert or incident |
| Opsgenie: Priority | $.alert.priority | The Opsgenie alert's priority |
| Opsgenie: Alert ID | $.alert.alertId | ID of the alert in Opsgenie |
| Opsgenie: Message | $.alert.message | Alert message or the Incident Summary if it's an incident |
| Opsgenie: Web URL | $.alert.links.web | Not all alerts have this parameter. If this parameter doesn't exist, FireHydrant reconstructs the URL for you and makes it available via Liquid templating. |
The following table shows our overall Alert Routing mapping object - these parameters are standard across all Alerting/Monitoring integrations.
| Parameter Name | Opsgenie Webhook Body | Notes |
|---|---|---|
| Alert Summary | $.alert.message | The same as Opsgenie: Message above |
| Alert Description | $.alert.description | The same as Opsgenie: Description above |
| Alert Priority | $.alert.priority | The same as Opsgenie: Priority above |
| Alert Status | $.alert.action | The same as Opsgenie: Action above |
| Alert Associated Infrastructure | N/A | The associated Service/Functionality in FireHydrant. For us to detect this, you must have linked a Service or Functionality to a service in Opsgenie. |
Next Steps
Now that you've configured the Opsgenie integration, you can take the following steps to get the full power of FireHydrant + Opsgenie:
- Import and Link Components into your Service Catalog from Opsgenie
- See how you can page and lookup on-call personnel in Opsgenie
- Automatically create Opsgenie incidents via Runbook step
- Configure teams to pull personnel from on-call schedules
Updated 5 months ago
