AWS CloudWatch Event Source
| Required Permissions | Required Entitlements |
|---|---|
| MemberOwner AWS SNS/CloudWatch Permissions | Signals |
This AWS CloudWatch integration guide for Signals will walk you through how to send webhook events from AWS CloudWatch to Signals. We'll use CloudWatch alarms and Simple Notificaiton Service (SNS) in conjunction with a FireHydrant Custom Event Source.
IAM Roles and PermissionsThis guide assumes that you have appropriate roles and permissions for the AWS services mentioned and Member or Owner privileges in FireHydrant.
Create Custom Event Source in FireHydrant
First, you'll need to create the Custom Event Source in FireHydrant. An Event Source on FireHydrant will often have a "transposer" that translates the monitoring source's proprietary webhook format into the Events Data Model that FireHydrant understands and can work with.
- Navigate to Signals > Event Sources and then click on the Custom Event Sources tab.
- Click "+ Add custom event source."
- In the Request Body for the incoming payload tab, insert the following test JSON:
{
  "Type": "Notification",
  "Message": "This is the message body/summary of the notification from SNS",
  "Subject": "This is the subject/summary of the notification from SNS",
  "TopicArn": "arn:aws:sns:us-east-1:1234567890:AcmeCompany",
  "MessageId": "f3da1149-e706-5099-8f29-4e5894d7d7dc",
  "Signature": "12345examplesignature",
  "Timestamp": "2024-07-17T07:24:01.029Z",
  "SigningCertURL": "https://sns.us-east-1.amazonaws.com/SimpleNotificationService-12345examplecert.pem",
  "UnsubscribeURL": "https://sns.us-east-1.amazonaws.com/?Action=Unsubscribe&SubscriptionArn=arn:aws:sns:us-east-1:1234567890:AcmeCompany:b6788449-25a1-42aa-b381-1234567890ee",
  "SignatureVersion": "1",
  "MessageAttributes": {
    "AnotherNumberAttribute": {
      "Type": "Number",
      "Value": "1234"
    },
    "ExampleBinaryAttribute": {
      "Type": "Binary",
      "Value": "ZmFsc2U="
    },
    "ExampleStringAttribute": {
      "Type": "String",
      "Value": "ExampleValue"
    },
    "ExampleStringArrayAttribute": {
      "Type": "String.Array",
      "Value": "[\"ExampleValue1\", \"ExampleValue2\"]"
    }
  }
}- Click "Next". On the next tab for Transposition Script, insert the following code. This code will handle both the initial subscription confirmation message as well as any messages thereafter.
function transpose(input) {
  const payload = input.data;

  let signal = {
    idempotency_key: payload.MessageId,
    body: payload.Message,
    annotations: {
      'sns.amazonaws.com/Signature': payload.Signature,
      'sns.amazonaws.com/SigningCertURL': payload.SigningCertURL,
      'sns.amazonaws.com/SignatureVersion': payload.SignatureVersion,
      'sns.amazonaws.com/Timestamp': payload.Timestamp,
      'sns.amazonaws.com/TopicArn': payload.TopicArn,
      'sns.amazonaws.com/Type': payload.Type
    },
    links: [
      {
        href: payload.SigningCertURL,
        text: 'AWS SNS Signing Cert URL'
      }
    ]
  };

  if (payload.Type === 'SubscriptionConfirmation') {
    signal.summary = `${payload.Type} from AWS SNS`;
    signal.links.push({
      href: payload.SubscribeURL,
      text: 'Subscribe URL for SNS Topic'
    });
  } else {
    signal.summary = payload.Subject;
    signal.links.push({
      href: payload.UnsubscribeURL,
      text: 'Unsubscribe URL for SNS Topic'
    });

    if (payload?.MessageAttributes) {
      for (const [key, object] of Object.entries(payload?.MessageAttributes)) {
        signal.annotations[`sns.amazonaws.com/MessageAttributes/${key}`] = object.Value;
      }
    }
  }
  return signal;
}- Click "Test Configuration" and you can see how this script will take the previous JSON from AWS SNS and translate the content to the universal event data model that FireHydrant uses internally.
- This script is provided as a starting point, but you are free to make modifications to it. Examples of other parameters customers might map include
level, notification priority, and more. For more information on available parameters to map, visit the Events Data Model.
- This script is provided as a starting point, but you are free to make modifications to it. Examples of other parameters customers might map include
- When satisfied with the script, you can click "Next" and then "Create source." Back on the Custom Event Sources tab, copy the URL next to the source you've just created, as this will be used in the Subscription section below.
Create SNS Topic
- In your AWS management console, navigate to the Simple Notification Service and then Topics. Click Create Topic.
- Ensure the following parameters are set:
- Choose Standard, as FIFO doesn't support HTTP/S requests for subscriptions currently.
- Under Delivery Policy (HTTP/S), uncheck "Use the default delivery policy" and change the Content-Type from
text/plain; charset=UTF-8toapplication/json; charset=UTF-8. - All other parameters on the Topic can be configured to your needs.
- This topic is where you will send notifications from your CloudWatch alarm. If you already have a topic configured for your CloudWatch alarms, assuming it is a Standard type, you can reuse that topic.
Create a Subscription
-
Back in AWS SNS, expand the side drawer and navigate to Subscriptions. Click "Create subscription".
-
Fill in the following values:
- Topic ARN: Choose the topic you just created in the last step. Note that if it is not selectable here, you may have created a Topic of type FIFO, which doesn't support HTTP/S subscriptions and should revisit the previous section.
- Protocol: Choose HTTPS here. Paste in the URL you copied from the custom event source section above.
- Enable raw message delivery: Make sure this is unchecked.
- Configure the other parameters as desired, and then click "Create subscription".
-
Back in FireHydrant, navigate to Signals > Event Logs. You should have received a log from AWS SNS with a subscription confirmation message. Click on this event, and go to the URL for confirming the subscription:
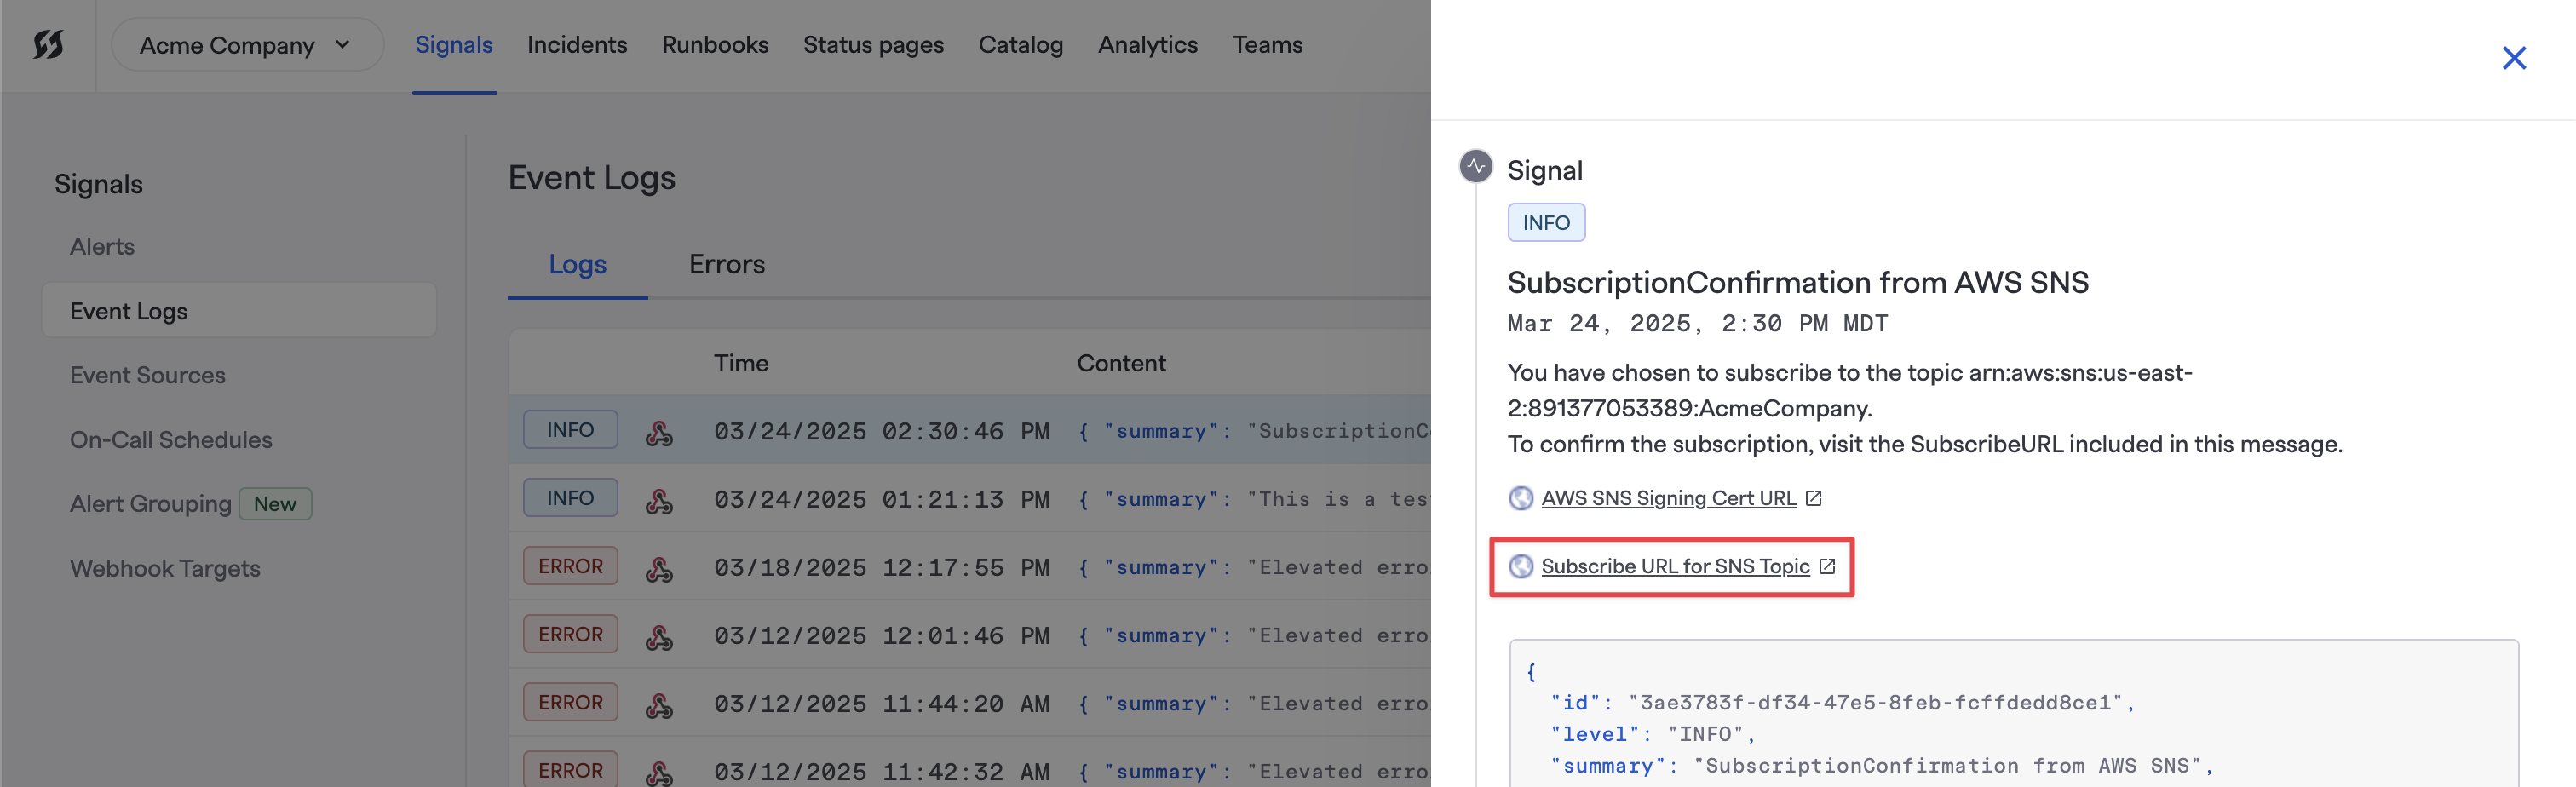
Subscribe URL for SNS Topic
-
Any messages sent to that Topic should now be sending Events to FireHydrant.
Configuring CloudWatch Alarm
- In your AWS Management console, navigate to the CloudWatch dashboard.
- Create a new Alarm, and configure any metrics for services that you'd like to track. On the "Configure Actions" page of the setup, choose an Alarm state trigger for "In alarm".
- To auto-resolve flappy alerts, add a second notification with "OK select for the Alarm state trigger. Use the same SNS topic since the Lambda function above is checking and setting the status in Signals.
- Select the existing SNS Topic that we created in the first section and complete the setup. You can add an Alarm name and description that you can use to send specific data to Signals in your Lambda.
- Review the details of your Alarm and click "Create Alarm."
Testing CloudWatch Alarm
- Either from your CLI or from the AWS cloud shell, run the following command:
aws cloudwatch set-alarm-state --alarm-name "{YOUR ALARM NAME}" --state-reason "Testing the Amazon Cloudwatch alarm" --state-value ALARM. - In FireHydrant, navigate to Signals > Events Logs to see your new incoming event.
- To test auto-resolving the alert, change the command above to use
--state-value OK. You will need to have an Alert Rule configured to see Alerts created and resolved with this.
Updated 11 months ago