Alerts & Alert Rules

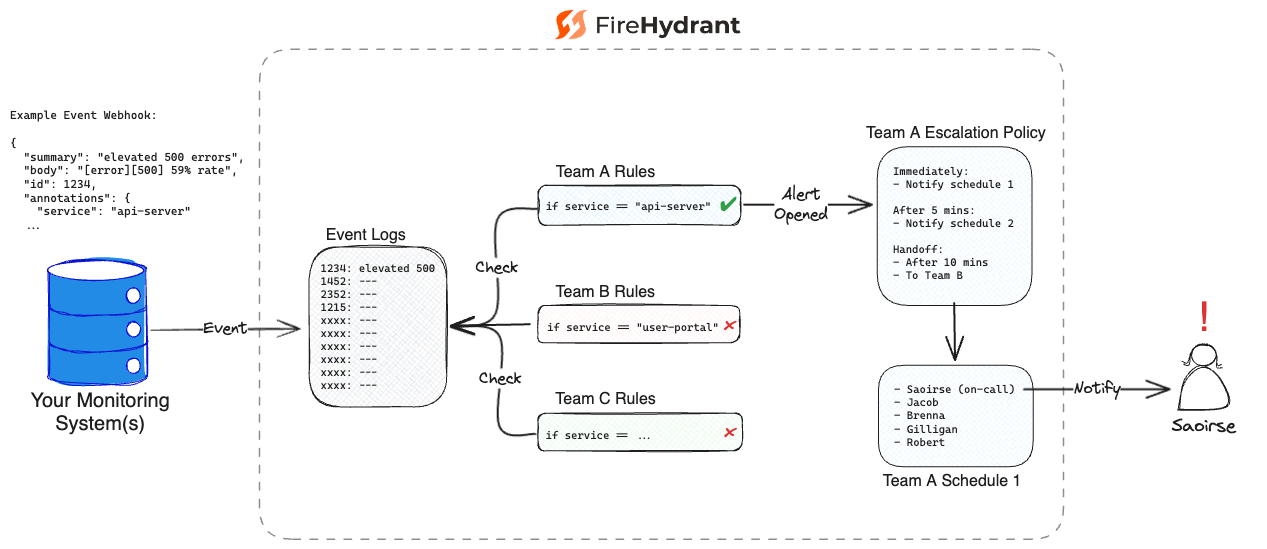
Diagram of how an inbound Event becomes an Alert on FireHydrant
As mentioned in Introduction to Signals, your infrastructure and observability tools will generate Events. Teams configure Alert Rules (see next section) to describe which events should alert and whom, and when a Rule matches, the Event is turned into an Alert and routed to the relevant party via Escalation Policies and On-Call Schedules.
You can also send Alerts directly to specific entities like teams, escalation policies, schedules, or users by bypassing rules, and finally, users can manually page out during incidents via chat applications, the web app, or the mobile app.
Creating an Alert Rule

Adding rules helps filter incoming events to create alerts that matter to your team.
Teams own all Alert Rules, so you can create a new rule for a team when looking at that team’s page (Teams > Team Name).
- From the team’s page, click the “Rules” tab.
- On the Rules page, click the “New Rule” button.
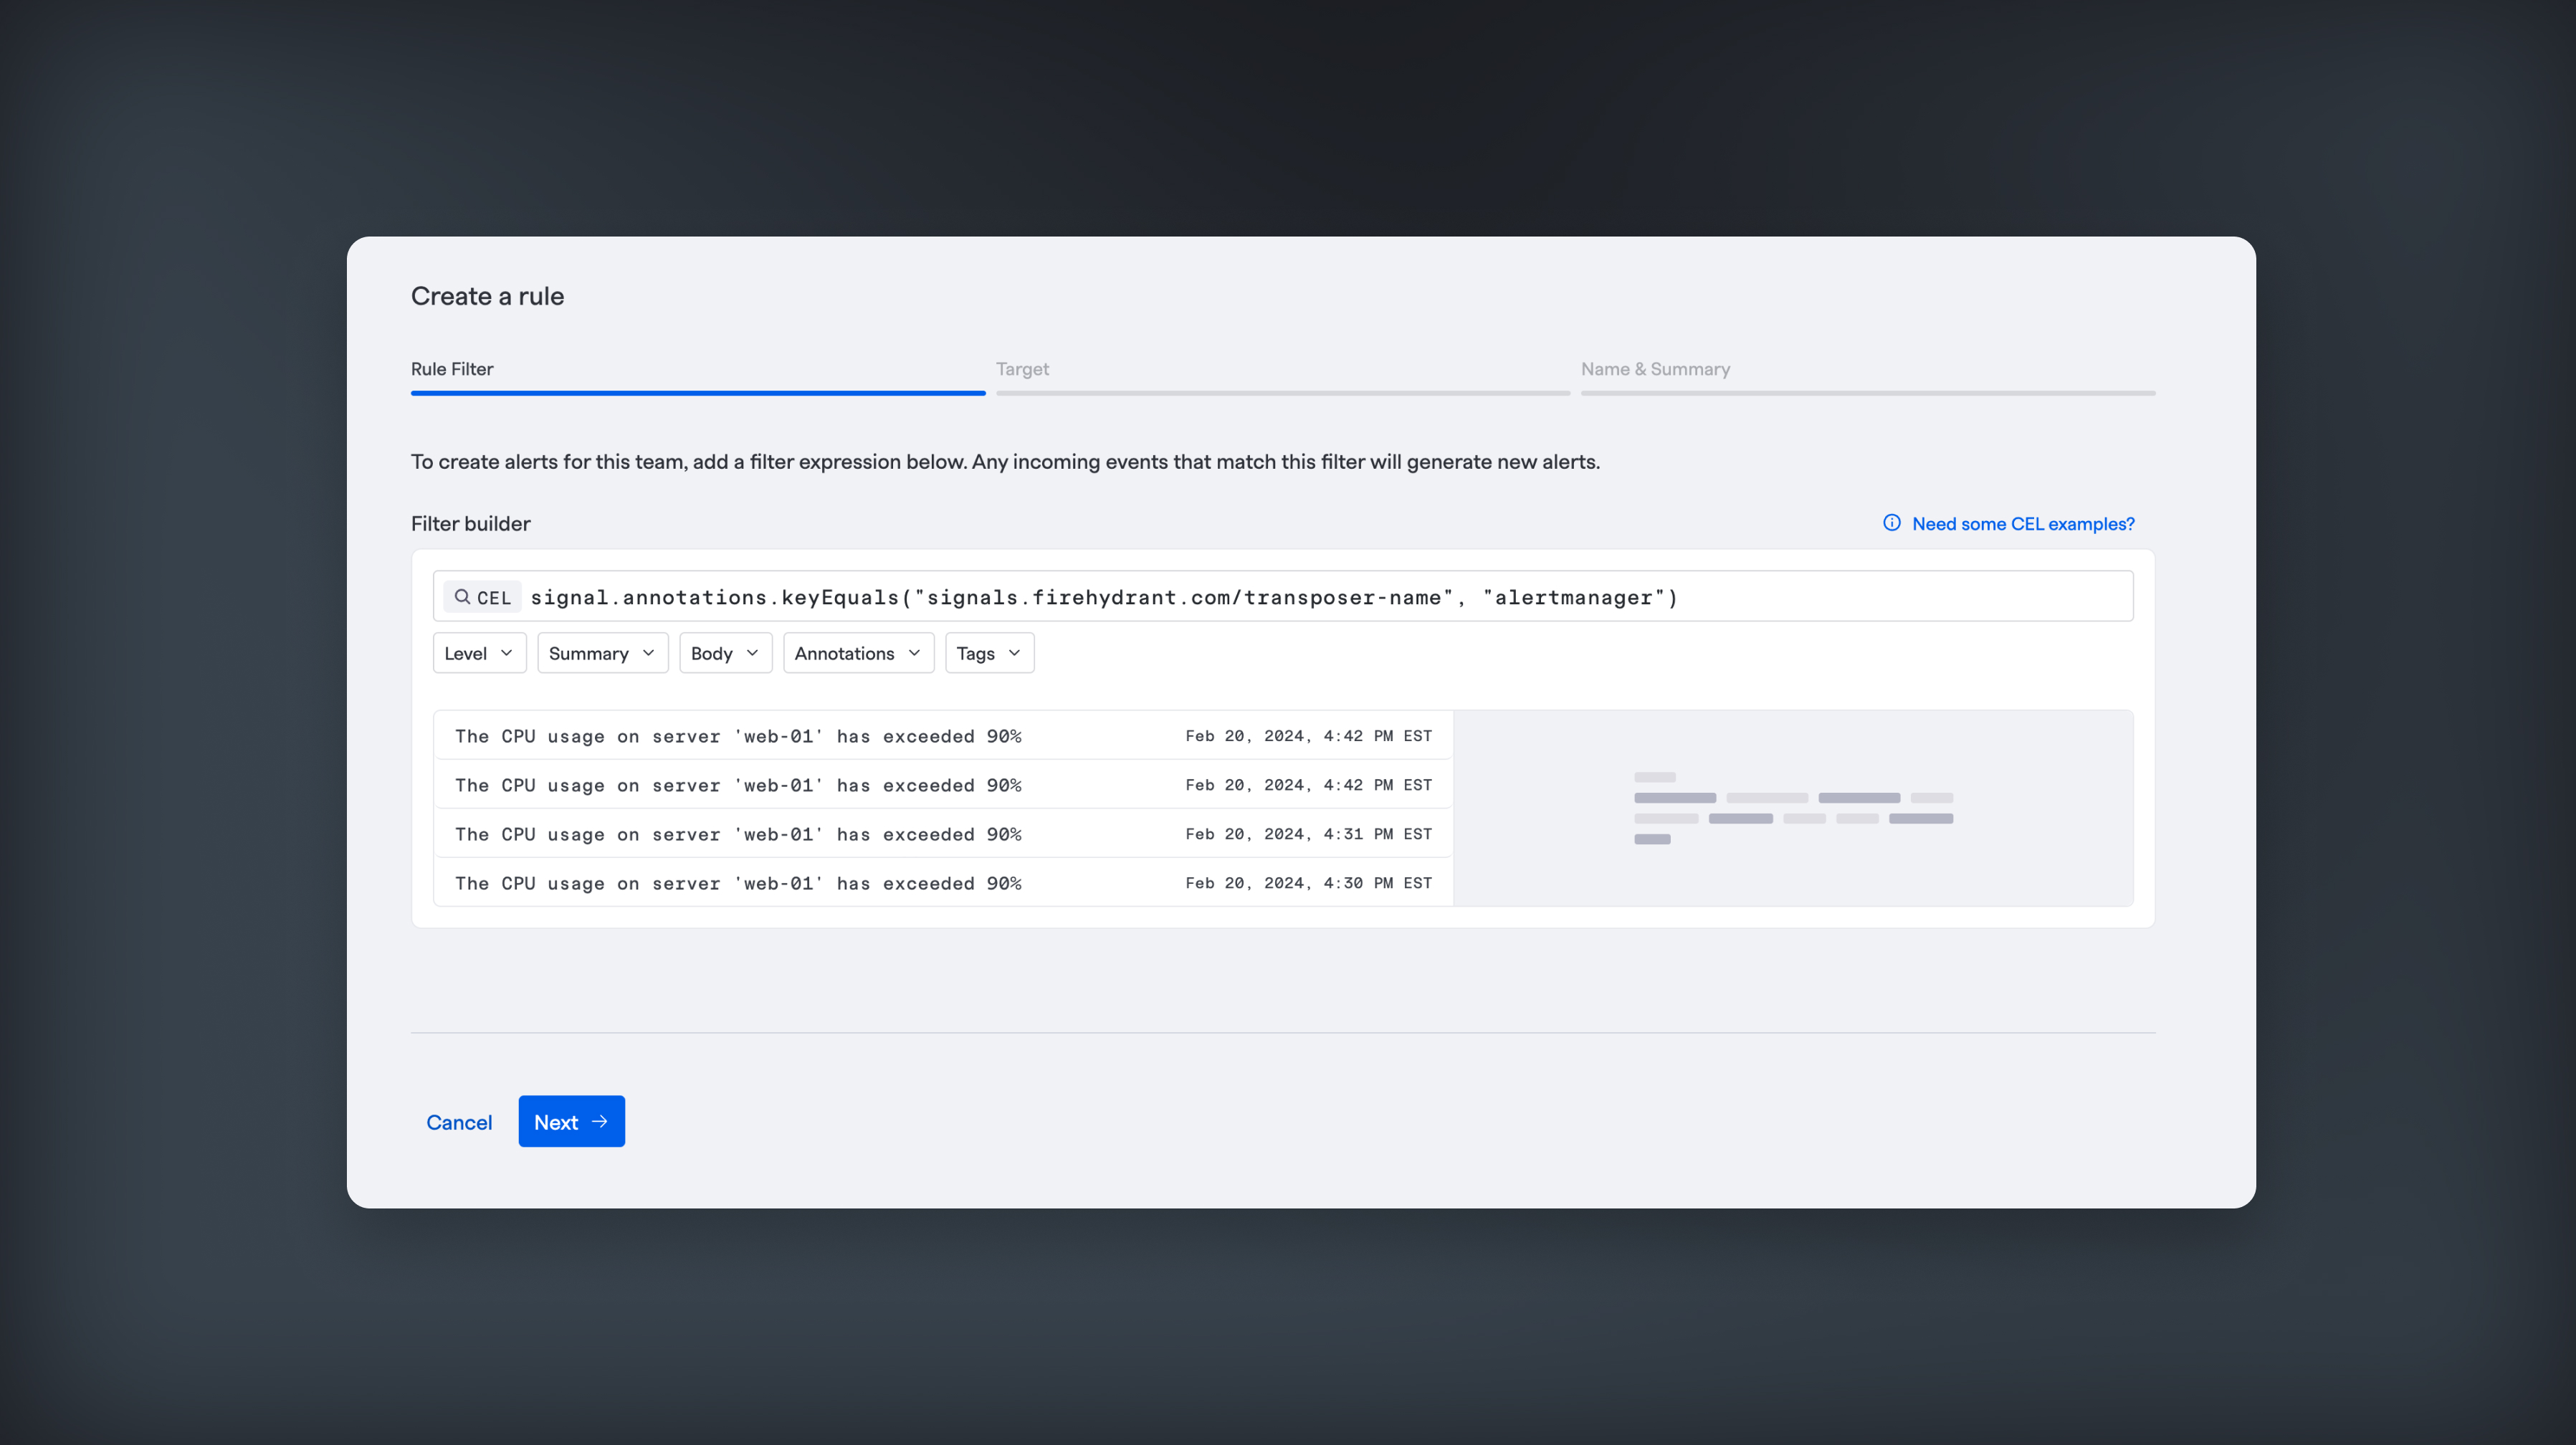
- First, you're going to create a filter expression to turn incoming events into Alerts. You'll be presented with some dropdown to help you get started with building your filter: Level, Summary, Body, Annotations, and Tags.
- The filters will dynamically pull in data from the last 100 incoming events, and you can explore any of the 100 most recent events by clicking on the events in the list below your filter.
- Once you've added some filters to the input, you can directly edit the CEL Expression to add more complex logic. Learn more about Using CEL.
- After creating your filter, the next step is to select a target to notify when events match your rule. This can be an escalation policy, an on-call schedule or a user. Notably, these targets will be limited to the team that owns the current rule.
- Finally, you can add a name for your rule. Additionally, you can choose an incident type to use when an incident is opened from a resulting alert. This allows you to pre-fill some fields like team or service-related data.
- Click “Create Rule” to create your new rule.
Overriding Priorities

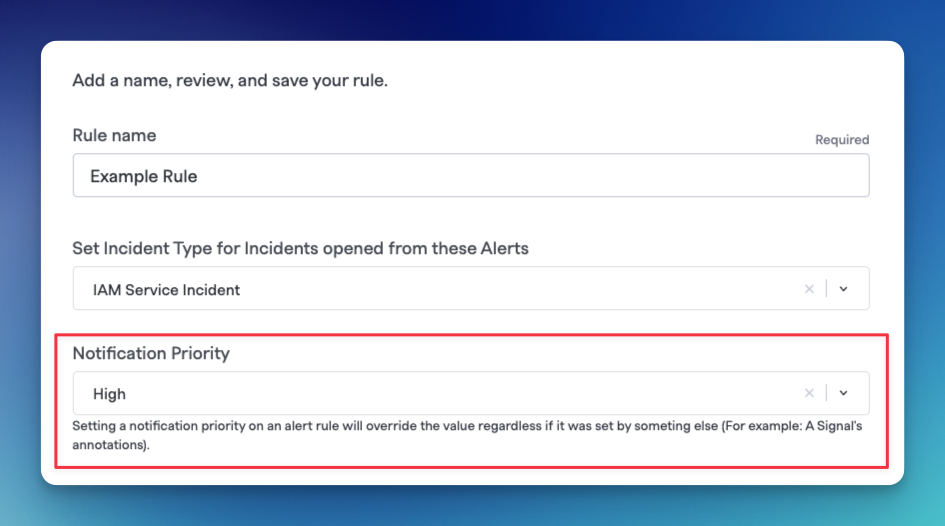
Overriding the determined priority
FireHydrant allows categorizing notifications as HIGH, MEDIUM, and LOW priority. The Transposers offered out-of-box will categorize an inbound Event according to sane defaults. However, when defining a Rule, you can override these assigned priorities at any time by setting the Notification Priority value.
This, in conjunction with Notification Preferences, allows responders to strategically decide how they would like to be notified, and for which Alerts.
Bypassing Rules
If you already have monitoring rules or routing configured externally and want to notify specific entities, you can send webhooks directly to:
- A team (Note: routing directly to a team will notify that team's default escalation policy)
- An escalation policy
- An on-call schedule
- A user
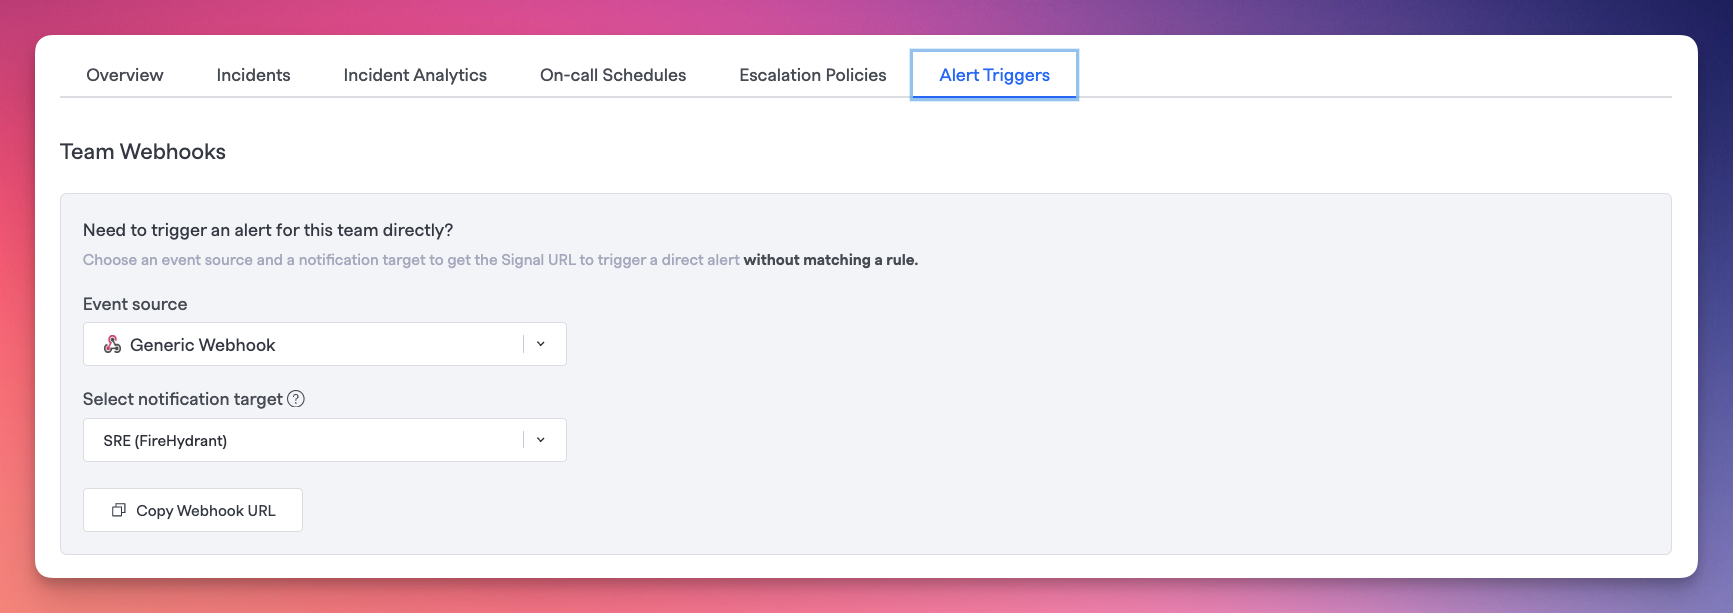
You can find these URLs by navigating to Teams > **** > *** > Alert Triggers. The top-most section of this tab will allow you to select a dropdown to change the target and copy the webhook that routes directly to that target.

Retrieving webhooks that route directly to entities
Permissions
Users with Member permissions can configure and update alert trigger rules within any teams they are members of. Users with Owner permission can edit the same for all teams regardless of their membership or lack thereof.
For more information, visit Role-Based Access Controls.
Next Steps
- Ensure you have configured your Notification Preferences so that you can receive your alerts when paged
Updated 4 months ago
