User Administration
FireHydrant works best when your entire incident response team has access to create, update, and manage incidents together. Inviting your team is simple and can be done via the UI. All new users will have Member access. For a primer on FireHydrant's access roles, visit Role-Based Access Controls.
Who should be on FireHydrant?
At FireHydrant, we believe that reliability is a company-wide metric. To that end, FireHydrant is a strong fit for most members of your organization who either respond to incidents or need to be aware of incidents.
We recommend starting with your engineering, SRE, or other teams participating in on-call rotations and responding to incidents. From there, many FireHydrant customers tend to provide access to Support and Success personnel, who often need to communicate incident updates to customers.
Users also provide access to upper leadership who may want access to Analytics and stay in the loop on severe incidents.
Inviting team members
If you have configured SSO, provisioning new users in your IDP will automatically provision team members according to application access. In addition, FireHydrant also supports SCIM for deeper automation and identity management.
The following instructions are for organizations not using SSO and authenticating via email.
-
Go to Settings > Users.
-
Click on the "+ Invite user" button. This takes you to a different page where you can enter the email address of whoever you want to invite to the FireHydrant organization.
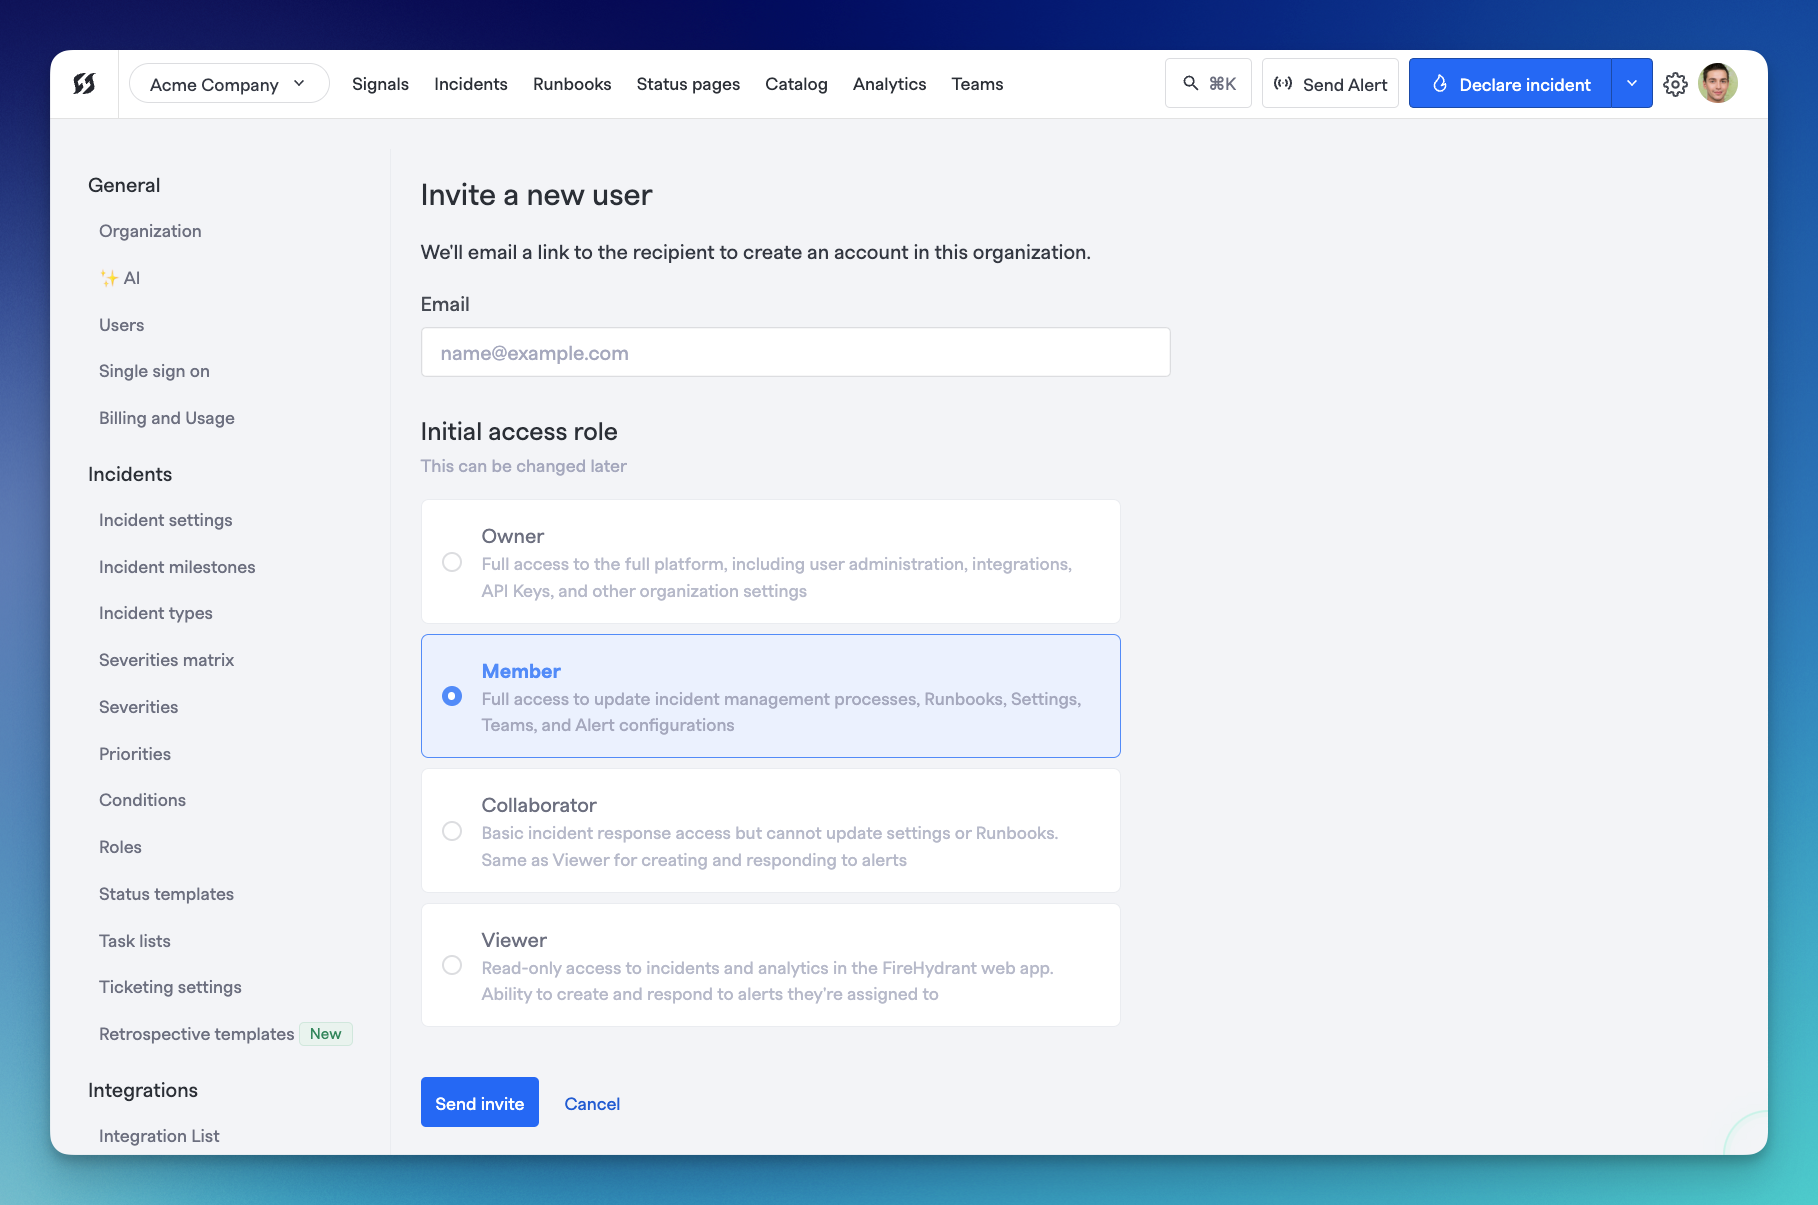
Inviting a user via UI/email
-
Provide the user's email address, select their starting access role, and click Send invite.
- After you invite a user, they'll receive an email invitation.
- When users click Accept My FireHydrant Invitation, they're prompted to provide their name and email, create a password, and accept the privacy policy. Then, they can accept the invitation and join your FireHydrant organization.
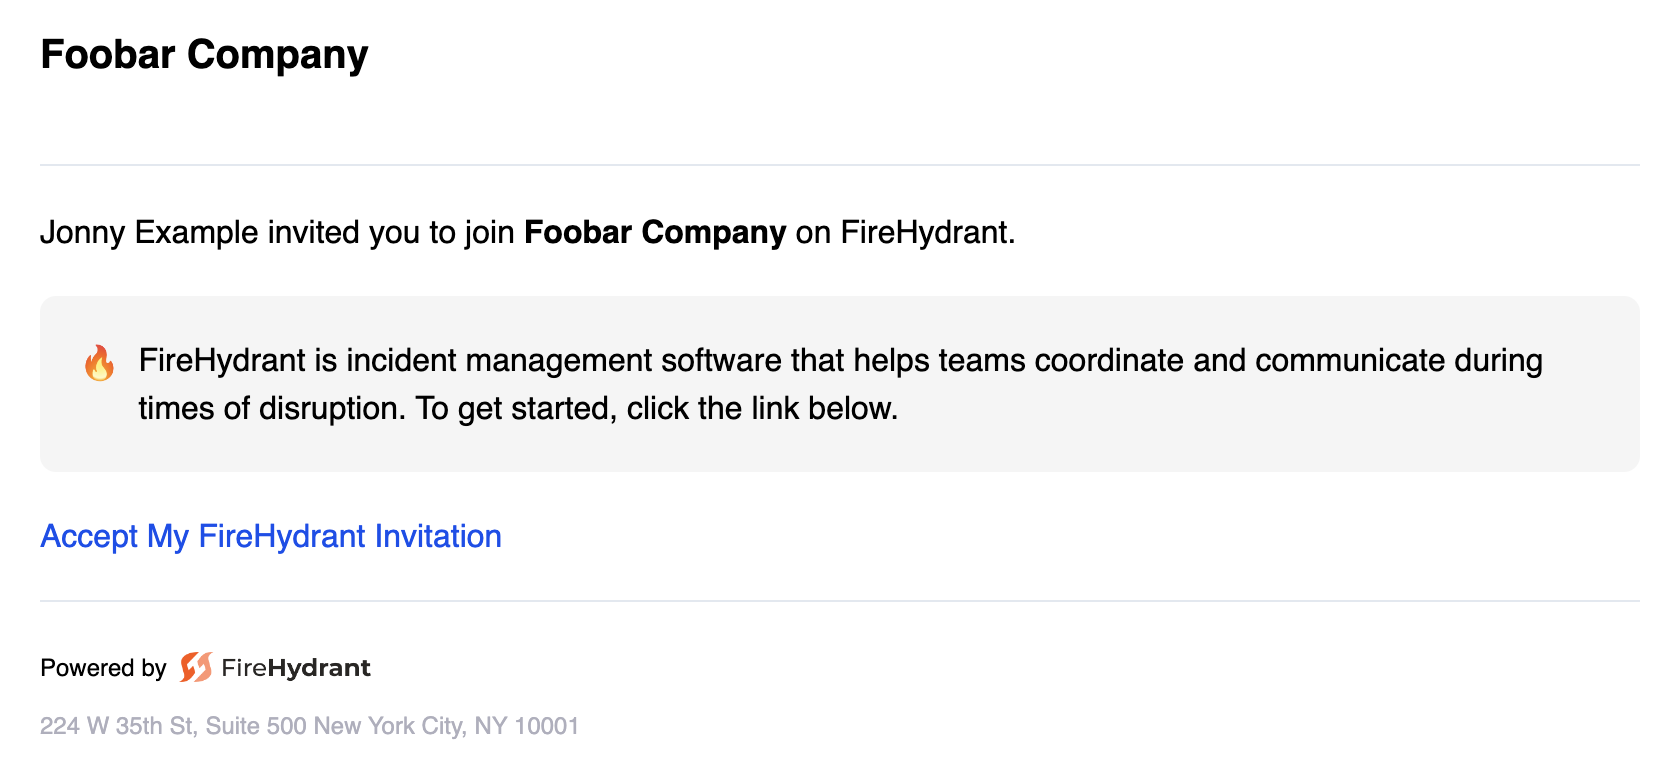
Example invitation email
Note:Make sure your team members accept your email invitation instead of signing up separately on the website. Signing up on the website creates a new organization and account. FireHydrant enforces unique email addresses system-wide, so if someone accidentally registers on their own, they will need to reach out to Support to disable the duplicate account/email before they can accept your invitation.
Manually Disable a FireHydrant User
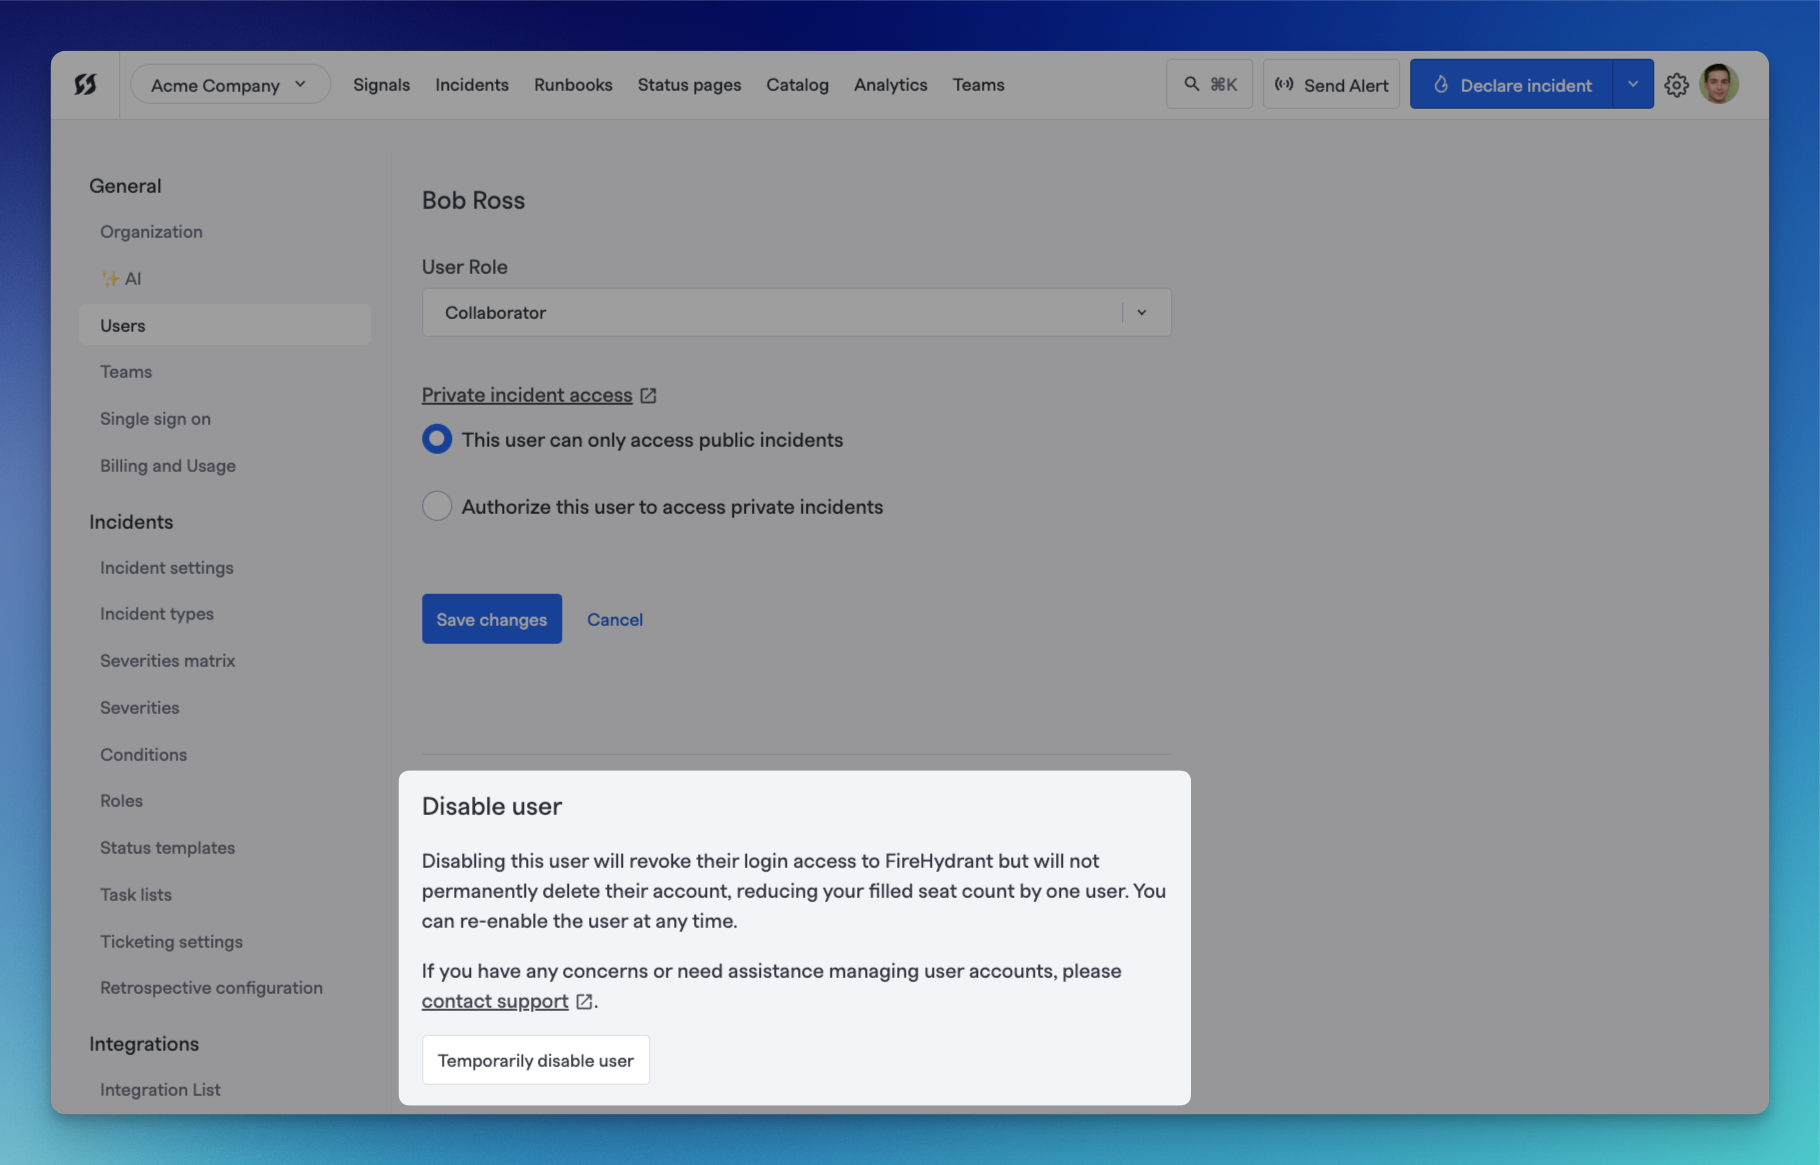
Disabling a user via web UI
Sometimes, teammates move on or change roles, and you want to ensure they can no longer access FireHydrant. You can automate deprovisioning if you are using SCIM Configuration. If not, then aside from reaching out to support, you can also do this yourself in the UI (requires Owner permissions).
- Navigate to Settings> Users and locate the user you want to disable.
- Click on the user, and scroll down to the "Disable user" section of the individual user details page. You can then choose to disable by selecting "Temporarily disable user."
What happens when you disable a user
While a user can be re-enabled, disabling a user will permanently remove the following Signals-related associations:
- On-call schedules — The user is removed from all current and future on-call shifts. A coverage request noting the user's disablement is automatically created for each affected shift.
- On-call rotations — The user's membership in on-call rotations is deleted. They will not be considered for future rotation scheduling.
- Escalation policies — The user is removed from any escalation policy steps that target them directly.
- Custom alert rules — Rules where the user is the target are disabled (soft-deleted).
What is restored when you re-enable a user
When you re-enable a disabled user, the following are restored or preserved:
Restored to the system:
- ✅ The user account and login access
- ✅ The user's organization role (Owner, Collaborator, Member, or Viewer) is reassigned in the permissions system
- ✅ Notification policy compliance is re-synced
Preserved (not removed during disable):
- ✅ Team memberships
- ✅ Incident role assignments
Not restored (must be reconfigured manually):
- ❌ On-call schedule assignments
- ❌ On-call rotation memberships
- ❌ Escalation policy assignments
- ❌ Custom alert rules
If you need to re-enable a user who was previously on-call, you'll need to add them back to the relevant on-call rotations and escalation policies.
Bulk Upload Phone Numbers via CSV
You can bulk upload phone numbers for users via CSV file to streamline notification preferences configuration.
Download CSV Template
- Navigate to Settings > Users
- Click the download icon or "Download User Template" button
- This downloads a CSV template with all current users and their phone numbers
Upload Phone Numbers
- Open the downloaded CSV file in a spreadsheet editor
- Add or update phone numbers in the designated column (format: +1234567890 or 1234567890)
- Save the file
- Return to Settings > Users and click the "Import/Upload" button
- Drag and drop your CSV file or click to browse and select it
- Review the preview showing which users will be updated
- Click "Confirm" to apply the phone number updates
Phone numbers are now available in users' notification preferences for SMS and voice alerts.
Filtering Users List
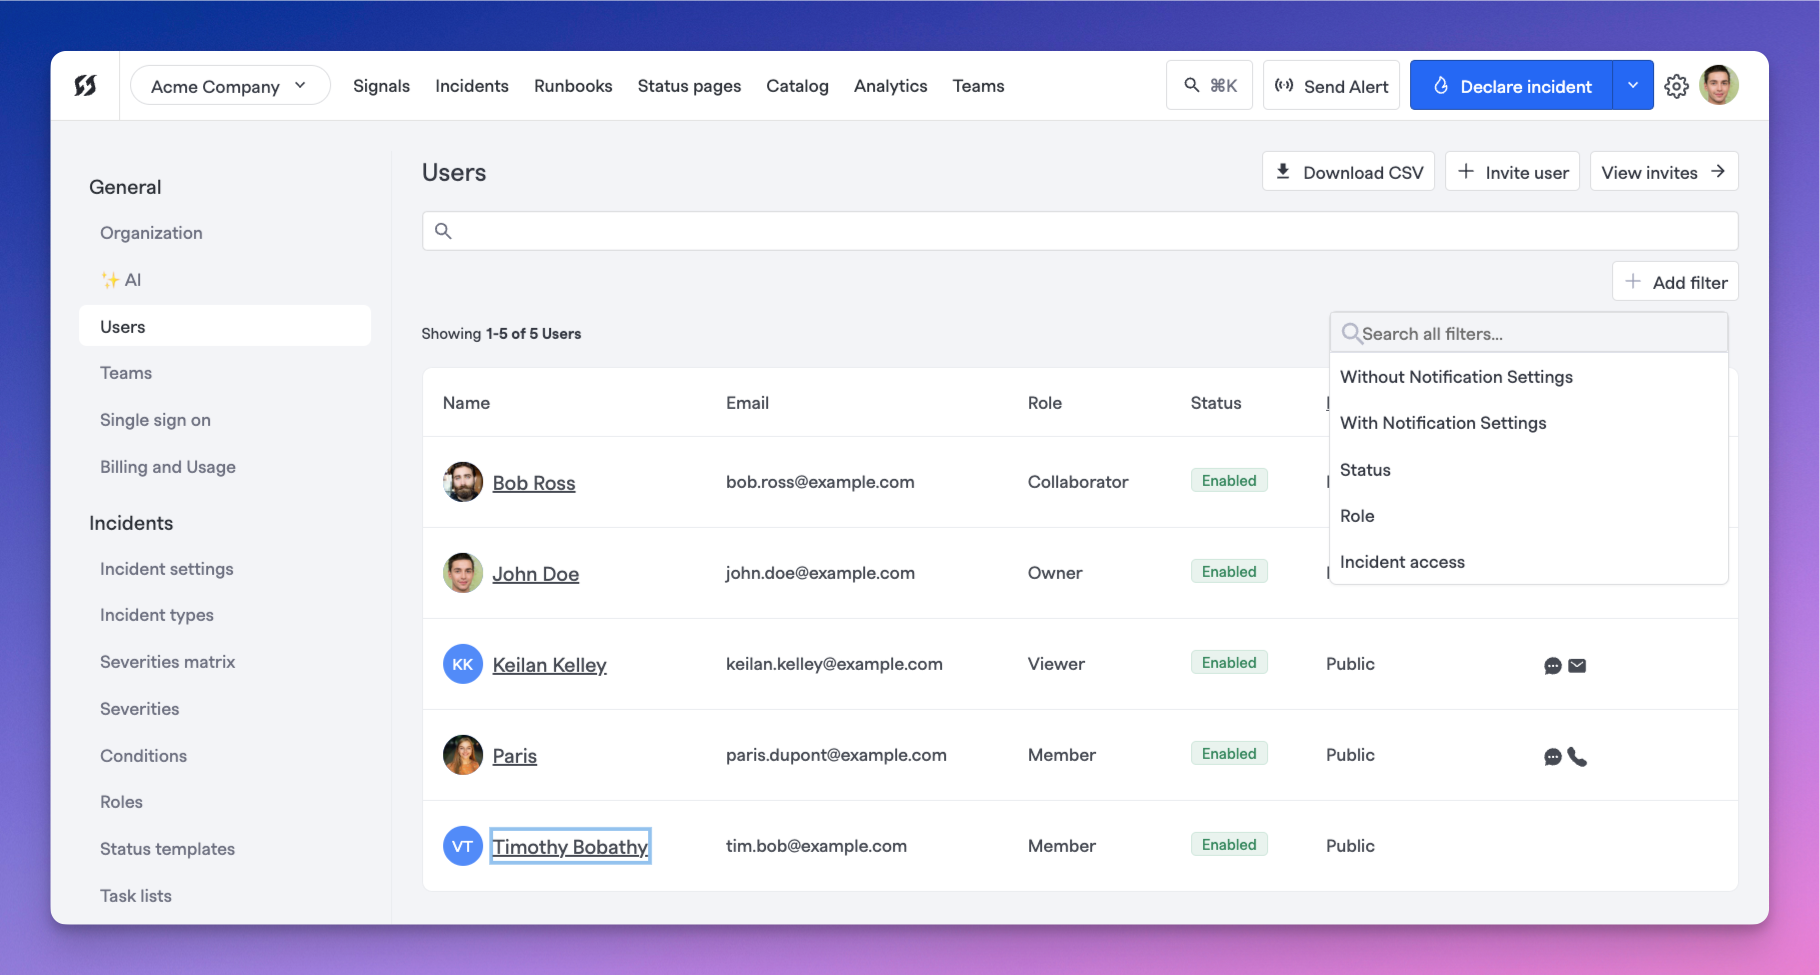
Users page with filters expanded
On the Users page, you can search for specific users and filter users by a few different parameters.
-
Navigate to Settings> Users.
-
Click on the Filter users dropdown or type into the search bar and hit 'Enter' to filter and search.
FireHydrant supports the following filters for showing users:
- Without Notification Settings - Shows users who do not have the specified notification method(s) configured
- With Notification Settings - Shows users who have the specified notification method(s) configured
- In Policy - Shows users whose notification preferences comply with your organization's notification policy
- Out of Policy - Shows users whose notification preferences do not comply with your organization's notification policy
- Status - Shows users who are enabled/disabled. By default, the interface only shows active/enabled users
- Role - Shows users with the specified access roles
- Incident access - Shows users with public/private/both incident access
In-Policy Column and CSV Export
The user list now displays an In Policy column indicating whether each user's notification settings comply with your organization's notification policy. You can:
- View compliance status - Green checkmark indicates compliant, warning icon indicates non-compliant
- Export to CSV - Export the full user list including the "In Policy" status for compliance reporting
- Filter by compliance - Use the "In Policy" and "Out of Policy" filters to find users needing attention
- Bulk remediation - Identify which users need notification settings updates to meet policy requirements
Automating User Administration
We recommend automating user provisioning and de-provisioning with SSO and SCIM when possible, as most enterprise companies will use an IDP to manage access to all of their applications.
In addition, FireHydrant does provide direct APIs to manage users via SCIM, in case you do not use an IDP but still want to manage users programmatically.
Next Steps
- As mentioned above, look at our SSO and SCIM docs or the API to see how you can automate FireHydrant account provisioning as part of your IDP workflows
- Read about Role-Based Access Controls on FireHydrant and how to assign the right roles for your users
- Learn more about Team Management as well as how to assign users and teams to incidents
Updated about 2 months ago